
Point a camera at the attendee’s QR code, read the card that opens, and tap Check in. Their RSVP becomes Attended, and your turnout figure comes out of the event itself rather than a clipboard.
The one thing to settle before doors open, not on the night, is who is allowed to scan. The two scanning routes need different permissions, and the difference catches people at the worst possible moment.
Who can scan
| How you scan | Permission needed |
|---|---|
| A phone camera, opening the check-in page in a browser | Organisation-level HR (HR_TENANT) or Event Manager (EVENT_TENANT). Organisation admin covers both |
| The scanner inside the Orgo mobile app | Organisation admin, organisation-level Event Manager, or chapter-level Event Manager (EVENT_LOCAL) on the event’s group |
The chapter-level events permission is not enough for the plain camera route. Somebody holding only EVENT_LOCAL who points their phone camera at a ticket gets an access error even though the ticket is perfectly valid. Give door staff the organisation-level Event Manager permission, or have them scan from inside the mobile app.
Marking somebody present without a scan is wider than both. The event owner, a chapter-level event manager on the event’s group, organisation-level HR, and admins of the event’s group can all set an RSVP to Attended from the participant list. If your permissions are wrong on the night, that is your fallback.
Where these permissions live
Permissions sit on a member’s profile, on the Permissions tab, grouped under headings that show each checkbox’s scope: Organization, Chapter and Parent chapter. The same label appears under more than one heading, and the heading is what decides the scope. Event Manager under Organization is the organisation-level one that scans anywhere; Event Manager under Chapter is the chapter-level one that scans only from the app.
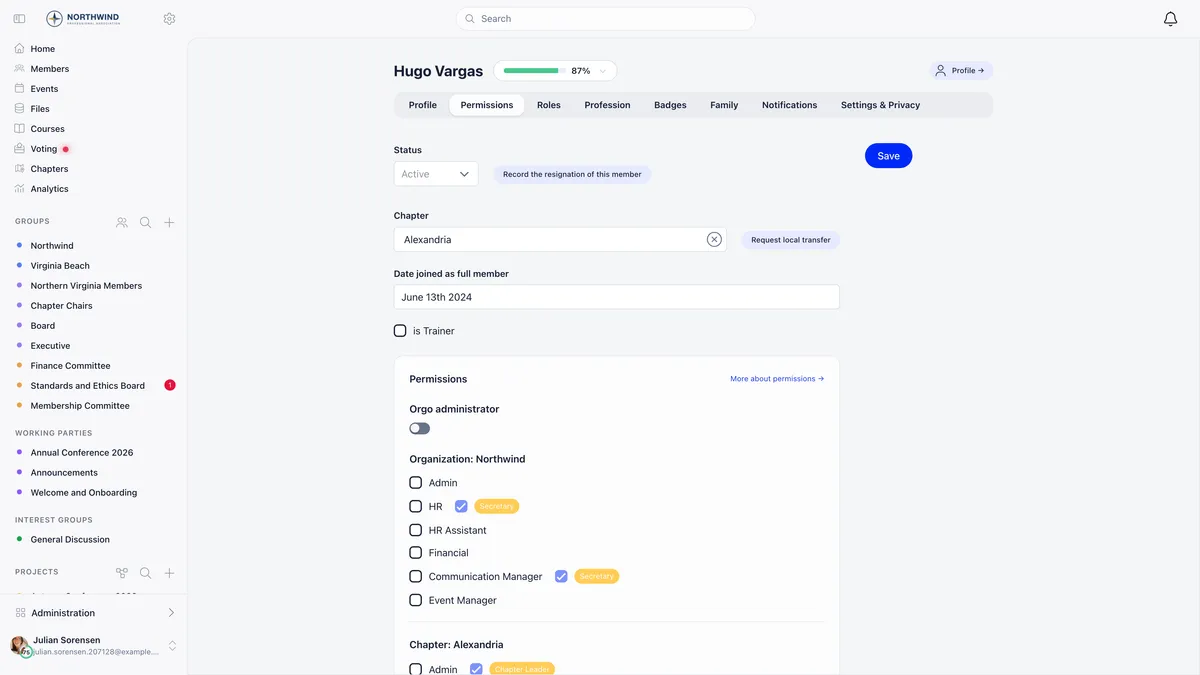
Granting these needs HR or admin rights at organisation level. Your sidebar labels are per workspace, so the member directory and settings screens may be renamed, moved or hidden through Menu Organizer. Look for the destination and the permission rather than a fixed menu position.
Getting the app onto door phones
The mobile app route is worth setting up in advance, because it is both faster between attendees and more forgiving about permissions. The download links sit in the account menu.
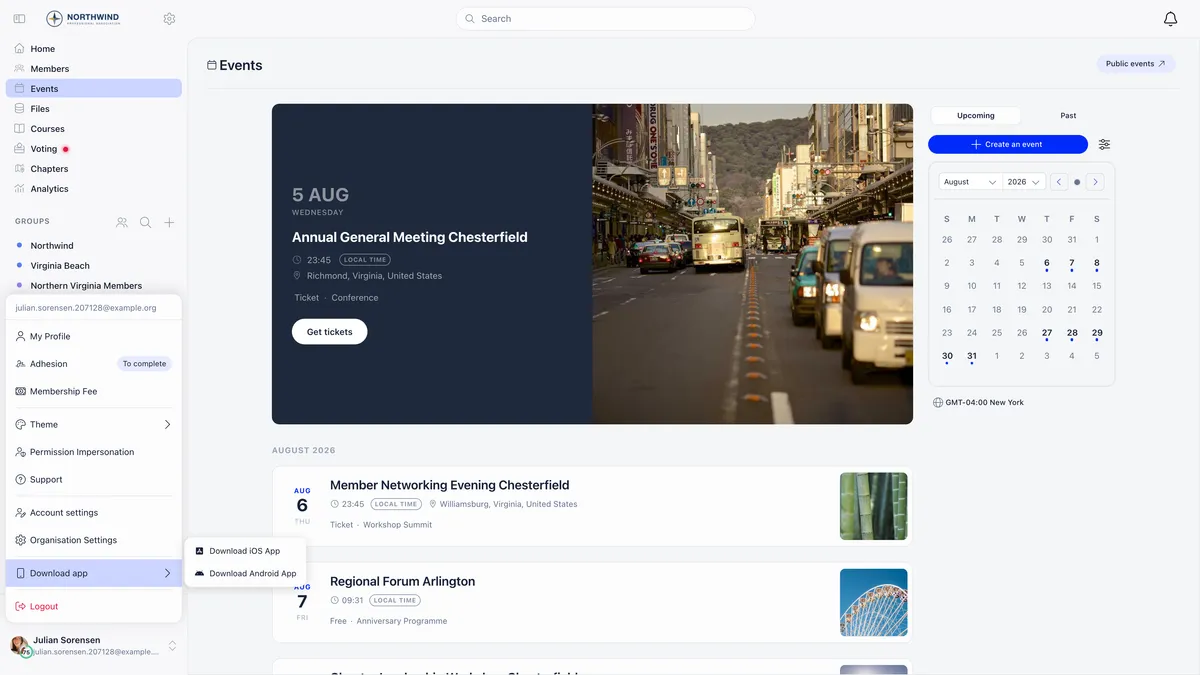
Where the code comes from
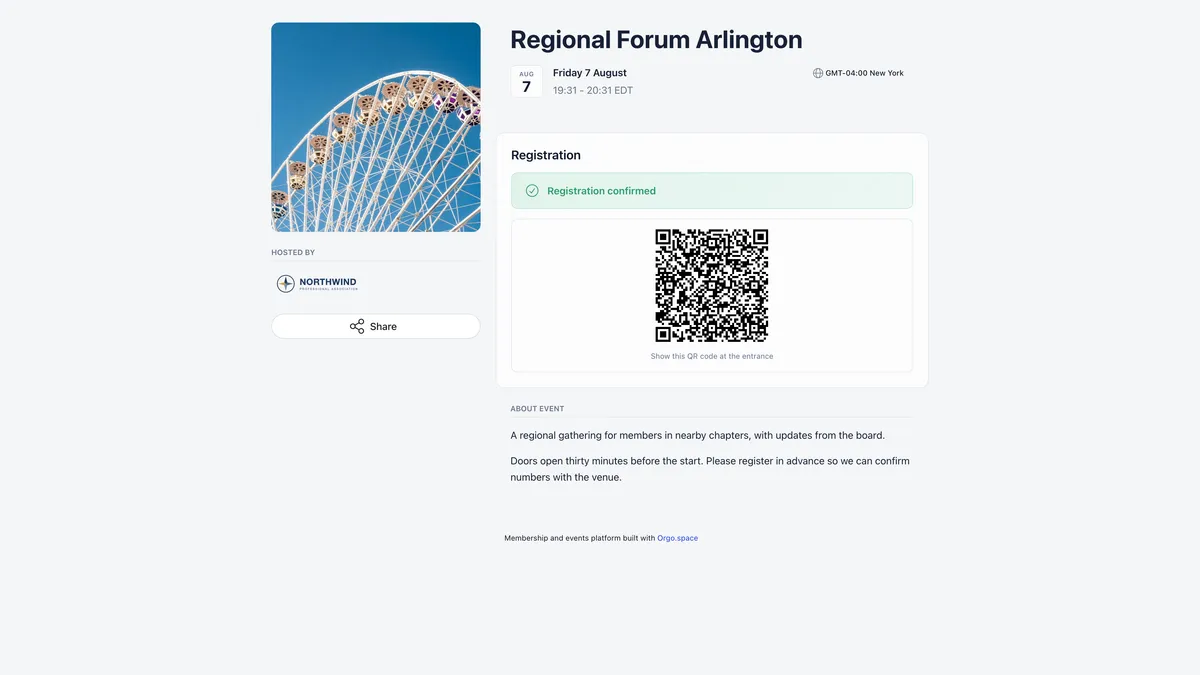
Every attendee record carries its own code, and guests get their own, so a member bringing three people hands over four different codes rather than one.
The code is minted with the attendee record and is never regenerated. A ticket downloaded again months later scans exactly like the original, and so does the QR in the first confirmation email. There is nothing to reissue and nothing to invalidate.
Attendees find theirs in three places:
- the PDF ticket attached to their confirmation email, carrying the code, ticket number, event, date and location;
- on the event page, once their registration shows as confirmed;
- in the event app, under their tickets.
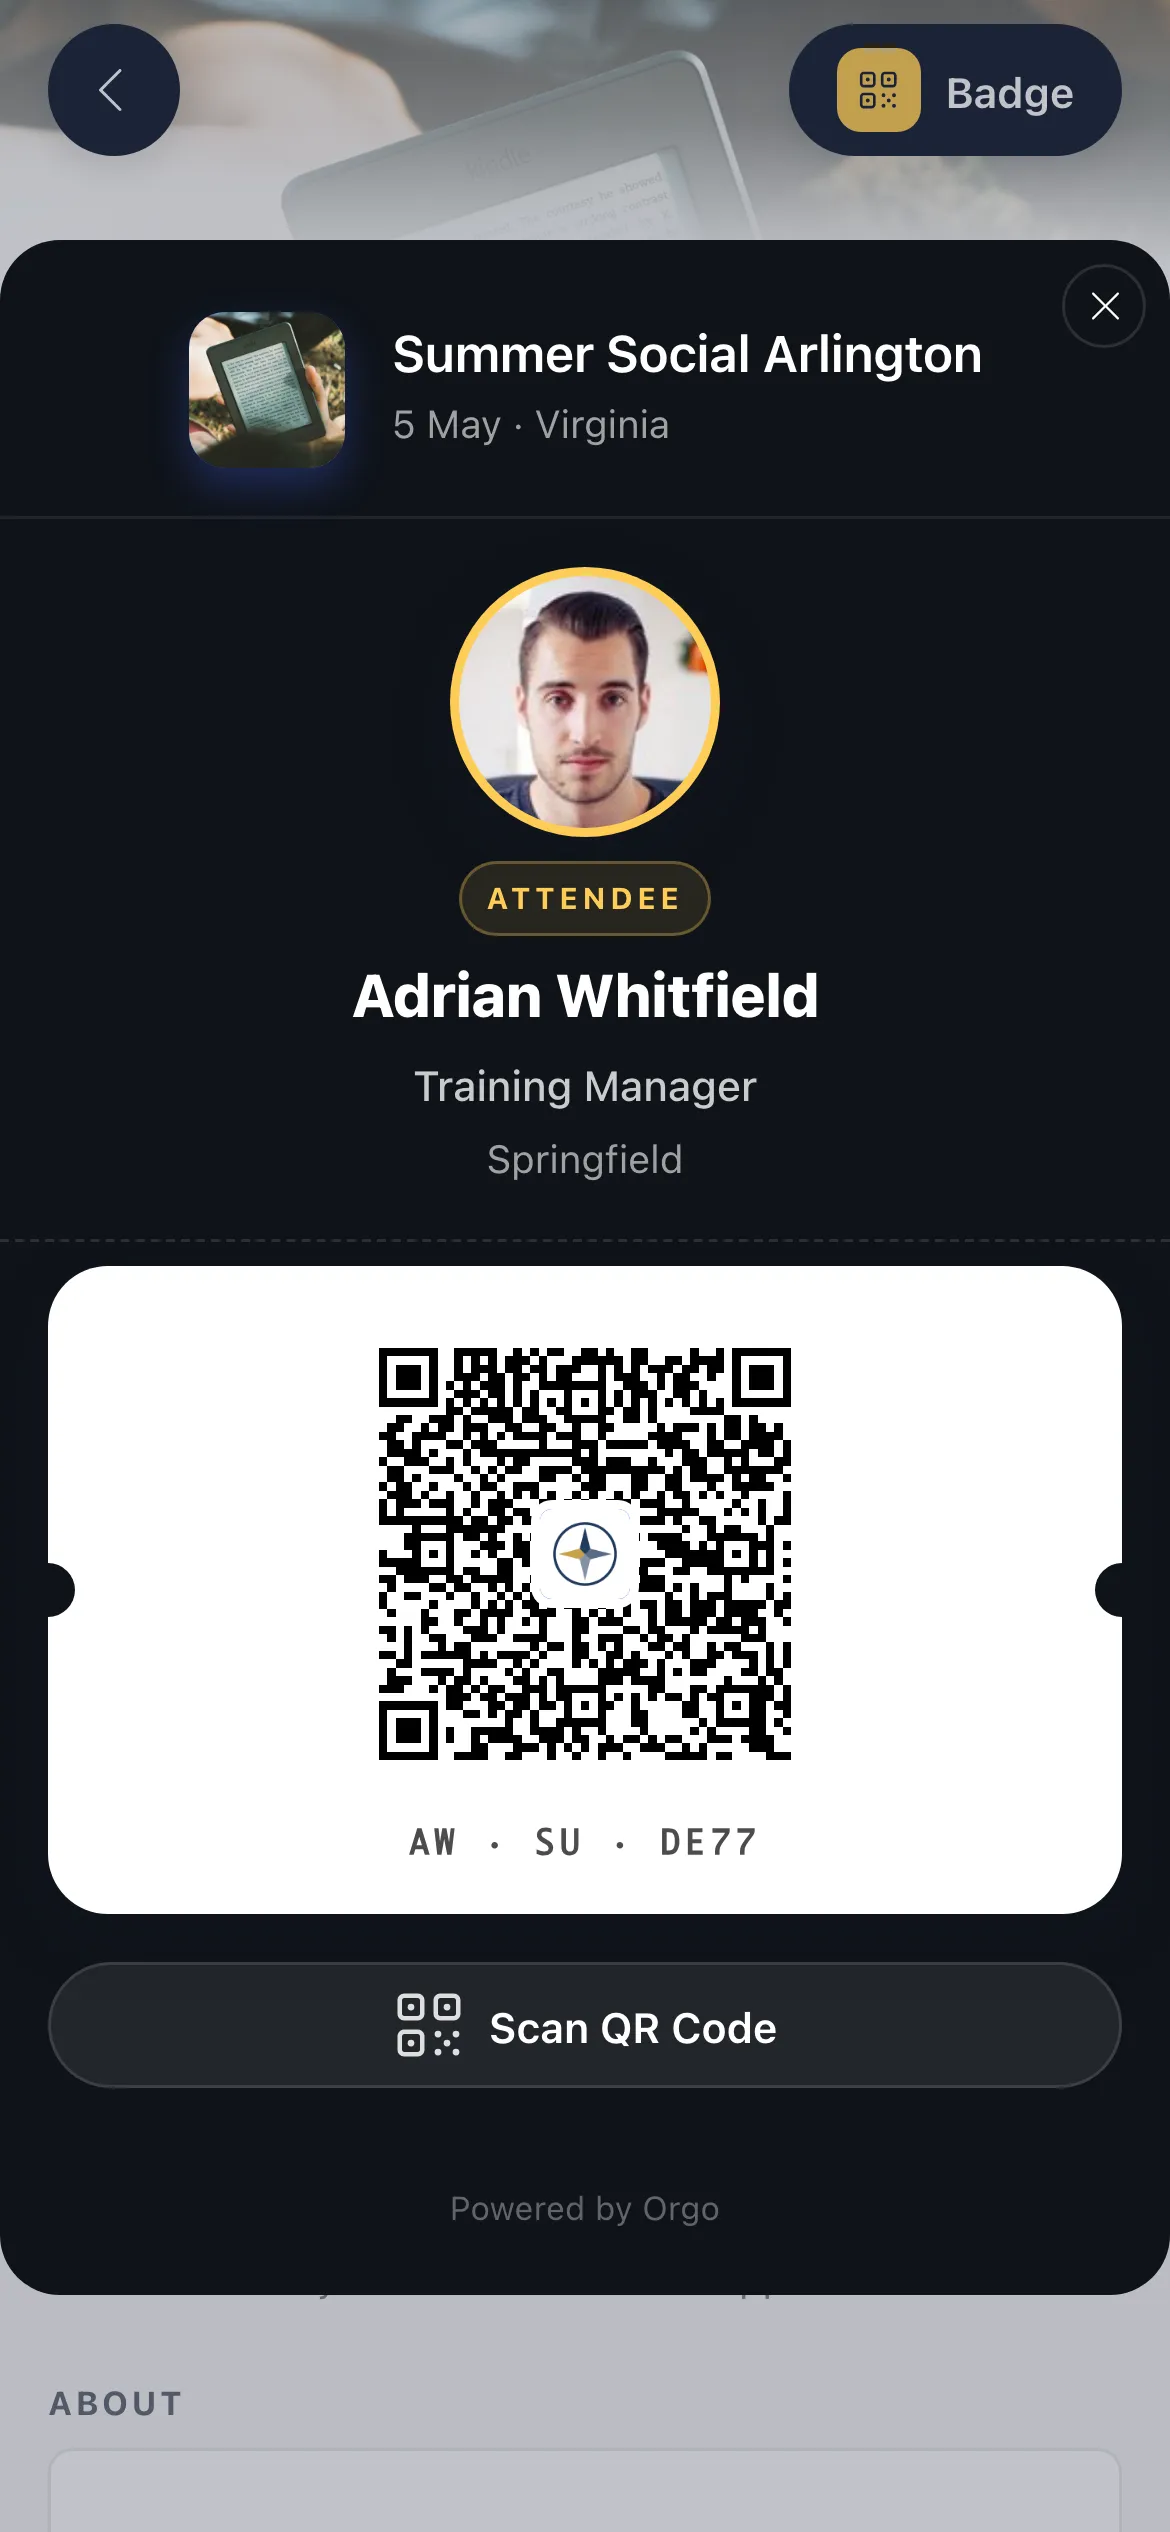
In the app the same code sits on the attendee’s badge, alongside the Scan QR Code button that door staff use.
One limit is worth knowing: the PDF ticket is only generated for events that have a location, or that use a registration form. A locationless event with a simple RSVP still produces a code on screen, but there is no attachment to email.
Scanning, step by step
- Point a camera at the code. Any phone camera works, because the code is a link to your organisation’s Orgo address and opens the check-in page in the browser. Inside the mobile app, open the event and use Scan instead, which keeps you in the app between attendees.
- Read the card. You get the attendee’s photo, name and email, the event name, the ticket number, the ticket type and price, and a badge saying whether this is a paid, free, invited or guest entry. A guest pass also names the person it was issued to.
- Tap Check in. The card turns green and the RSVP becomes Attended.
Scanning the same code again reports that they are already checked in rather than throwing an error, so a double scan is harmless and a nervous volunteer scanning twice costs nothing.
If the payment behind a ticket has not completed, the card shows a payment warning but still lets you check the person in. That is deliberate. Sort the money out afterwards rather than holding up a queue at the door.
Read the event name on the card before tapping check in. A code from a different event resolves perfectly well to whatever registration it belongs to, which matters at multi-day or multi-session gatherings where somebody may present last night’s ticket.
Somebody arrives with no code
Speakers, sponsors, staff, board members and anyone who paid by bank transfer routinely turn up with nothing to scan. A code exists only where a registration exists, so the fix is always the same: put them on the list.
Route 1: Participants, then Invite
Open the event, go to Participants, and use Invite at the top right.
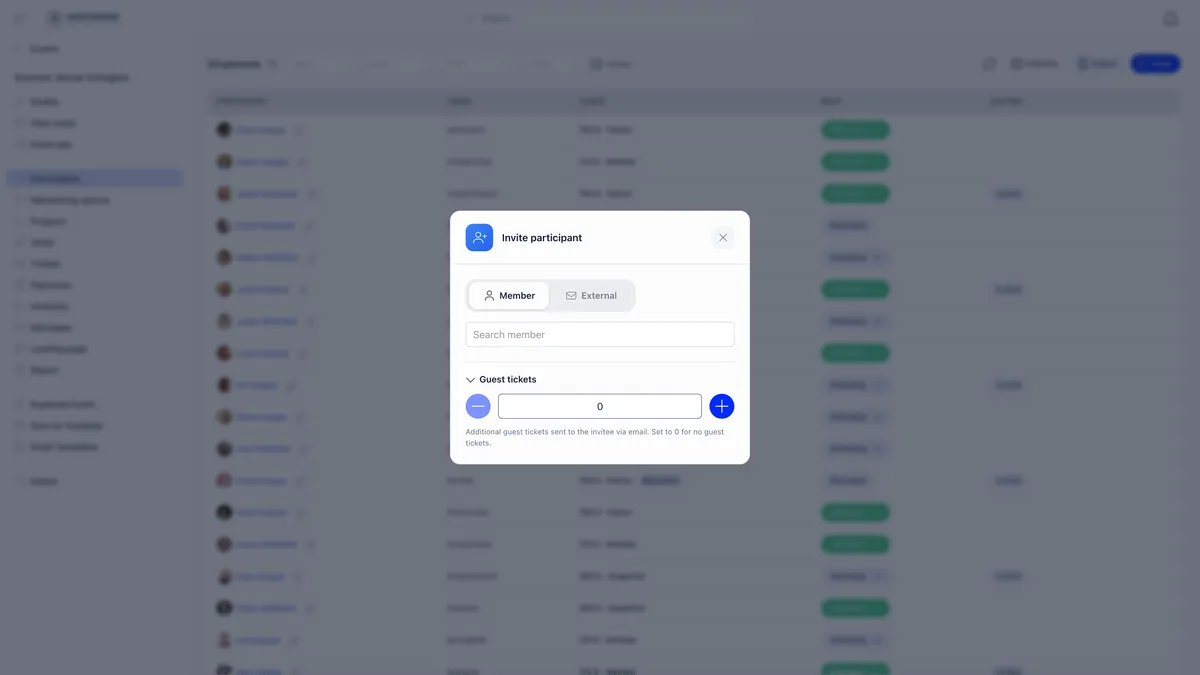
The Member tab searches your directory. The External tab takes a name and email, matching the address against members first, then contacts, and creating a new contact only if neither exists.
Either route confirms them immediately: registration Registered, RSVP Attending, and an emailed ticket carrying a QR code and a calendar invite. No payment is involved anywhere in this path, which is exactly what you want for a speaker.
Guest tickets takes a number from 0 to 20. Each guest becomes a separate registration and a separate ticket issued to the same person, with its own QR code, so somebody can bring people whose names you do not need in advance.
Route 2: a ticket type priced 0
If you would rather people register themselves, add a ticket type with a price of 0. It skips the card step entirely while still collecting the registration form and still issuing a QR code, so a complimentary category sits alongside your paid ones on the same event.
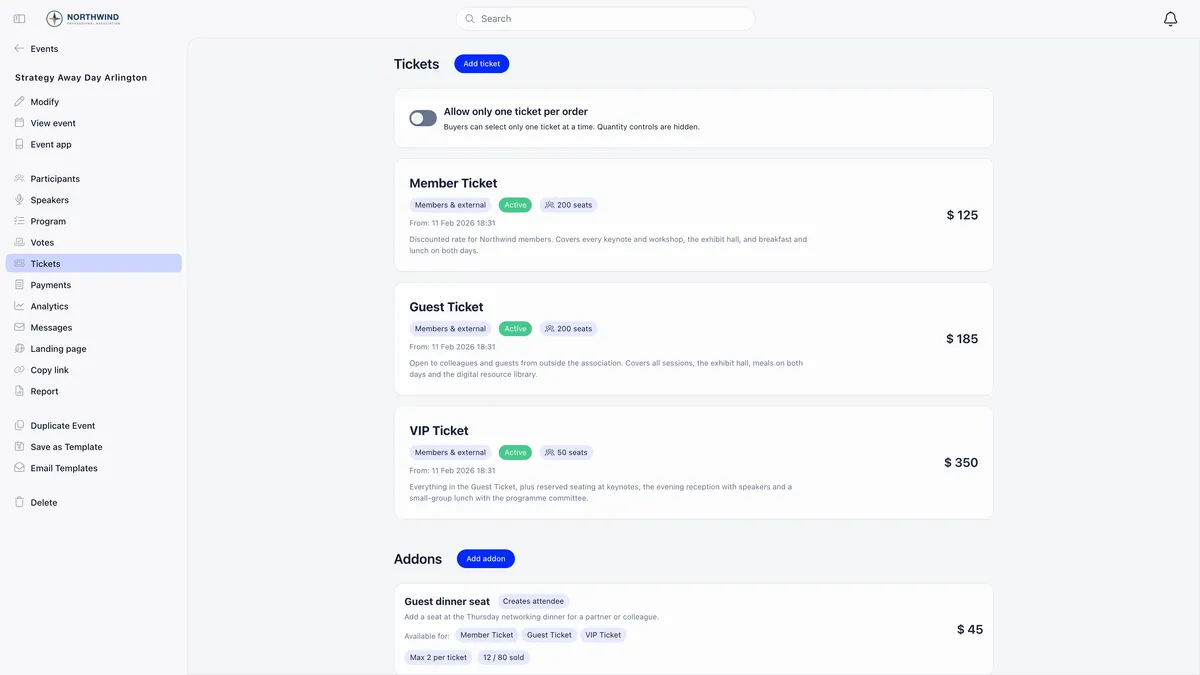
An event where every ticket carries a price cannot be used for free registration, so if you want a complimentary category it has to exist as its own zero-priced ticket type.
Checking people in by hand
The Participants screen is where you invite, chase, check in and export. It opens for the event owner, chapter-level event or chapter admin rights on the event’s group, organisation-level event or admin rights, and admins of a private group for that group’s events.
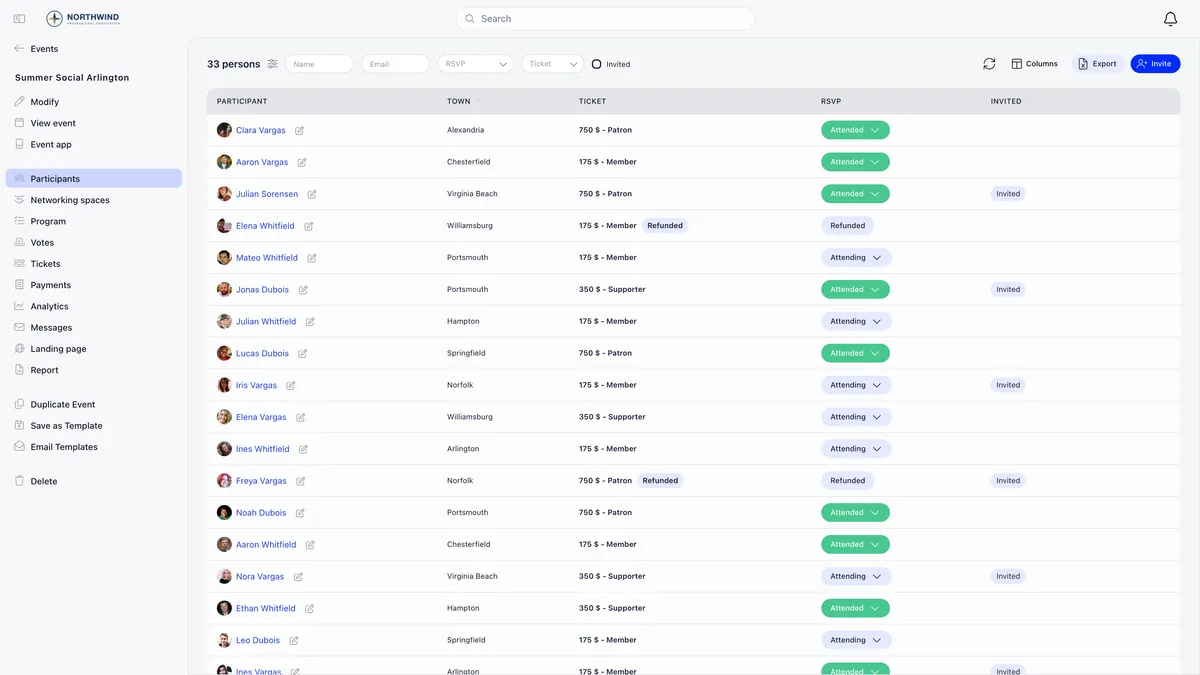
Set the RSVP dropdown on a row to Attended and that person is checked in. There is no separate checked-in flag anywhere in Orgo: your attendance figure is a count of participants whose RSVP reads Attended, which is why scanning and the dropdown produce exactly the same number.
There is no multi-select and no bulk check-in action. Every change is one row at a time. On an event without ticketing the screen is simpler, carrying the RSVP column alone.
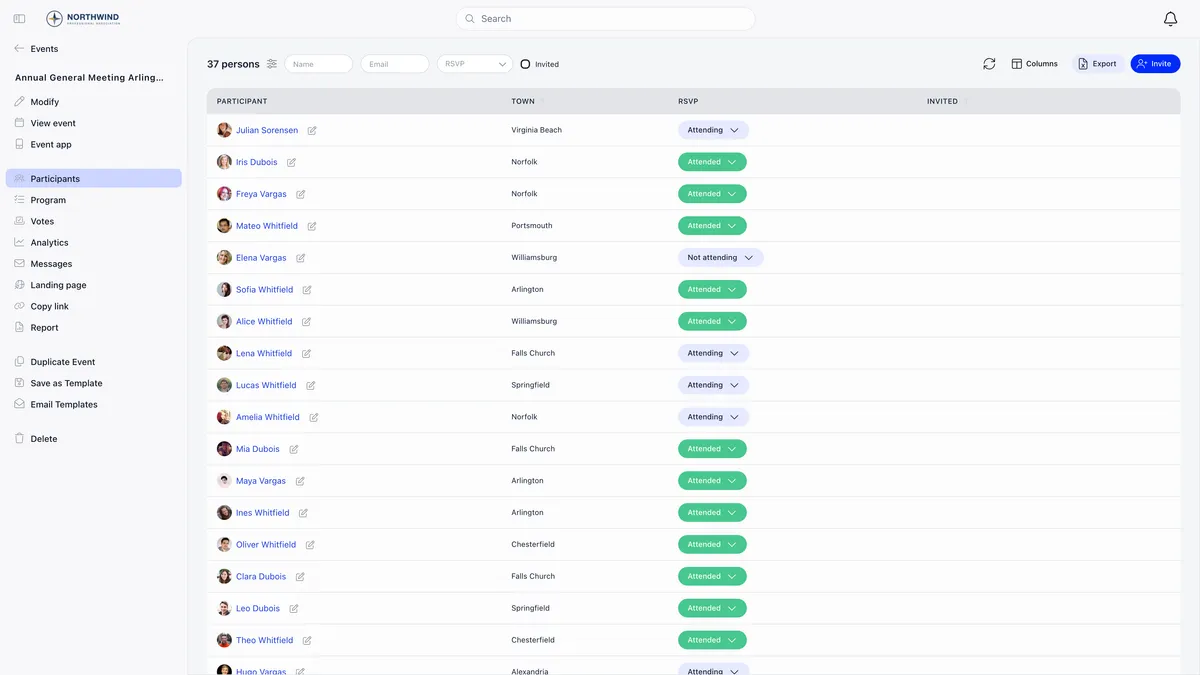
Walk-ins have to exist on the list first. Add them with Invite, then set them to Attended. Two statuses are worth keeping straight while you do this: registration status is where somebody sits in the sign-up workflow, and RSVP status is their own answer, which after the event is where attendance is recorded.
| RSVP status | Meaning |
|---|---|
| Attending | Coming |
| Maybe | Undecided. Not offered on events that use a registration form |
| Not attending | Declined |
| Attended | Present. This is what check-in sets |
The registration dropdown greys out once a payment is attached, because the status follows the money. Cancel or refund the payment first. The Logs button on a row shows every status change with a timestamp and who made it.
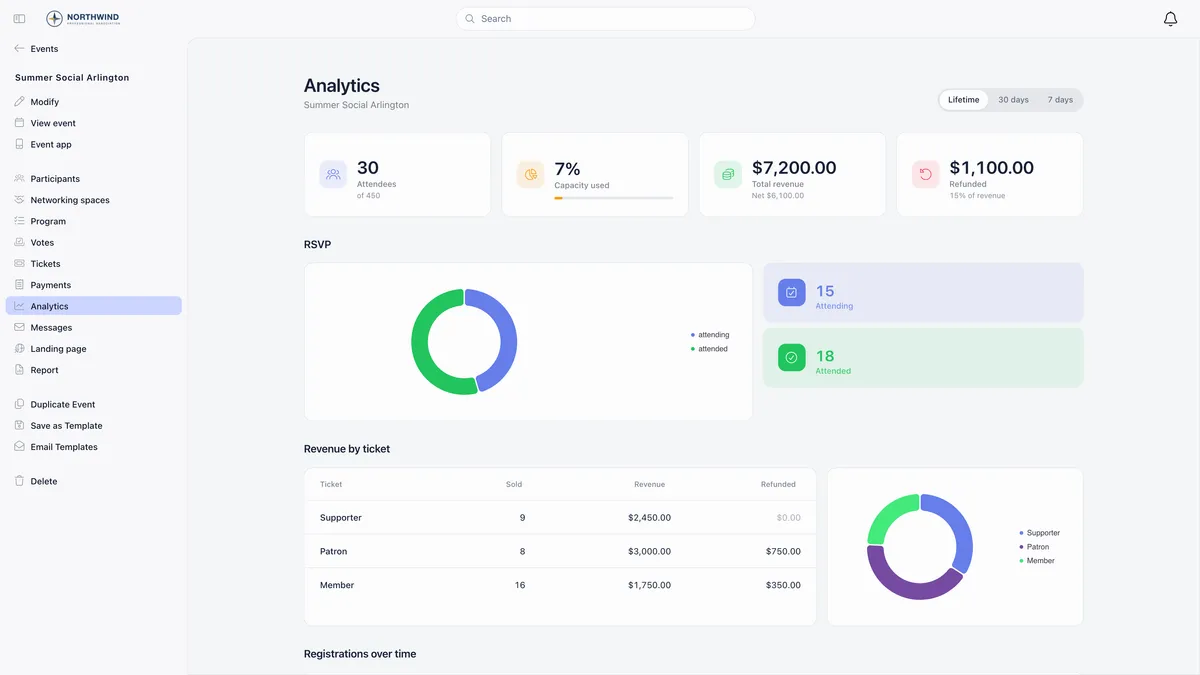
Once the doors close, the count lands in the event’s analytics as the Attended figure, alongside the registration and ticketing numbers that how Orgo runs events keeps on the same record.
There is no offline mode
Check-in is online only. There is no offline queue, no scans waiting to sync, and no cached attendee list on the device. If the venue connection drops, scanning stops.
Plan for it before the day rather than discovering it at the door:
- Export the participant list from the event ahead of time. The export needs organisation-level event rights, chapter-level event rights on the event, or event ownership, and it downloads a CSV carrying names, emails, ticket type, ticket price, registration status and RSVP status.
- Take it on paper or on a device that already holds the file. Mark people off by hand.
- Record the RSVPs afterwards from the participant screen, one row at a time.
For a large event it is worth testing the venue connection from where the door team will actually stand, not from the office. A signal that works in the lobby and dies in the basement hall is the usual shape of this problem.
Troubleshooting
The scanner says the ticket is invalid, or access denied
Almost always permission rather than the ticket, especially if a helper was handed a phone at the door. Check the scanning account against the table at the top of this page. The most common case by far is somebody with chapter-level rights using a plain phone camera.
There is no Scan button on my laptop
The in-app scanner is only rendered in the Orgo mobile app. On a laptop, scan with a phone camera and use the page that opens, or check people in from the participant list.
The camera never starts
The scanner reports the reason rather than failing silently. Camera access denied means the device refused the permission, and No camera found means there is no usable camera. Grant the permission in the device settings and reopen the scanner.
An attendee says the code never arrived
Check their registration status first. The ticket email goes out when a registration is confirmed, so somebody sitting at Invited, Pending approval or Awaiting payment has nothing to receive yet. Confirm the row, which sends the ticket.
There is no resend button. A signed-in member can open the event page and download their own ticket as a PDF, and an administrator with member-management rights over that person can download the same PDF and forward it. Because the code is never regenerated, that copy scans exactly like the original.
The participant count does not match the rows
The count above the list includes guest tickets, while the rows show only the people those tickets were issued to. A member with three guests is one row and four codes. The list also paginates at 100 rows.
Nobody recorded attendance and the event is over
Switch on the attendance reminder in the Events module settings and each event gains Send attendance reminder 24 hours after event ends. It goes to the event owner rather than to attendees, and links straight back to the event so the RSVP column can be filled in.
Related
- Creating an event
- Selling tickets to an event
- Using the mobile app
- QR check-in, the full reference
- The participant list and attendance
- Permissions
Frequently asked questions
My door staff get an access error when they scan. What is wrong?
Almost always the permission, not the ticket. Scanning with a plain phone camera opens the check-in page in a browser, and that page needs organisation-level HR or Event Manager rights. The chapter-level Event Manager permission is not enough there, so a chapter organiser scanning with their own phone camera is refused even though the ticket is perfectly valid. Either give the door team the organisation-level Event Manager permission, or have them scan from inside the Orgo mobile app, whose scanner does accept the chapter-level permission on that event's group.
Can I give somebody a QR ticket without charging them?
Yes, two ways. Open the event, go to Participants and use Invite, on the Member tab for someone in your directory or the External tab for a name and email. That confirms them straight away and emails a ticket with a QR code, with no payment anywhere in the process, which is how speakers, sponsors and staff get in. The other way is a ticket type priced 0, which skips the card step entirely while still collecting the registration form and still issuing a QR code.
What happens if the venue internet drops during check-in?
Check-in stops working. It is online only, with no offline mode, no queue of scans waiting to sync, and no cached list on the device. Plan for it before the day: export the participant list from the event and take it on paper or on a device that holds the file, mark people off by hand, and record the RSVPs from the participant screen once you are back online.