How to access
Settings → Users & Profiles → Registration Form If User Types are configured, each type gets its own registration form — so you can ask different questions of Scouts vs Leaders, Students vs Professionals.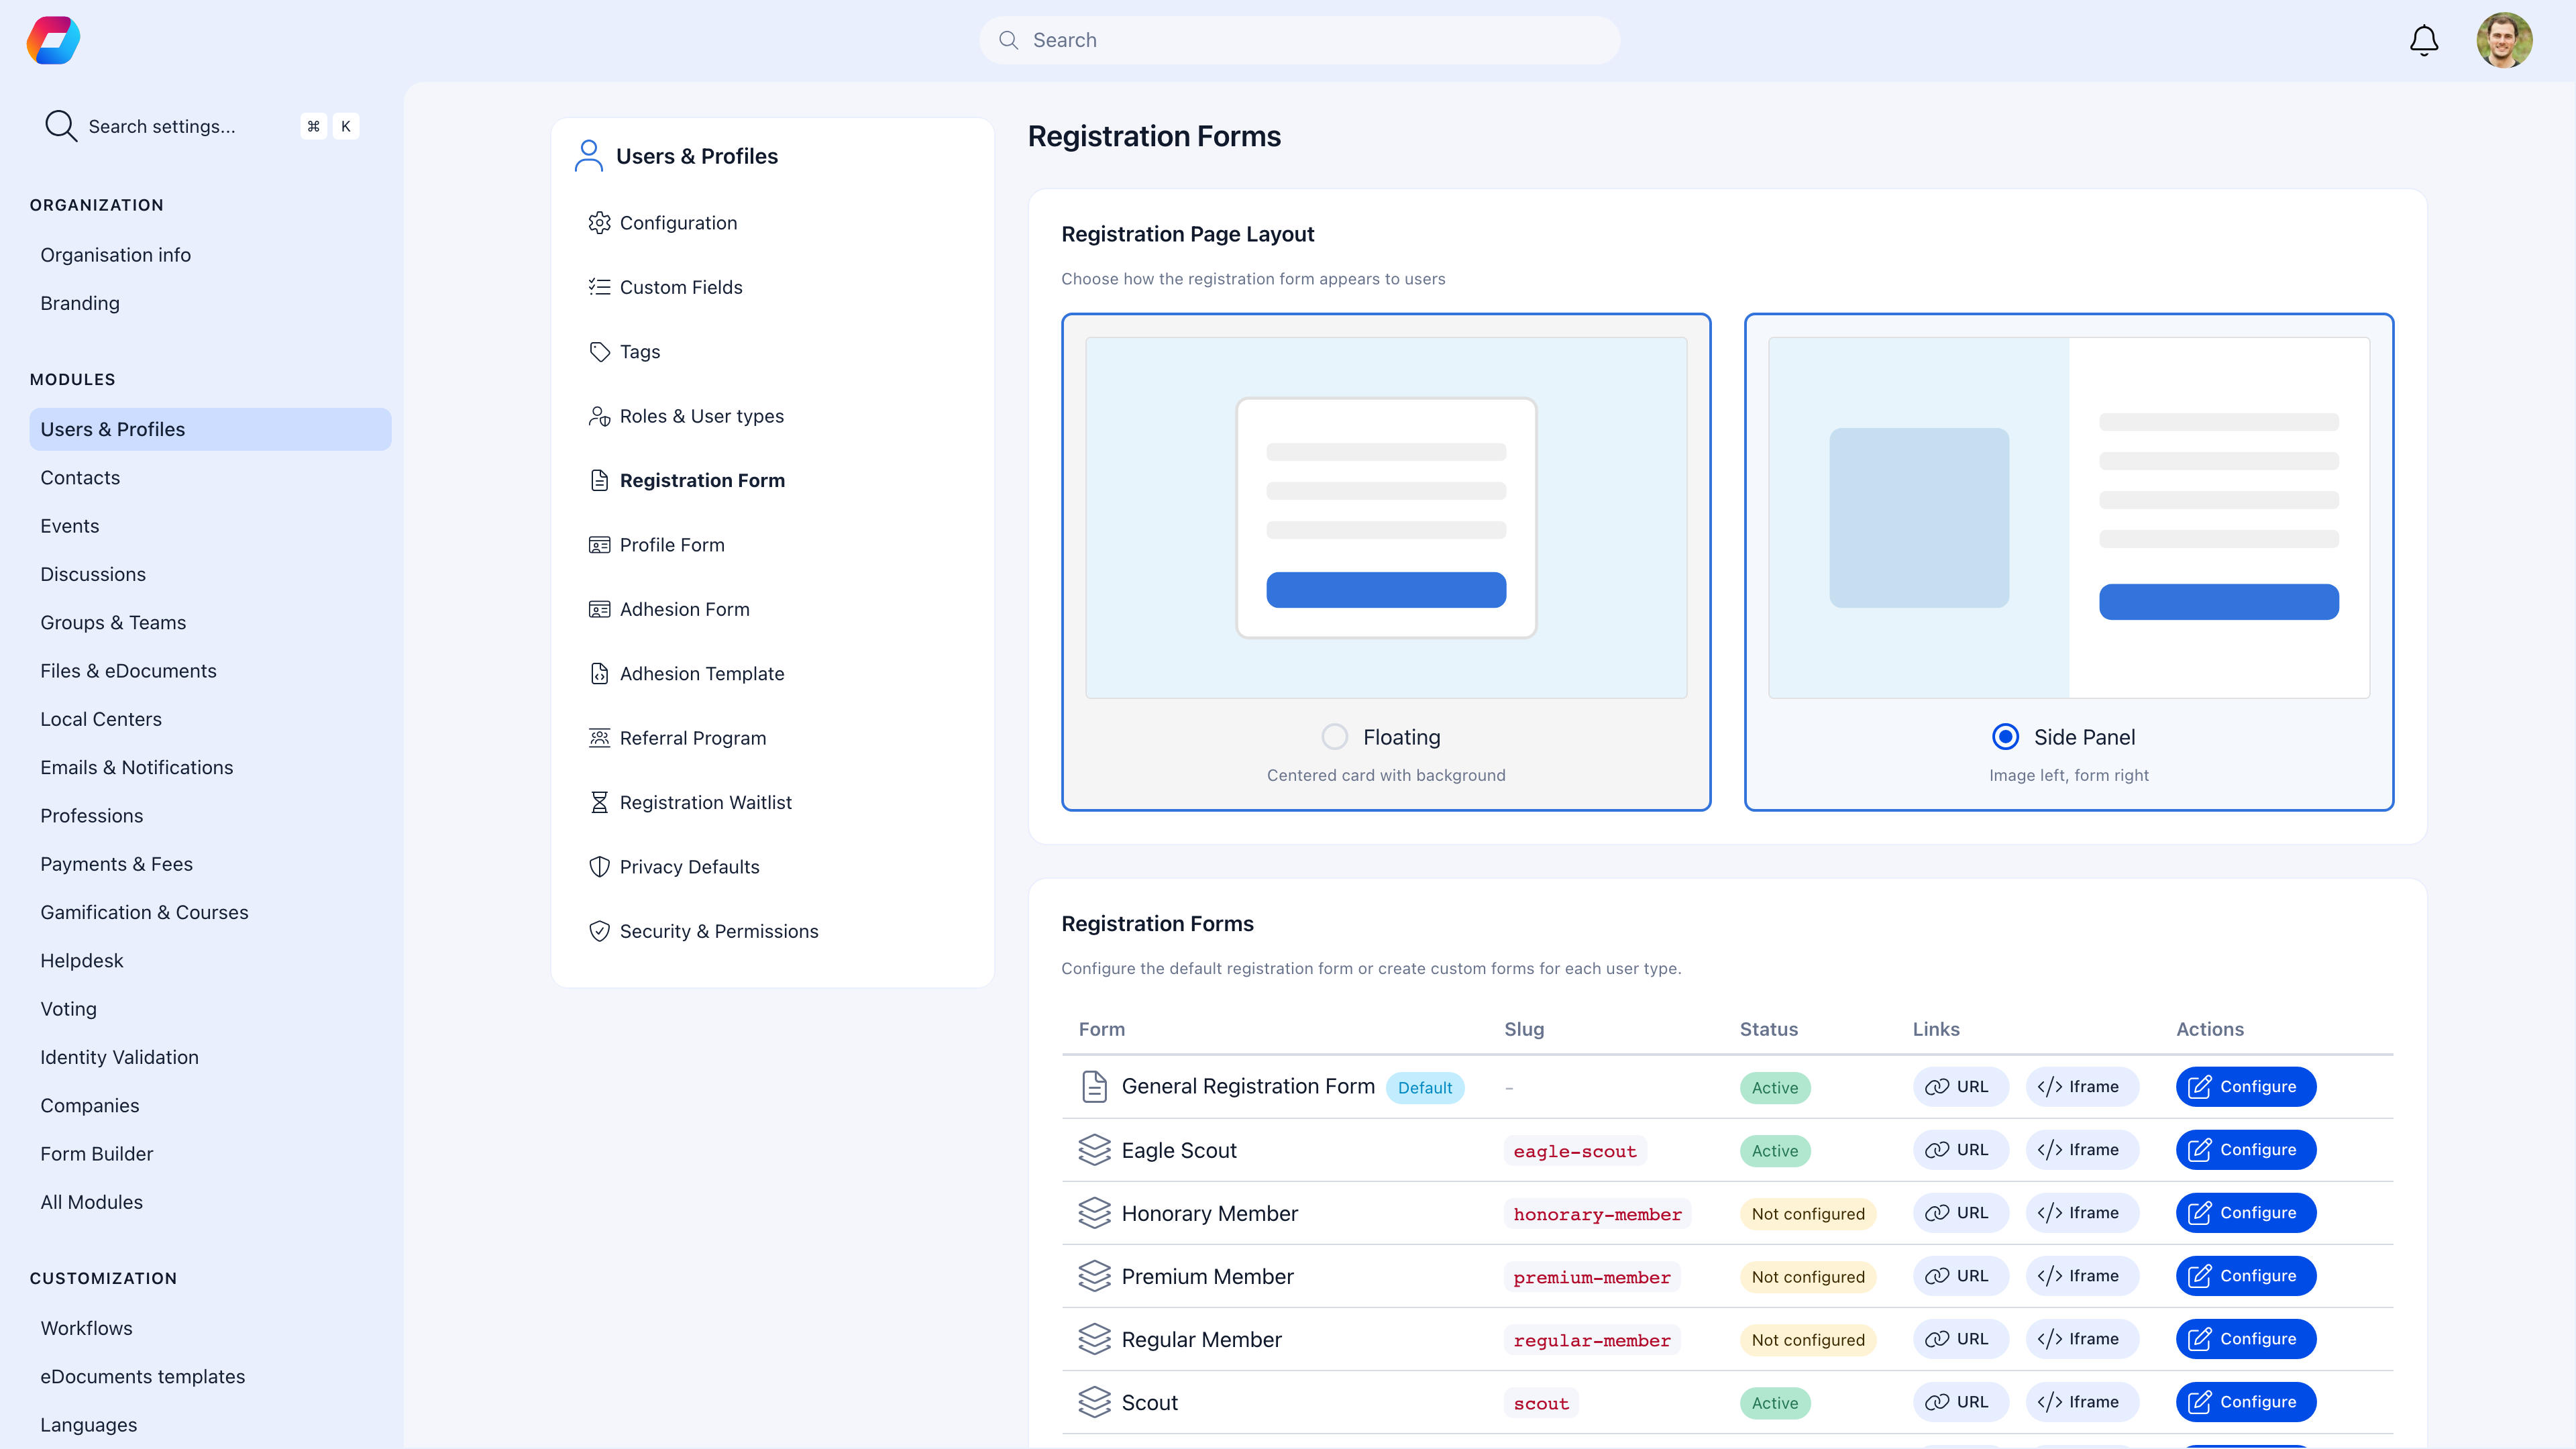
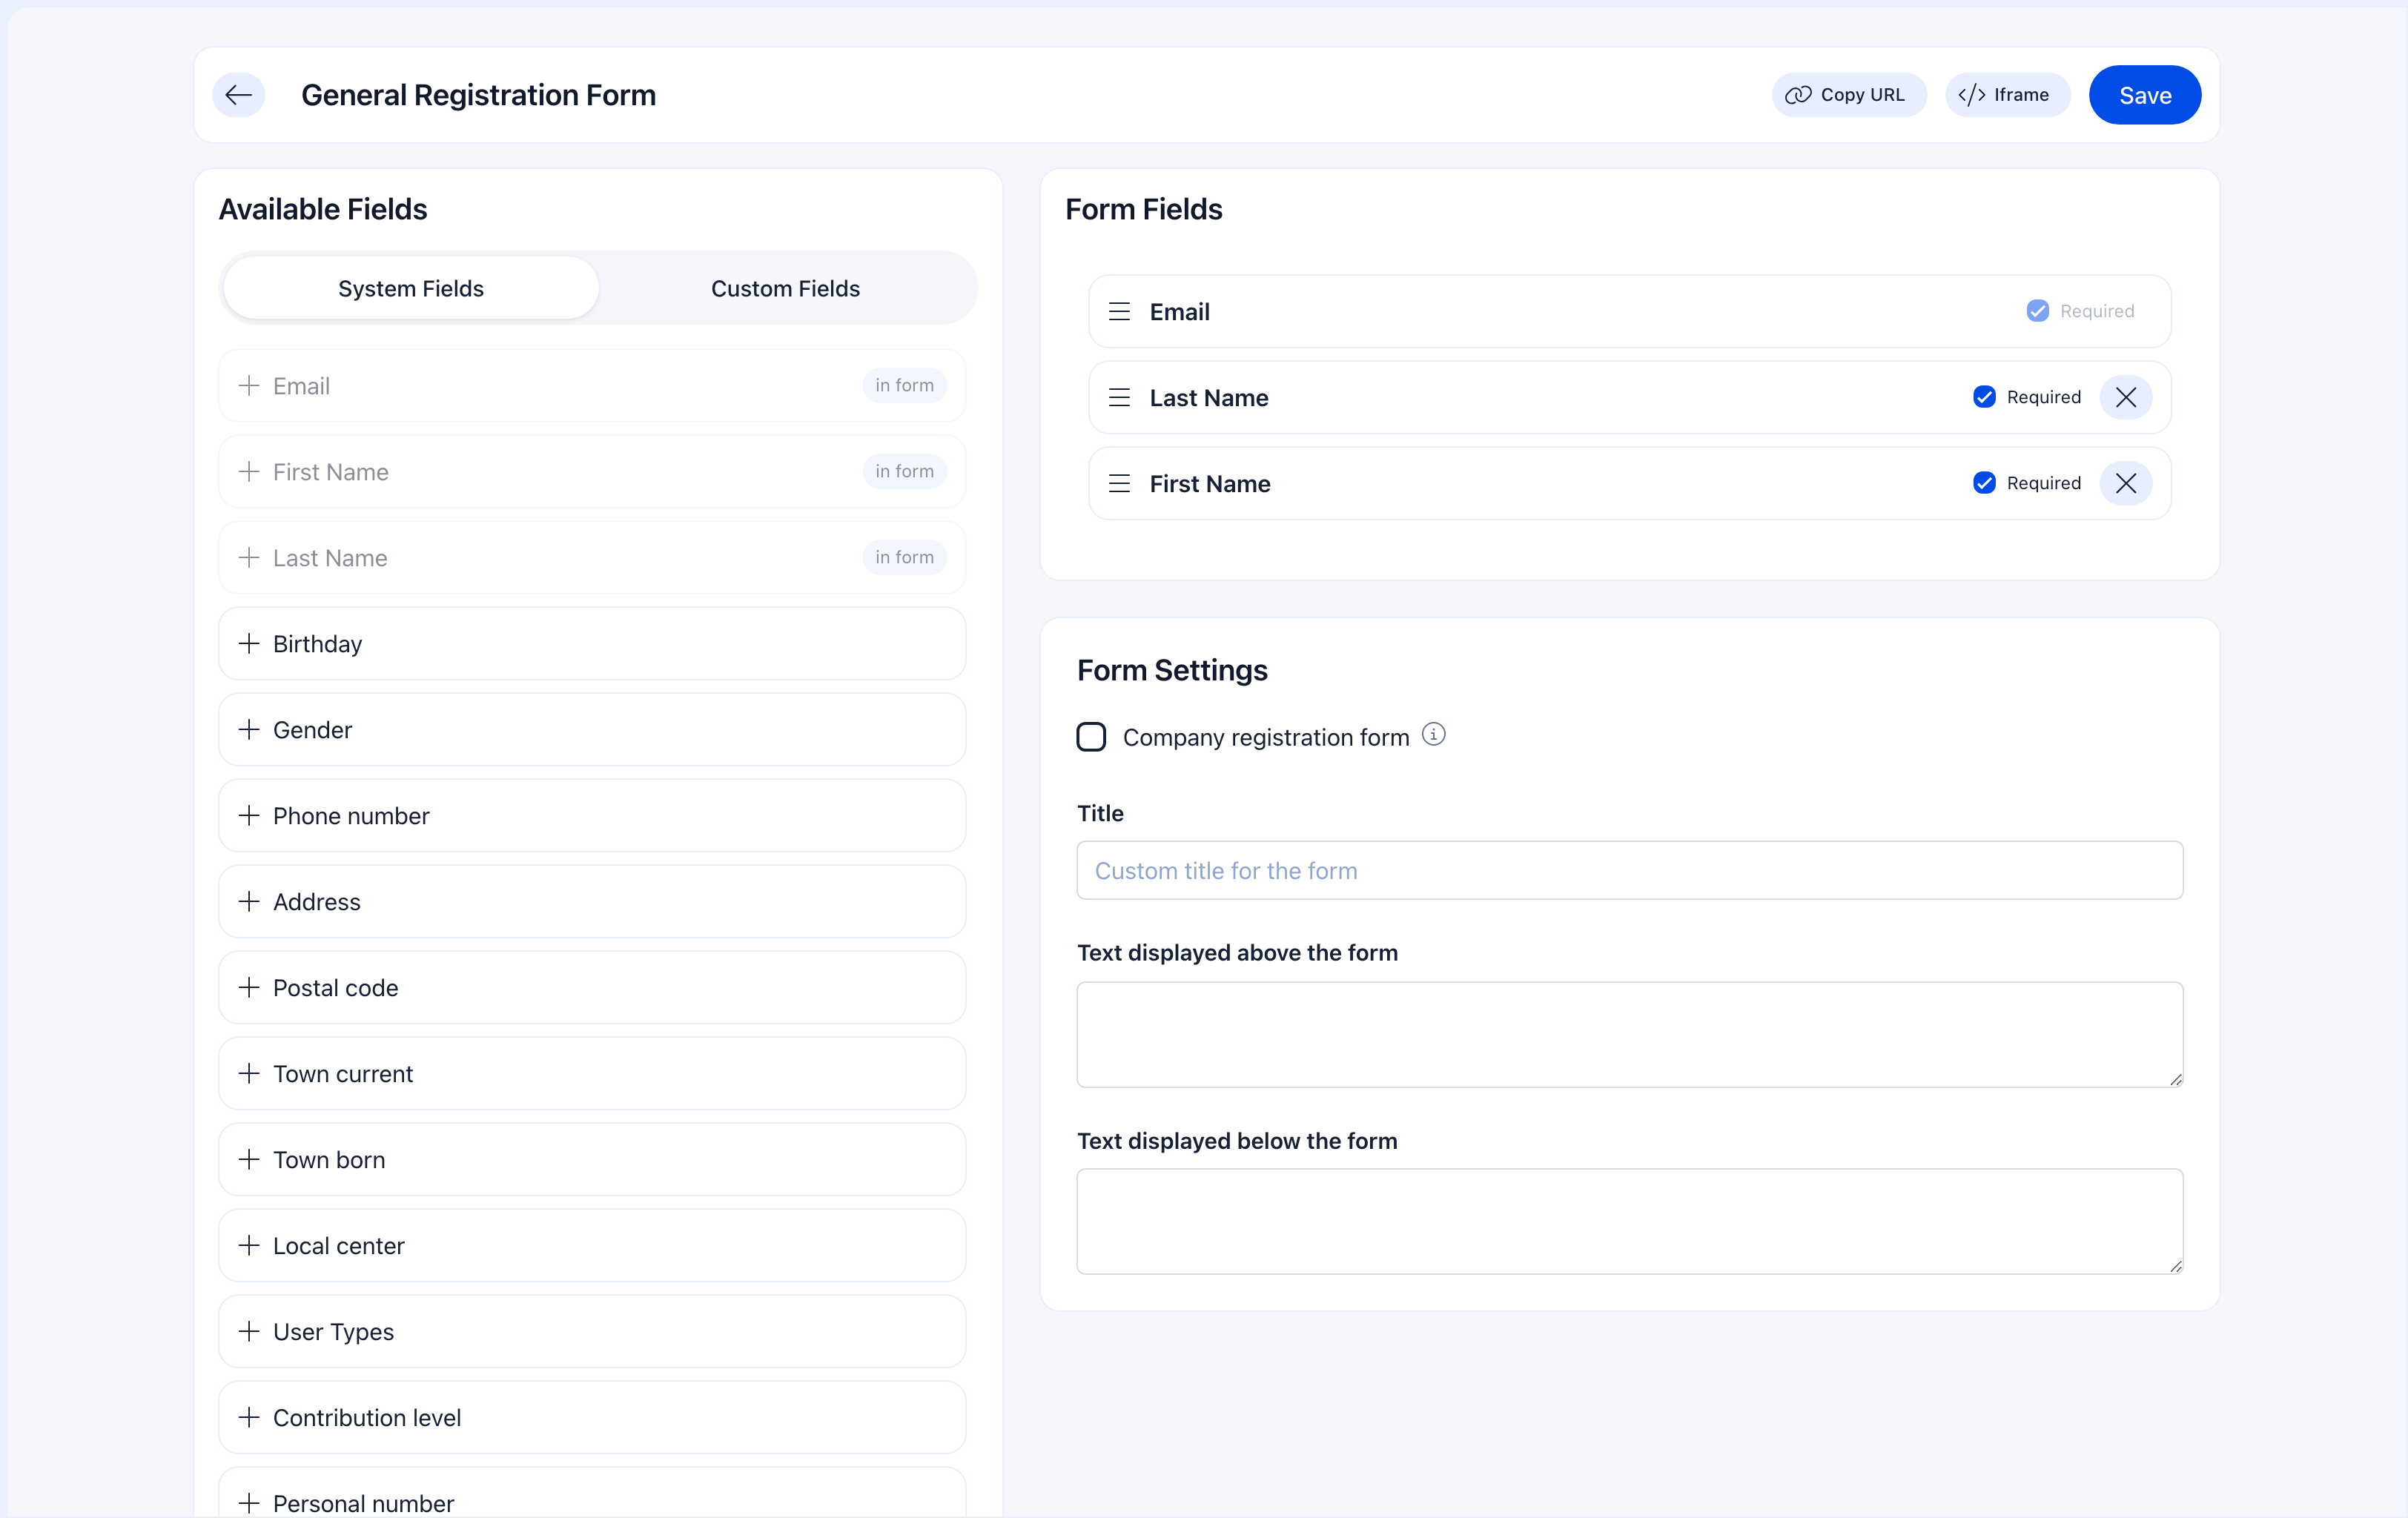
Designing your form
What to require vs what to skip
| Field | Require it if… | Skip it if… |
|---|---|---|
| Always required (used for login) | — | |
| First Name, Last Name | Almost always | Never — you need a name |
| Phone | Your org calls members, or for emergency contacts | It’s a casual community |
| Birthday | You serve minors (age restrictions), or need age data | It feels invasive for your audience |
| Local Center | You have local branches and members need to be assigned | You don’t have local branches |
| Address | You mail physical items or need location data | You’re online-only |
| Profession fields | You’re a professional association | You’re a hobby/social community |
| Social profiles | You want members to connect outside the platform | They add friction for no payoff |
Available fields
Basic Information
| Field | Description |
|---|---|
| Always enabled and required — this is how members log in | |
| First Name | Member’s first name |
| Last Name | Member’s last name |
| Birthday | Date of birth — triggers age restrictions if configured |
| Gender | Gender selection |
| Phone Number | Contact phone |
Location
| Field | Description |
|---|---|
| Town Born | City/town of birth |
| Town Current | Current city/town |
| Address | Street address |
| Postal Code | ZIP/postal code |
| Location on Map | Pin on the members map |
| Local Center | Affiliated local center/branch |
Professional
| Field | Description |
|---|---|
| Profession Headline | Job title or professional summary |
| Profession Industry | Industry/sector |
| Current Company/Organization | Employer |
| Current Role | Position |
| Company Legal Name | Official company name |
| Company Identifier | Tax/registration ID |
| Company Address | Office address |
| Commerce Registry Number | Business registration |
Social
| Field | Description |
|---|---|
| Website | Personal website |
| Facebook, Twitter/X, LinkedIn, Instagram | Social profiles |
| Telegram, TikTok, Signal, Bluesky | Messaging and social |
Other
| Field | Description |
|---|---|
| ID Serial & Number | National ID document |
| Personal Number | Personal identification number |
| User Type | Let members choose their category during registration |
| Register as Member | Checkbox to confirm membership intent |
| Fee Level | Select membership fee tier |
Per-type registration forms
If you’ve created User Types, each type gets its own form. This means you can:- Ask Scouts for their parent’s contact info, but not Leaders
- Require Professional members to provide a license number
- Keep the Volunteer form short and simple
- Create your user types in Settings → Users & Profiles → Roles & User Types
- Go back to Registration Form — you’ll see one form per type
- Configure each form independently
The “User Type” field on the registration form lets members self-select their type during sign-up. If you don’t include this field, you’ll need to assign types manually or through Adhesion approval.
Customizing the registration page
Choose between two layouts for your registration page:| Layout | Description |
|---|---|
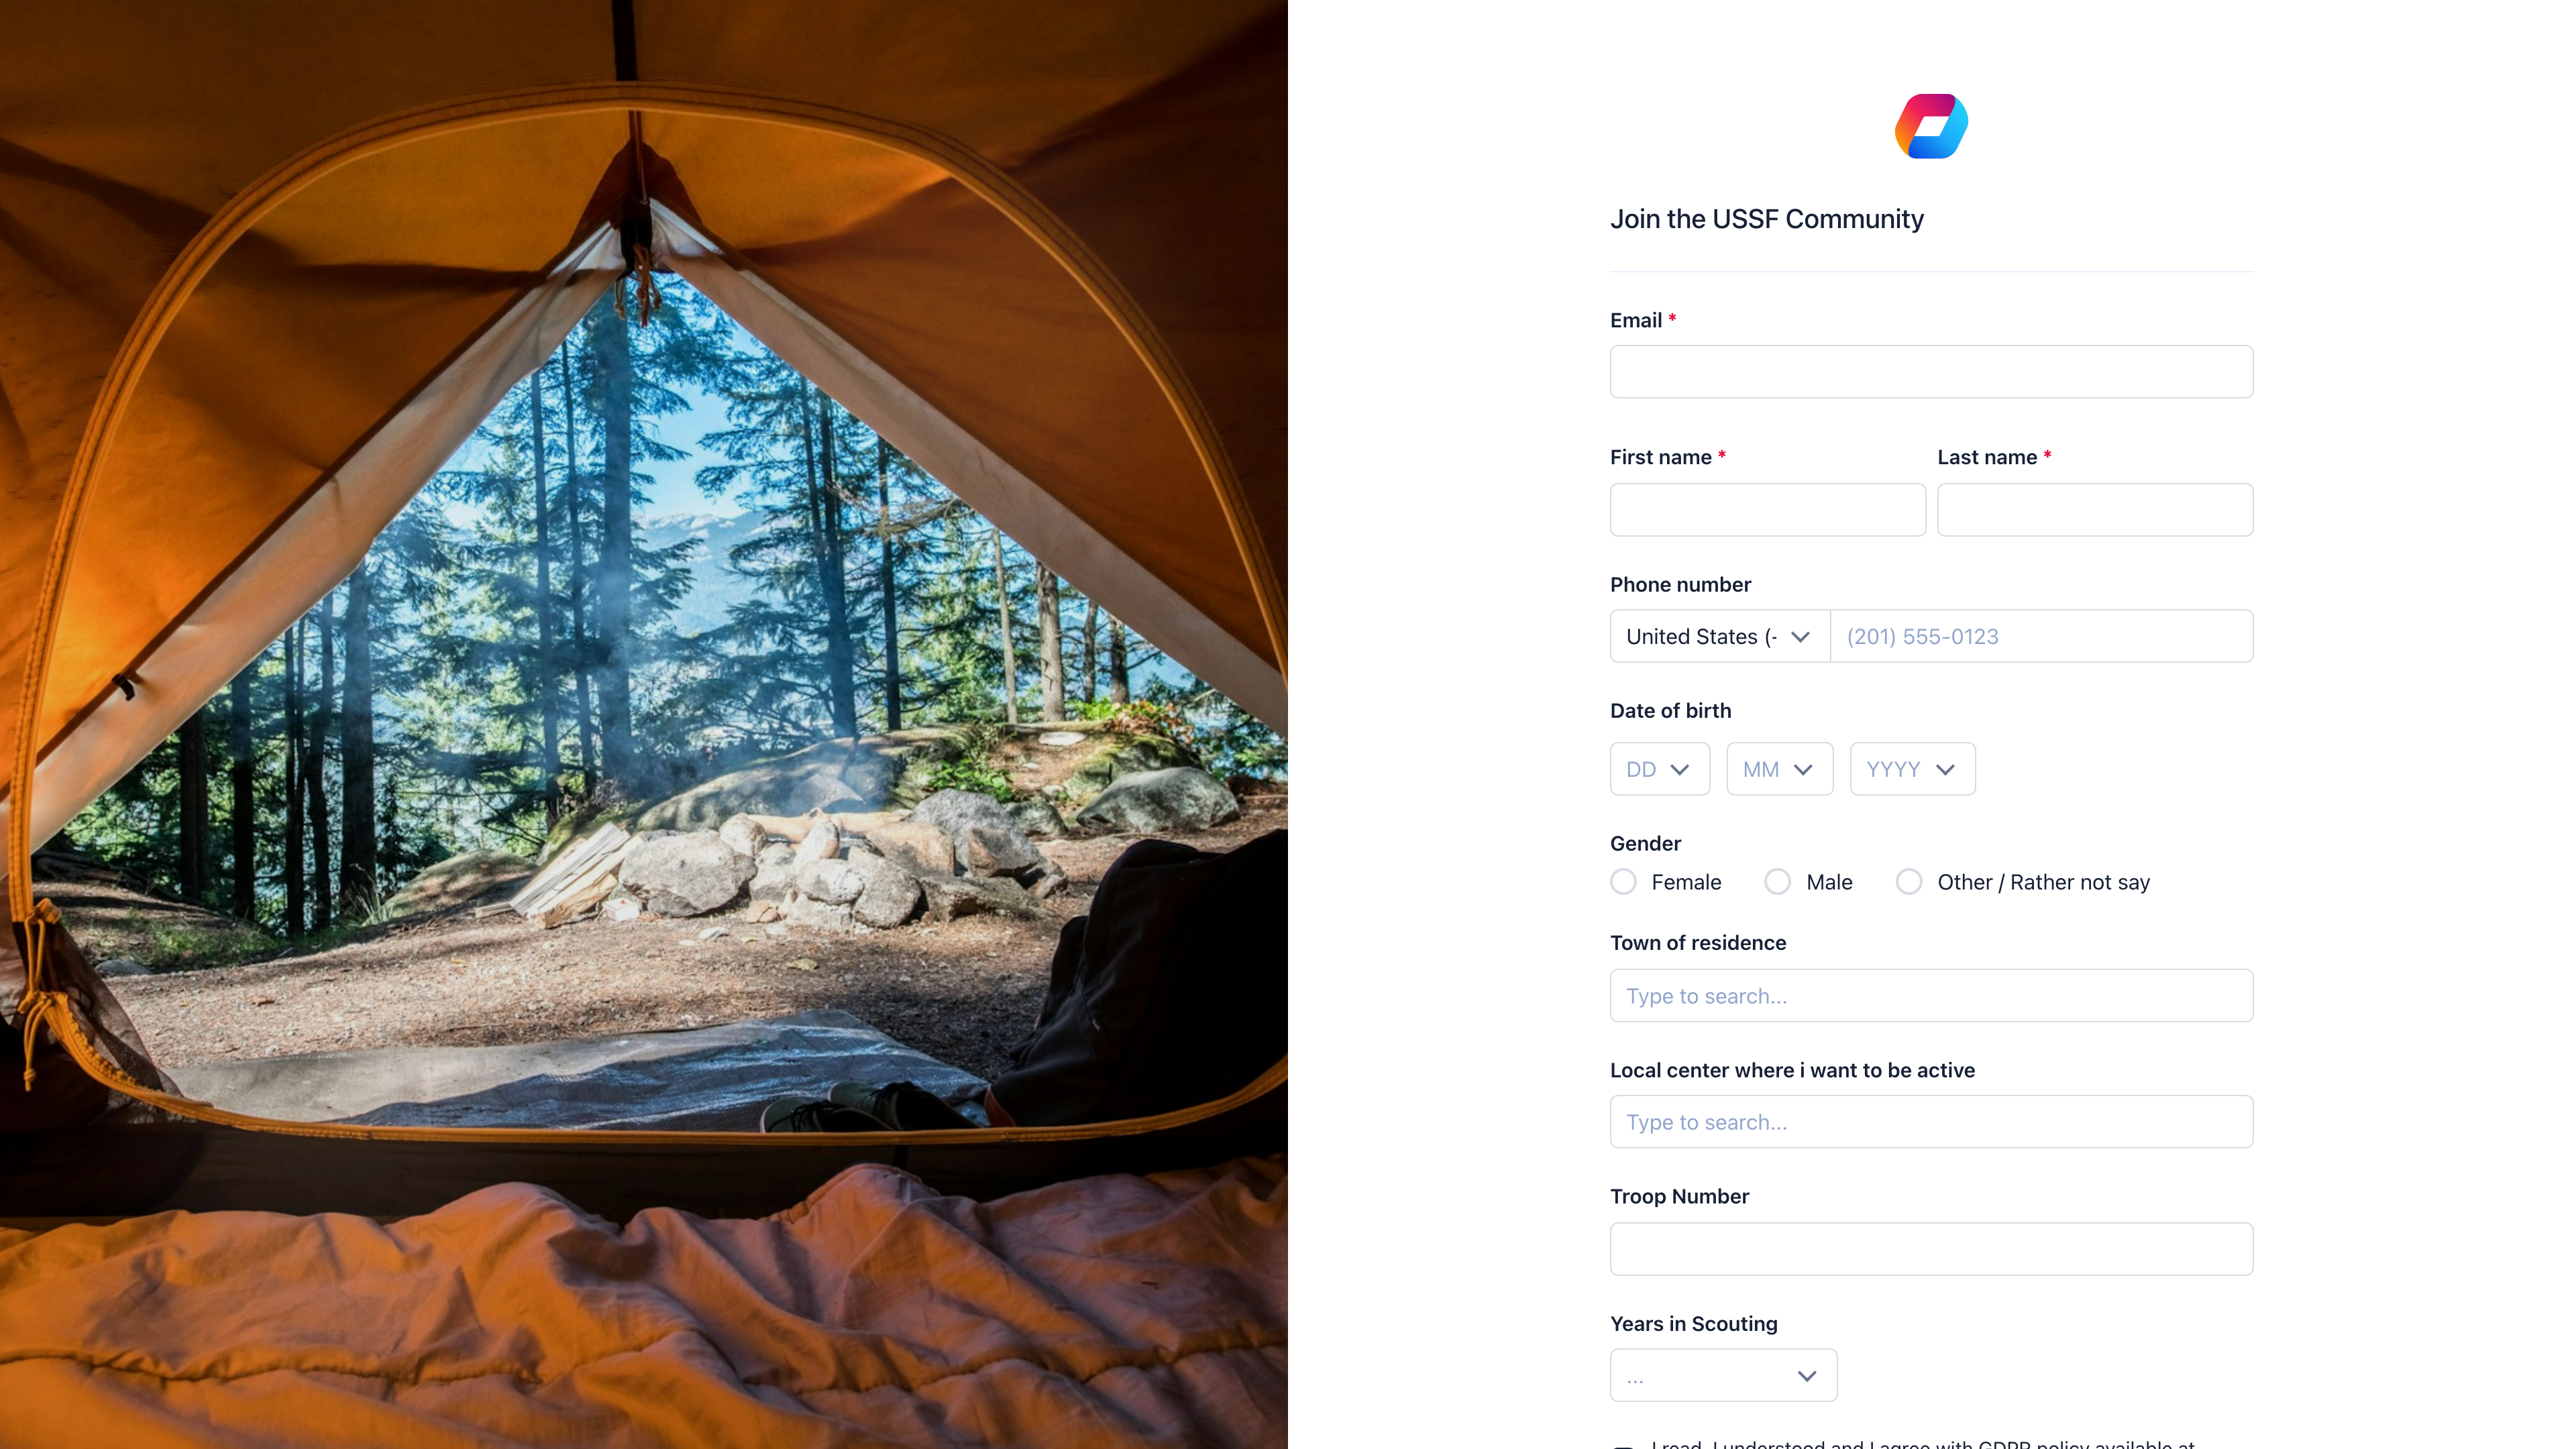
| Floating | Centered card with a background — clean and focused |
| Side Panel | Image on the left, form on the right — more visual and branded |
| Setting | What it does |
|---|---|
| Title | Custom title at the top of the registration page. Leave empty for the default. |
| Text before form | Introductory text above the form. Welcome new members, explain what they’re joining, or set expectations. |
| Text after form | Text below the form, before submit. Good for terms reminders or next-step info. |
| Volunteer opt-in text | Text for the volunteer opt-in switch (if volunteer roles are enabled). |
Embedding on your website
You can embed the registration form on any external website using an iframe:- Click the Iframe URL button in the form builder to copy the embed link
- Add it to your website:
lang parameter for different languages (en, de, fr, es, it, nl, ro, bg, ua).
How registration connects to other features
| Feature | How it interacts |
|---|---|
| User Types | Each type gets its own registration form. Members can self-select if you include the User Type field. |
| Adhesion | When adhesion is mandatory, registration alone doesn’t grant full access — a separate application process follows. |
| Waitlist | When the waitlist is active, visitors join a queue instead of registering directly. They register after being invited from the waitlist. |
| User Statuses | Status After Register determines whether new members are Active immediately or Unapproved (requiring admin approval). |
| Custom Fields | Custom fields you create appear as additional options in the form builder. |
| Profile Fields | Fields not on the registration form can be collected post-registration through profiles. |
Common scenarios
I changed the registration form but existing members aren't affected
I changed the registration form but existing members aren't affected
Correct — the registration form only applies to new sign-ups. To collect new information from existing members, add the field to Profile Fields and mark it as required. Members will see a splash screen on their next login.
I want different registration forms for different member types
I want different registration forms for different member types
Create User Types first, then configure each type’s registration form separately. Include the “User Type” field so members can self-select during registration.
Members are abandoning the registration form
Members are abandoning the registration form
Your form is probably too long. Reduce required fields to the minimum (email, name). Move everything else to Profile Fields. You can always collect data later through the splash screen mechanism.
I need to collect a field that doesn't exist in the standard list
I need to collect a field that doesn't exist in the standard list
Create a Custom Field (Settings → Users & Profiles → Custom Fields), then come back to the registration form builder — your custom field will appear at the bottom of the field list.
Related
- Profile Fields — Collect additional data after registration
- User Types — Per-type forms and member categories
- Custom Fields — Organization-specific data fields
- Adhesion — Formal application process (separate from registration)