

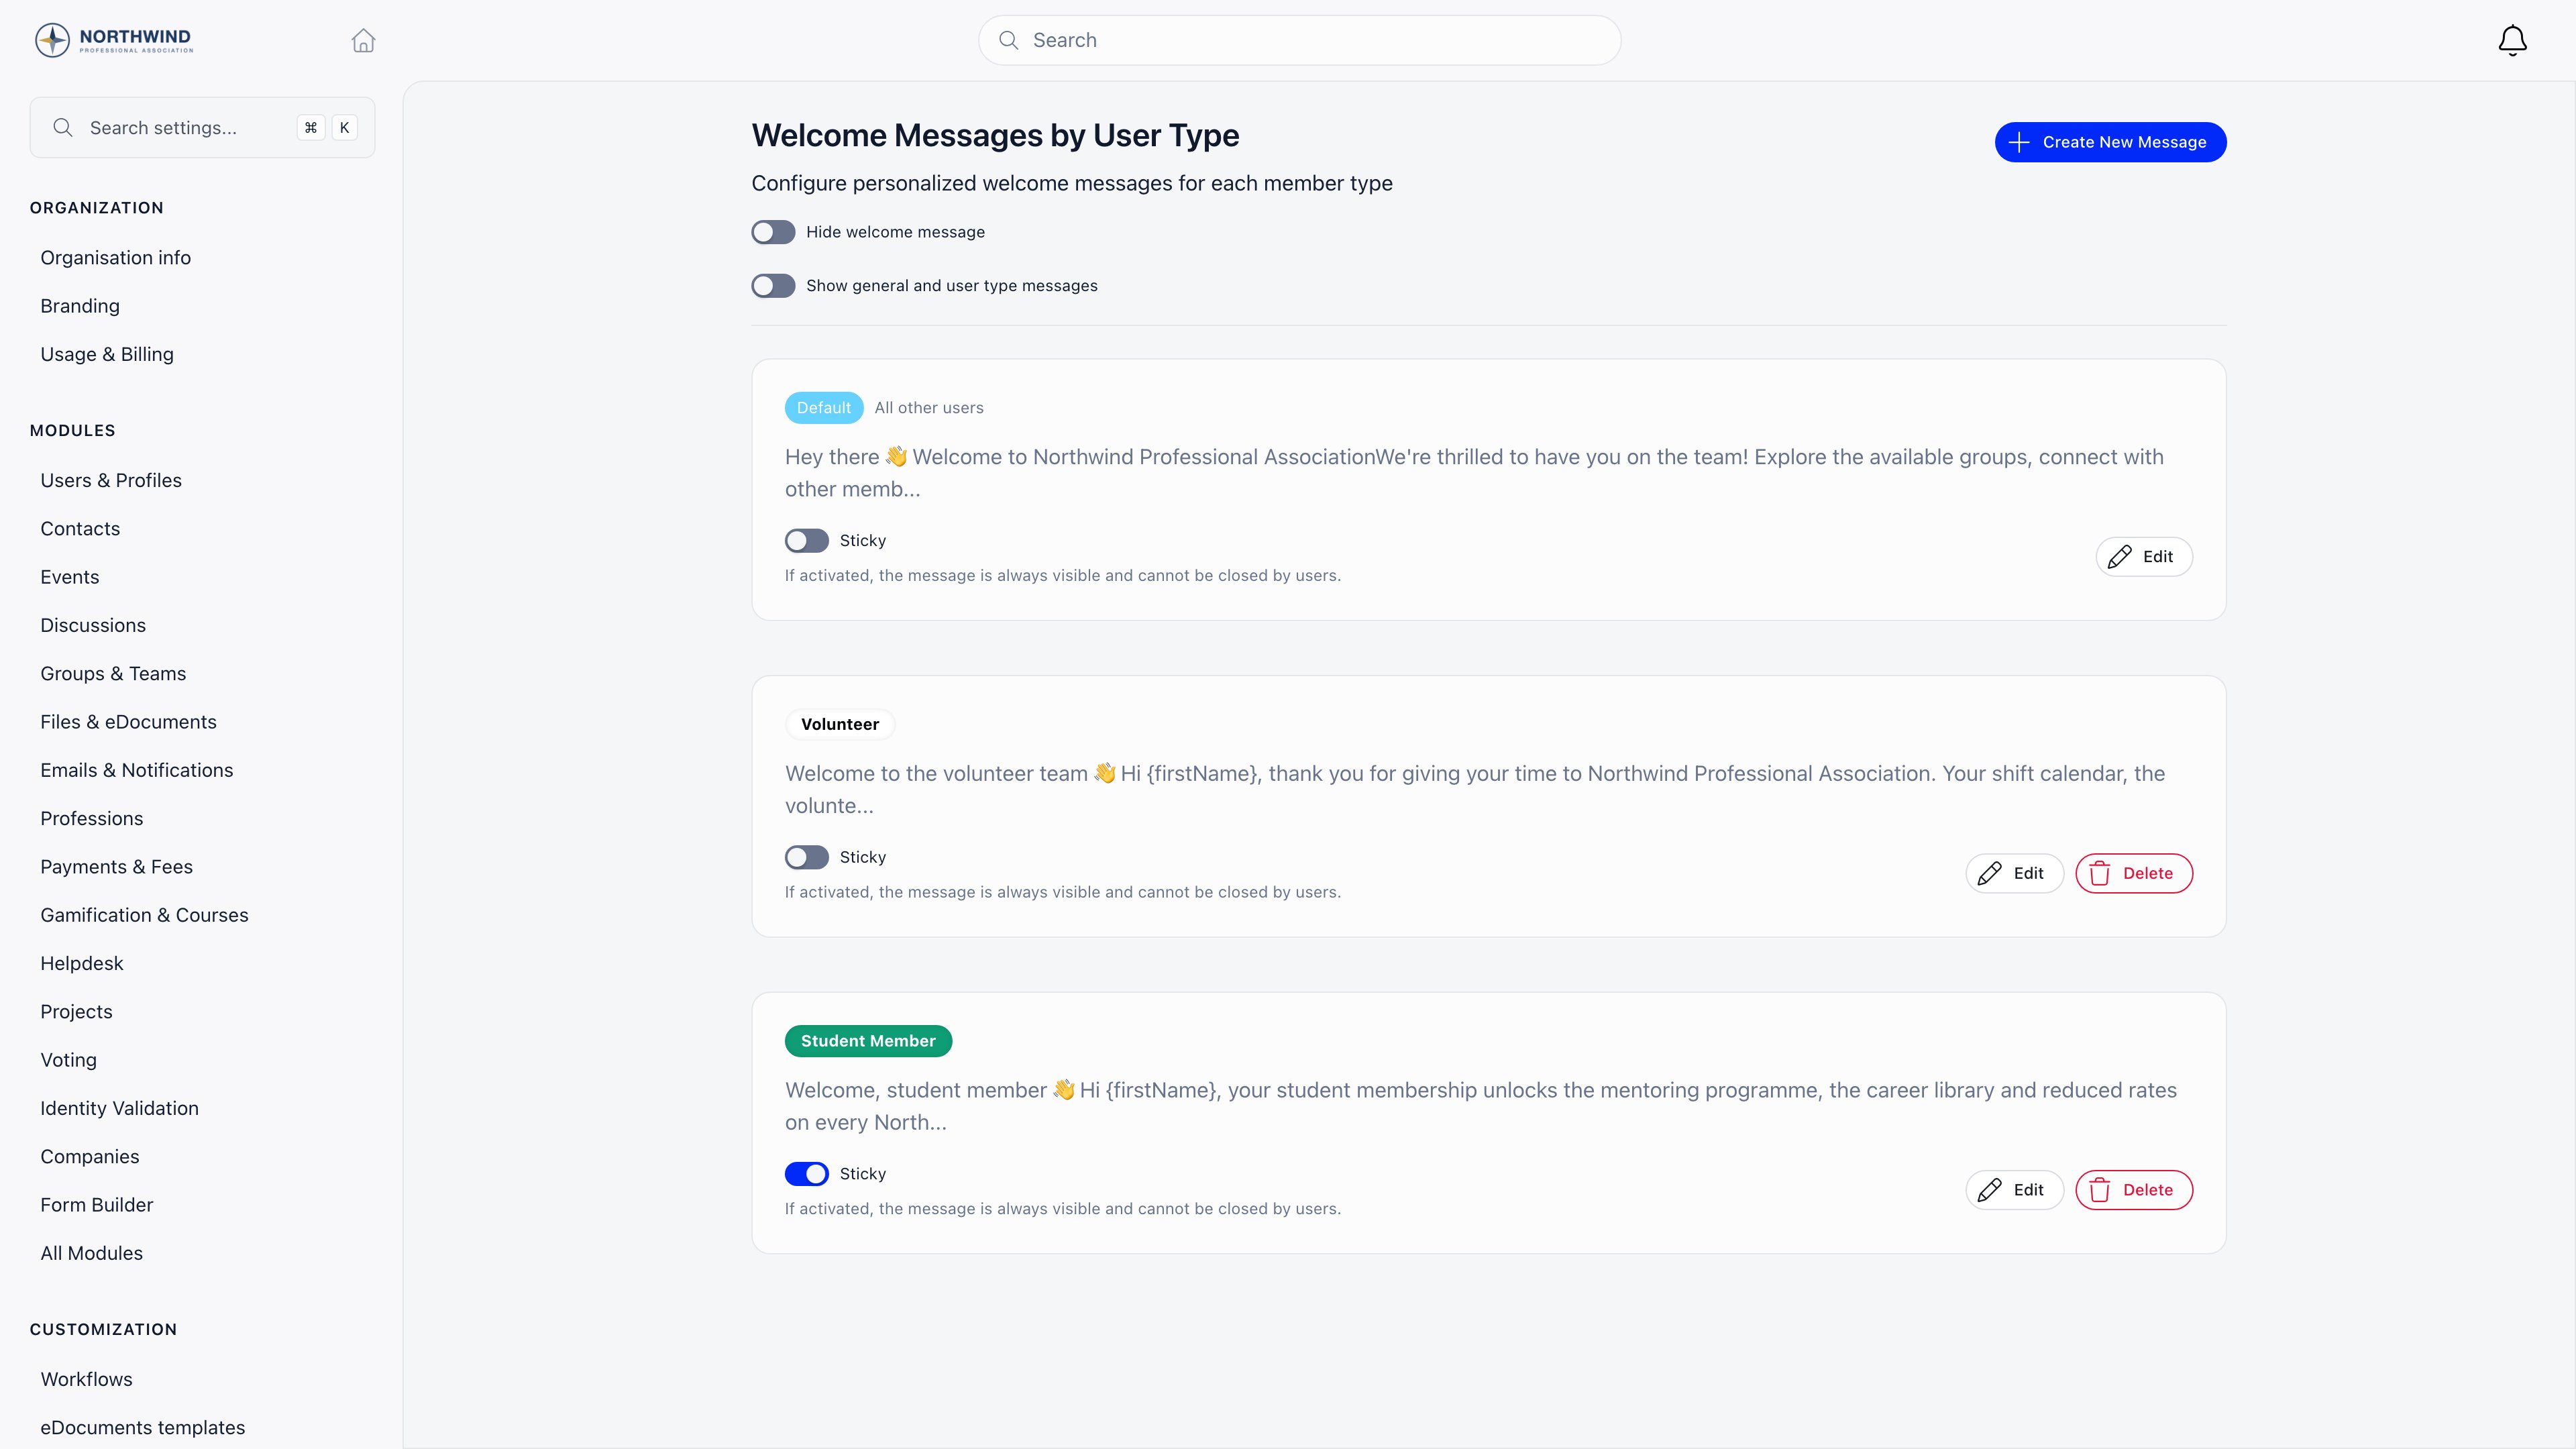
Requires ADMIN_TENANT. The page is headed Welcome Messages by User Type.
Writing the message
1
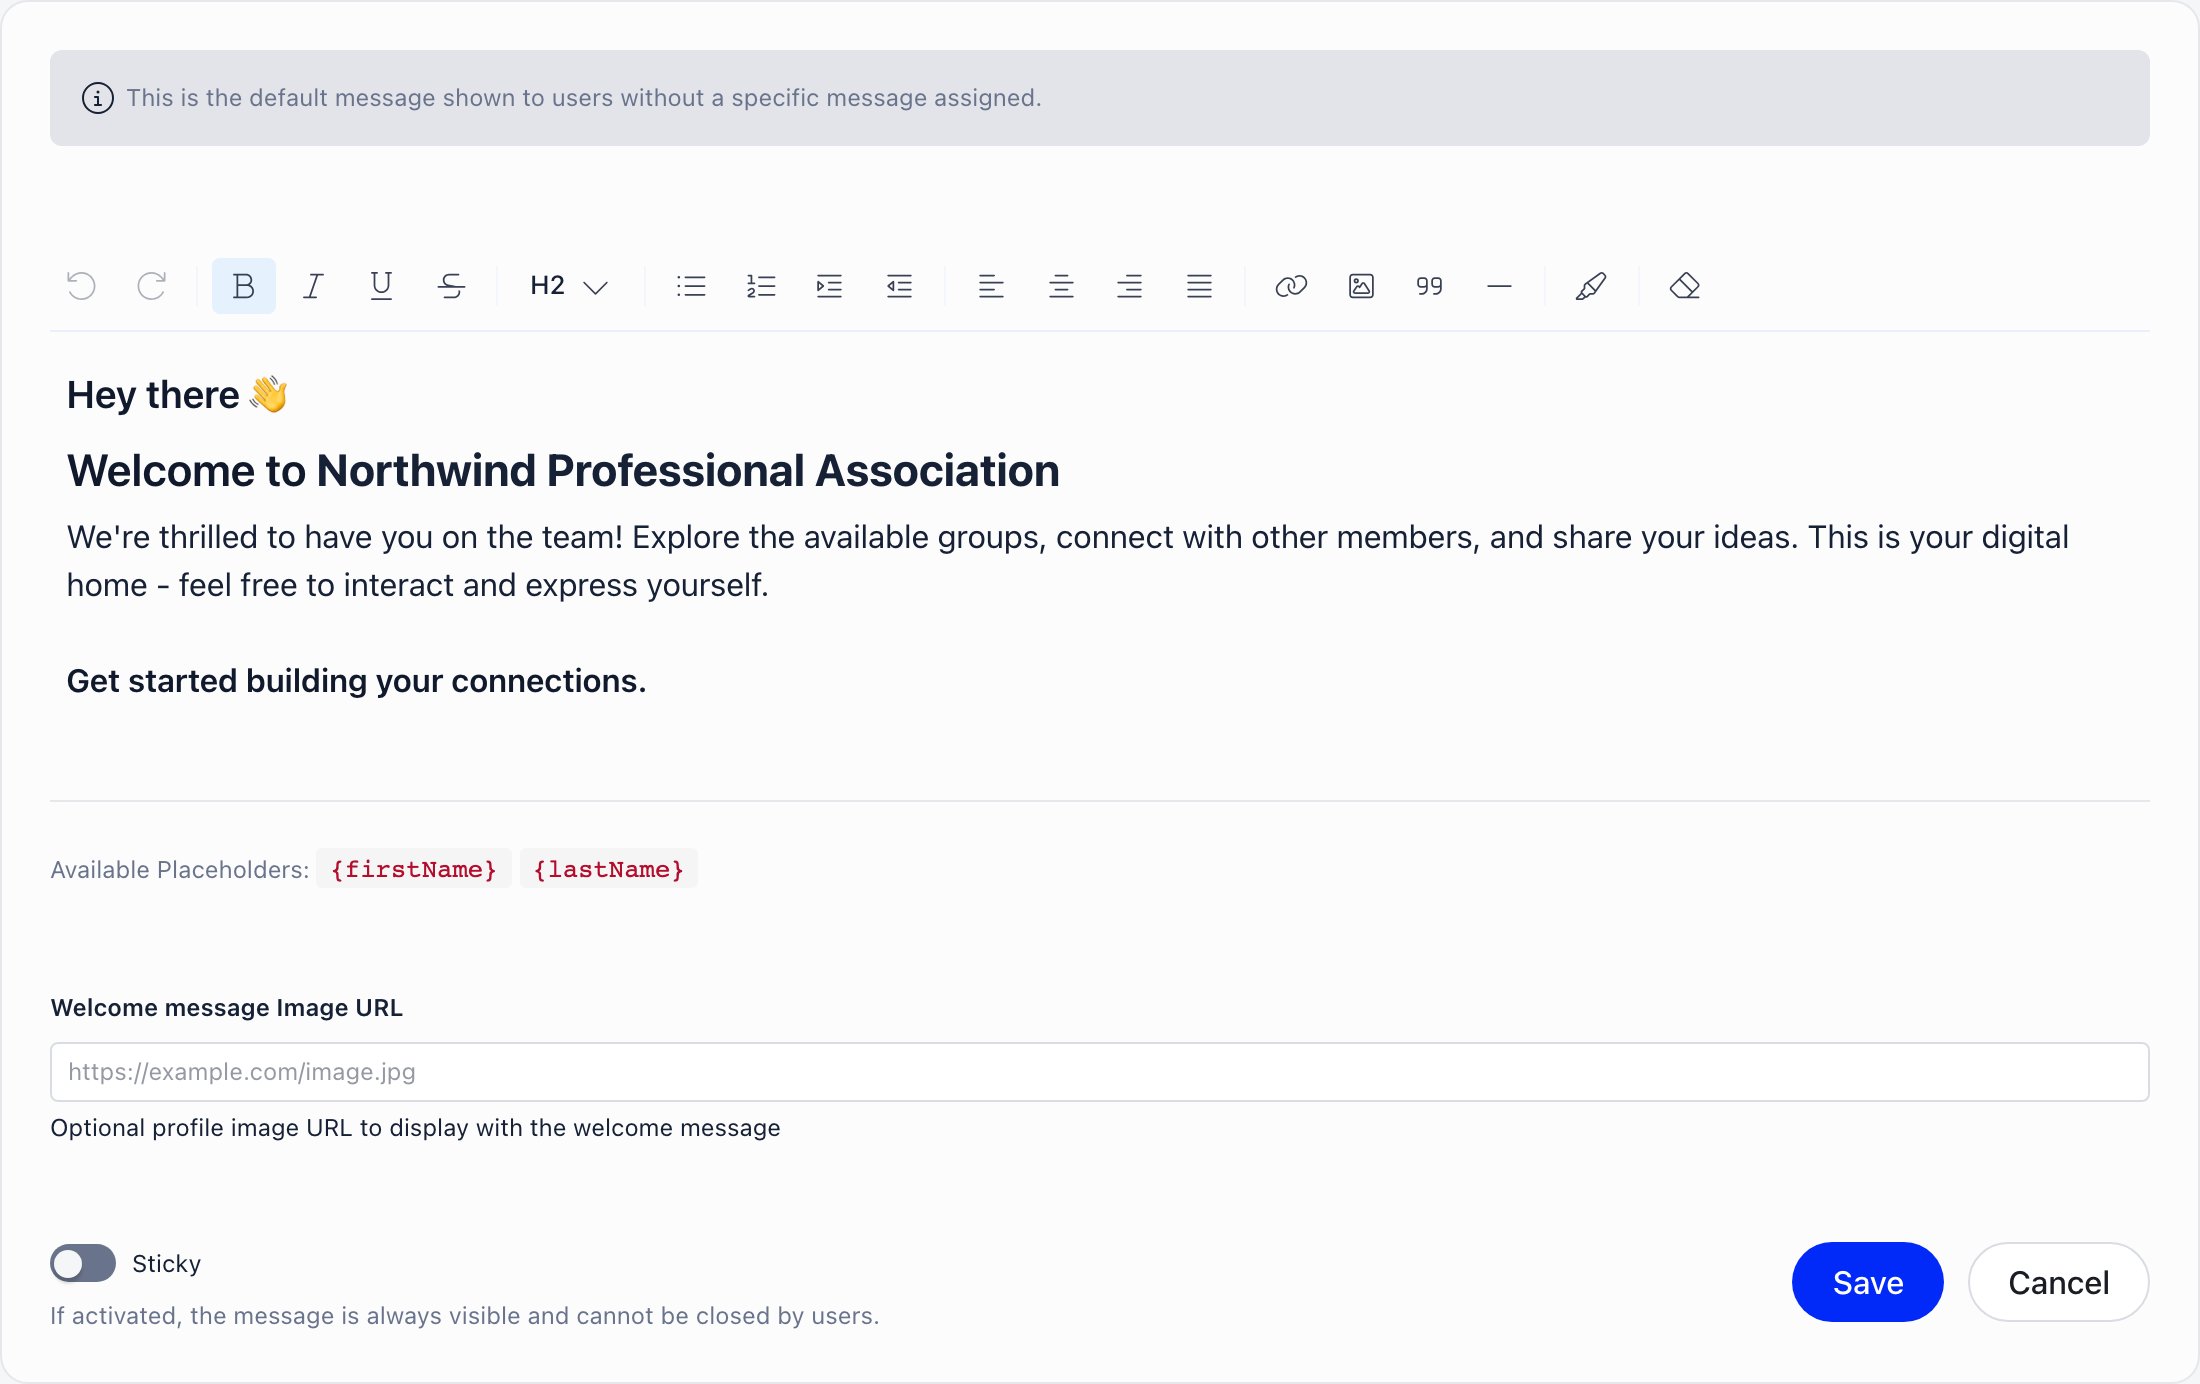
Open the message card and click edit
An organization with a single message opens it in edit mode automatically.
2
Write the content
The editor supports headings, bold, italic, links, lists and pasted or uploaded images. Images are uploaded when you save, not when you paste them.
3
Add placeholders
Type them inline in curly braces. They resolve per member when the dashboard renders.
4
Add an image URL (optional)
Welcome message Image URL takes the address of an image shown alongside the message. It must be a publicly reachable URL.
5
Assign user types (optional)
On a non-default message, add user types from the dropdown. See targeting below.
6
Save
The message is live immediately.
Placeholders
Write them exactly as shown, with no spaces inside the braces. The editor’s own hint lists only the two name placeholders, but
{organizationName} works as well.
Targeting by user type
The Create New Message button appears only when your organization uses user types. Without them there is a single message for everyone and nothing to target.- The Default message is tagged as such and labelled All other users. It is the fallback for anyone whose user type has no message of its own. It cannot be deleted.
- Any other message carries a list of user type tags. Assignment is exclusive: adding a user type to one message removes it from whichever message held it before, so a member is never matched by two.
- A non-default message with no user types assigned shows No user types assigned and reaches nobody.
Which message a member sees
Both switches sit at the top of the page. Show general and user type messages only appears once at least one user-type message exists.
Sticky and dismissible
Each saved message has a Sticky toggle, and the help text says it plainly: if activated, the message is always visible and cannot be closed by users. A non-sticky message has a close button. Once a member closes it, it stays hidden for them across sessions, on every message that is not sticky. That preference is per member and is not reset when you edit the text.What to put in it
Troubleshooting
No welcome message appears on the dashboard
No welcome message appears on the dashboard
Check Hide welcome message is off, that a message exists, and that its content is not empty (the card shows No content yet when it is). If you use user types, check the reader’s type is either assigned to a message or covered by the default.
Some members see it and others do not
Some members see it and others do not
Almost always a dismissal. Non-sticky messages stay closed once a member closes them. Turn on Sticky to make it unclosable.
Placeholders show as literal text
Placeholders show as literal text
Use single braces with no spaces:
{firstName}, not { firstName }. Names are case-sensitive. Only {firstName}, {lastName} and {organizationName} are substituted; anything else is left as typed.I assigned a user type and it disappeared from another message
I assigned a user type and it disappeared from another message
That is intentional. A user type belongs to exactly one message, so adding it here removes it there.
The image does not display
The image does not display
The image URL must be publicly reachable over HTTPS. Test it in a private browser window. Images pasted into the editor itself are uploaded when you save the message, so save before checking those.
I need a different message per local center
I need a different message per local center
Not supported: targeting is by user type only. Either use
{organizationName} and keep the message generic, or send local announcements through notifications or a newsletter segmented by local center.I want to delete the default message
I want to delete the default message
You cannot. Blank its content, or turn on Hide welcome message to suppress all messages at once.
Related
- Dashboard Organizer - the rest of the dashboard
- User Types - the types you target messages at
- Notifications - for time-sensitive messages
- Newsletter - for anything that has to reach inboxes
- Customization - everything under Settings → Customization