How to create an event
Events → Create Event, or from the Dashboard quick actions.Description and location
Write the event description (rich text with images and links). Add a physical address, an online meeting link, or both.
Registration settings
Decide whether people can register, set capacity, configure ticket types, and choose which fields to collect.
Visual customization
Upload a hero image, set accent colors, and configure the public page appearance.
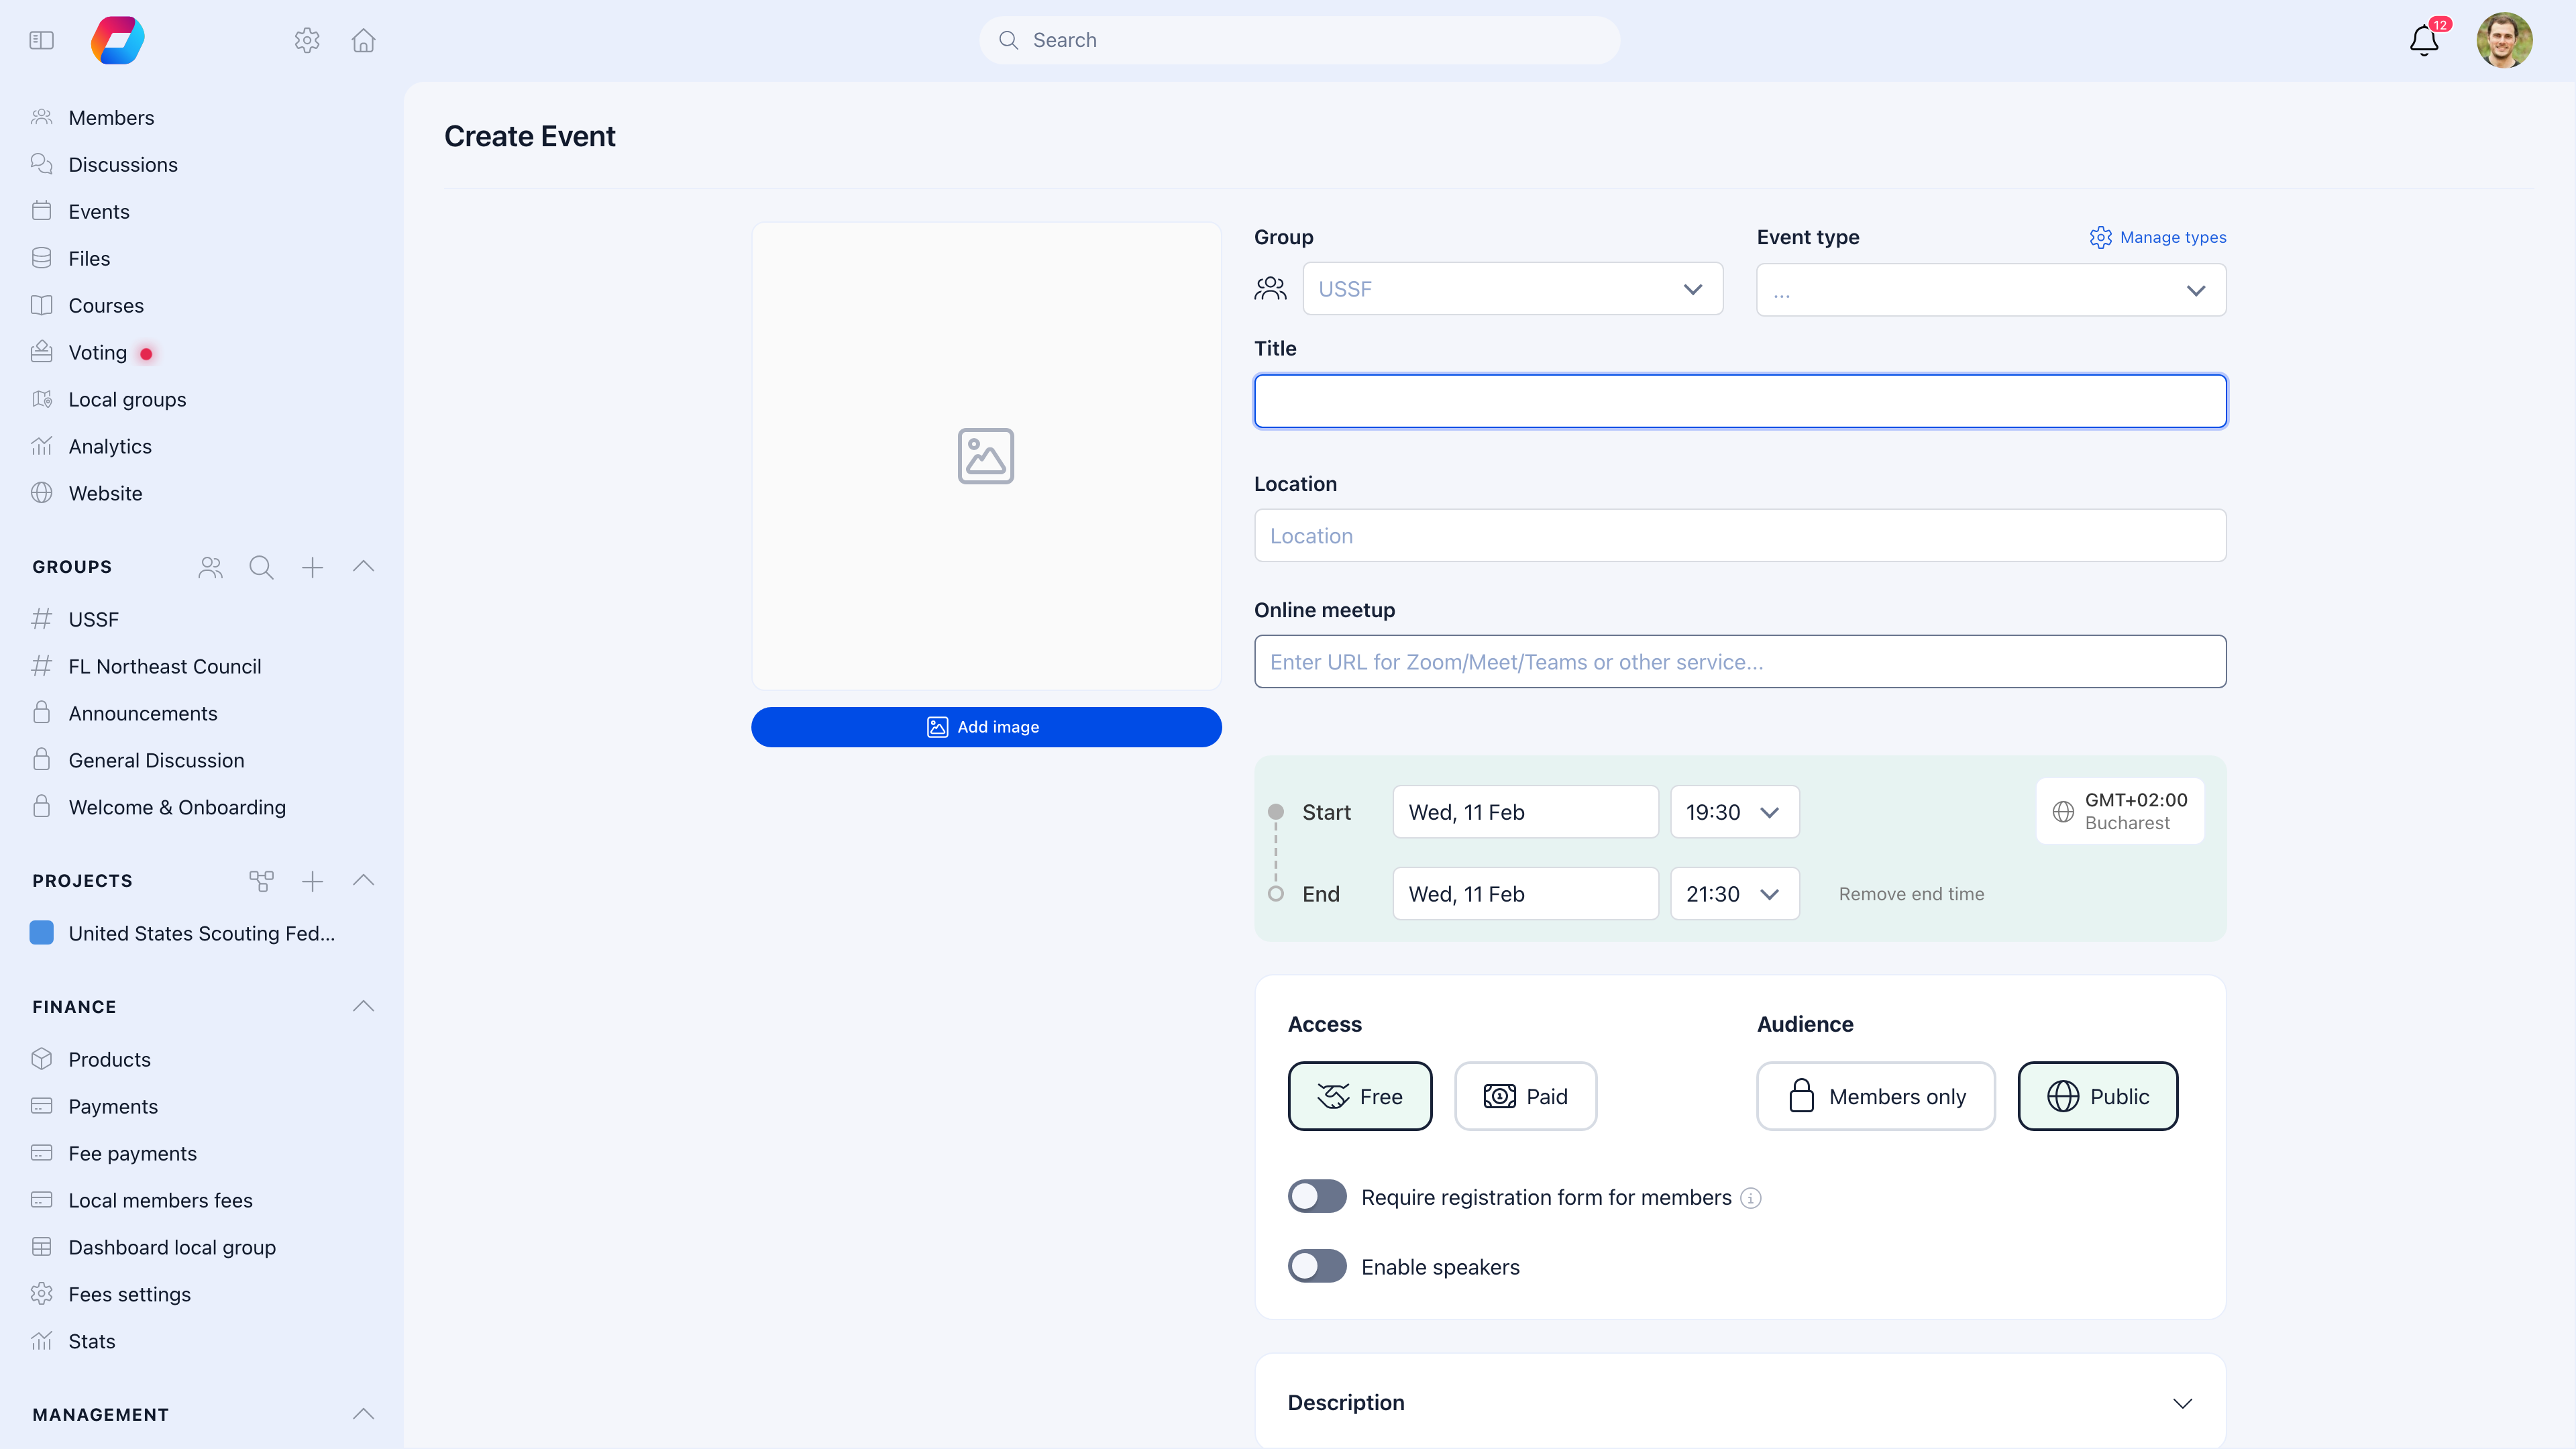
Event details
Required fields
| Field | What to enter |
|---|---|
| Title | Clear, descriptive name — “Annual Leadership Conference 2026” not “Event” |
| Start date/time | When the event begins, including time and timezone |
| End date/time | When the event ends |
| Group | Which group is hosting — this determines who sees it in their calendar. You must have posting permissions in the selected group. |
Optional but recommended
| Field | When to use |
|---|---|
| Description | Always — this is your event’s sales pitch. Rich text formatting, images, and links supported. |
| Location | Physical events — enter the venue name and address |
| Online link | Virtual events — paste your Zoom, Teams, or Meet link |
| Event type | Always, if you’ve set up Event Types — enables filtering and reporting |
| Hero image | Public events and any event you want to look polished. Recommended: 1200x675px, 16:9 ratio. |
| Timezone | Multi-timezone organizations — defaults to your profile timezone |
Visibility: public vs. private
This is a key decision:| Setting | What it means |
|---|---|
| Public | Anyone can view the event page — even without an Orgo account. The event gets a shareable URL. Use for open events you want to promote externally. |
| Private (default) | Only members of the hosting group can see the event. Use for internal meetings, member-only activities. |
Attendable vs. informational
| Setting | What it means |
|---|---|
| Attendable — ON | People can register or RSVP. Enables capacity, tickets, waitlist. |
| Attendable — OFF | The event is informational only — it shows on the calendar but nobody registers. Use for holidays, deadlines, or reminders. |
Registration settings
When “Attendable” is enabled, configure how registration works:Capacity
| Setting | What it does |
|---|---|
| Max attendees | Hard limit on registrations. Leave empty for unlimited. |
| Waitlist | When capacity is reached, new registrants join a waitlist instead of being rejected. |
Registration deadline
Set a date/time after which registration closes automatically. Useful for events with preparation requirements (name badges, catering headcount, etc.).Registration fields
Choose what information to collect when someone registers:| Field | Collect when |
|---|---|
| Name | Always (usually required) |
| Always (usually required) | |
| Phone | You need to contact attendees directly |
| Organisation | External attendees from various companies |
| Role/Title | Networking events, professional conferences |
| Town | Geographic spread matters |
| LinkedIn / X / Instagram | Networking events where social connections matter |
Ticketing
For paid events or events with multiple registration tiers, enable ticketing. This is a deep topic — see Ticketing for the full guide. Quick overview: you create ticket types (General Admission, Early Bird, VIP, Member, Student), set prices, and optionally limit quantities. Attendees pay via Stripe checkout and receive a QR code ticket.Event page customization
Every event has a page — for public events, this is what the world sees. Customize it to match your brand:| Setting | What it controls |
|---|---|
| Organization logo | Show/hide your org logo on the event page |
| Show title | Display event title prominently over the hero image |
| Hero image corners | None, Small, Medium, or Large border radius |
| Accent color | Affects buttons, links, and highlights throughout the page |
| Button color | Specific color for the register/purchase button |
| Light theme only | Force light theme even if the visitor uses dark mode |
| Hide newsletter checkbox | Remove the “subscribe to updates” checkbox from the form |
| Disable registration | Show event info but no registration form (info-only mode) |
SDG tagging
If your organization tracks impact against the UN Sustainable Development Goals (common for NGOs and civil society organizations), you can tag each event with the relevant SDGs (1-17). These tags feed into Annual Reports for impact reporting.Draft vs. published
Events start as drafts:| State | Visibility | Notifications |
|---|---|---|
| Draft | Only you and admins can see it | None sent |
| Published | Visible based on public/private setting | Members notified, event appears in calendars |
After publishing
Once live, you can:- Track registrations — see who signed up in the Participants tab
- Send invitations — invite specific members or entire groups
- Send updates — notify registered attendees of changes
- Manage waitlist — approve waitlisted people when spots open
- Cancel the event — registrants are notified automatically
Common scenarios
How do I create a recurring weekly meeting?
How do I create a recurring weekly meeting?
Orgo doesn’t have a built-in recurrence feature. Create each instance individually, or create the first one and duplicate it for future dates. For recurring meetings, some organizations create a Private Group with the meeting info pinned as a discussion post, and only create formal events for special sessions.
Can I edit an event after people have registered?
Can I edit an event after people have registered?
Yes. You can update the title, description, location, times, and hero image. Registered attendees won’t be automatically notified of changes — use the “Send update” feature to notify them explicitly.
How do I create a hybrid event (in-person + online)?
How do I create a hybrid event (in-person + online)?
Add both a physical location and an online meeting link. The event page shows both. You might create separate ticket types: “In-Person” and “Online” to track attendance mode.
I want to create an event on behalf of a local center
I want to create an event on behalf of a local center
You need posting permissions in that Local Center. Select the center as the hosting group when creating the event. Or have the local admin create it — they have the permissions by default.
Can non-members register for events?
Can non-members register for events?
Yes, if the event is public. Non-members register as guests — they provide their name, email, and any required fields. They receive a ticket/QR code by email. They don’t need an Orgo account.
Related
- Events Overview — Module setup and configuration
- Event Types — Categorize your events
- Ticketing — Paid tickets and pricing strategies
- Public Event Pages — Shareable branded event pages
- Attendance — Check-in and tracking