- You need to vet applicants (professional associations, selective clubs)
- You require documents or qualifications before granting membership
- You need a paper trail for who was accepted and why
- Regulatory requirements demand a formal application process
- Open communities where anyone can join
- Casual groups with no vetting requirements
- If you just need a simple approval gate, use Status After Register → Unapproved instead — it’s lighter weight
How to enable
Settings → Users & Profiles → Adhesion → toggle Active| Setting | What it does |
|---|---|
| Active | Turns on the adhesion module |
| Mandatory | When on, all new registrations must complete adhesion. Members can’t access the platform until approved. When off, adhesion is available but optional. |
| User type after approval | Automatically assign a User Type when an application is approved. Example: auto-assign “Full Member” to approved applicants. |
| Admin email | Email that receives notifications for new submissions. Use a shared HR inbox. |
| Change-to-draft reasons | Predefined reasons admins can select when returning an application. Enter each on a new line (e.g., “Incomplete information”, “Missing documents”, “Photo not acceptable”). |
The application workflow
Member submits application
After registering (or as part of registration if mandatory), the member fills out the adhesion form — which can include profile fields, custom fields, document uploads, and declarations.
Application goes to Pending
The admin email receives a notification. The application appears in the Adhesions admin queue.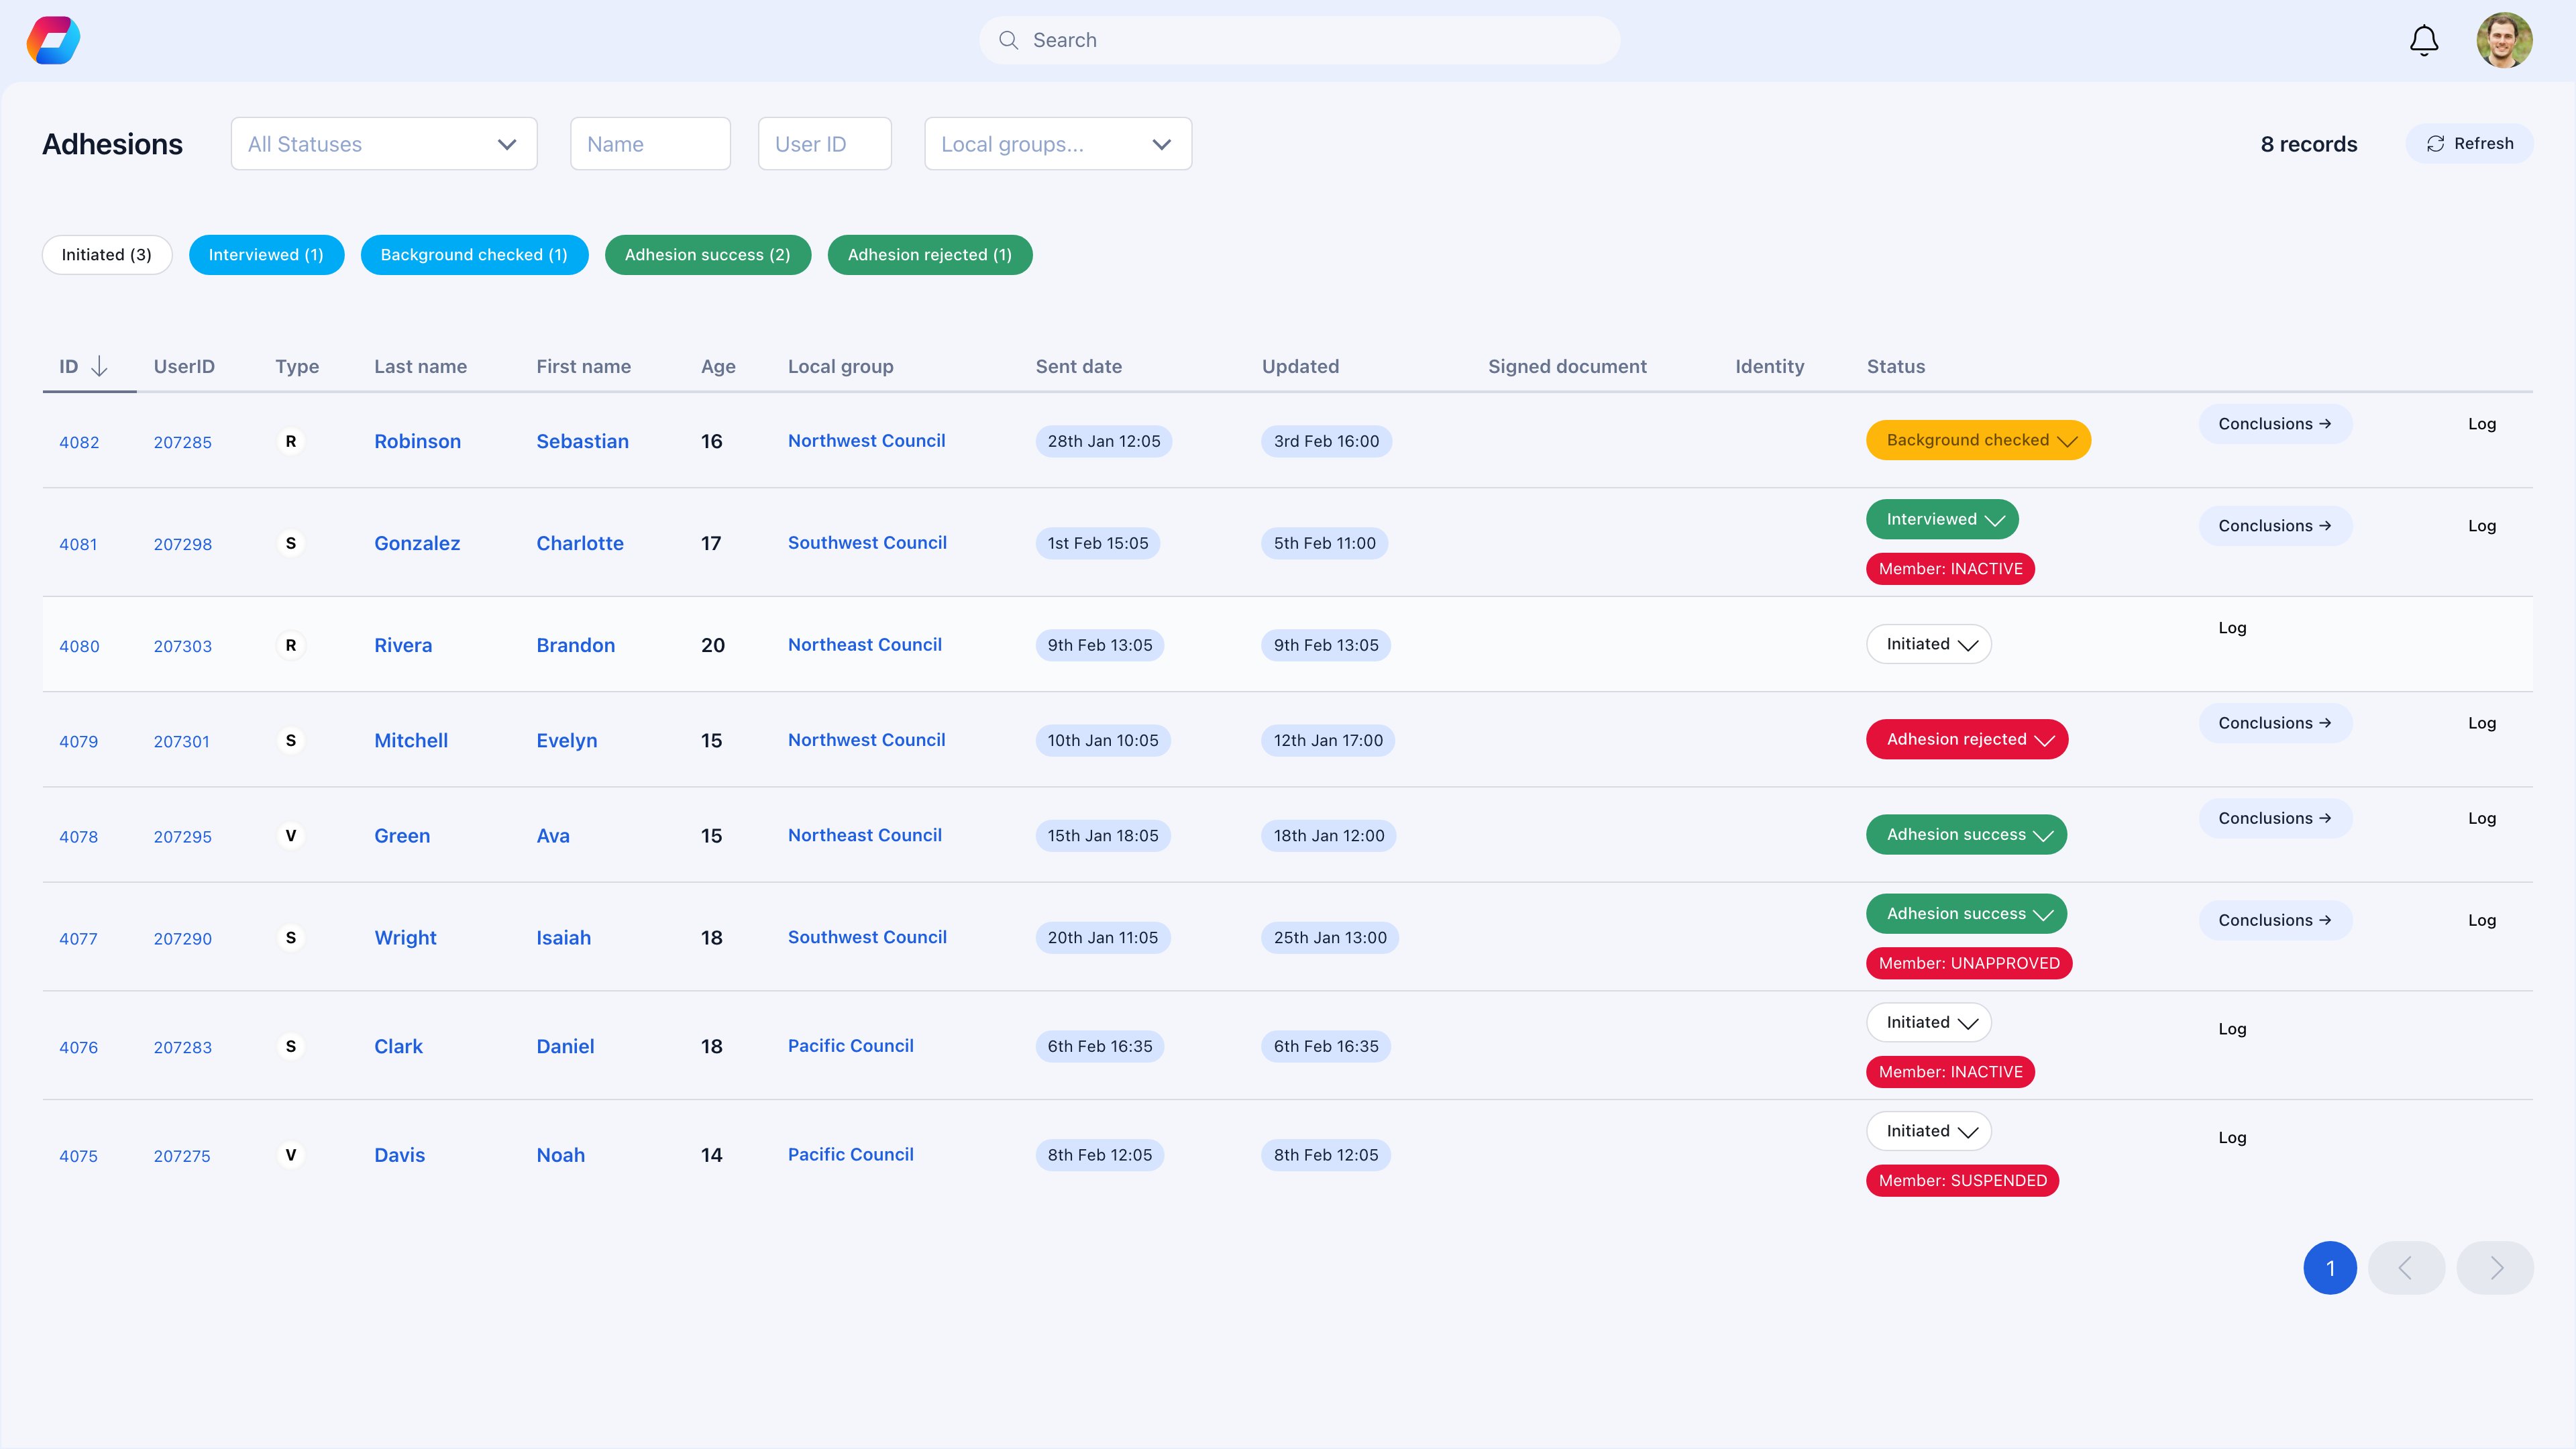
Admin reviews
Open the application to see all submitted information, uploaded documents, and history. Then choose an action:
- Approve — Member gains full access. User type is auto-assigned (if configured).
- Return to Draft — Select a reason (from your predefined list). The member is notified and can revise their application.
- Reject — Deny membership. The member is notified.
If returned to Draft
The member receives a notification with the reason. They update their application and resubmit. It goes back to Pending.
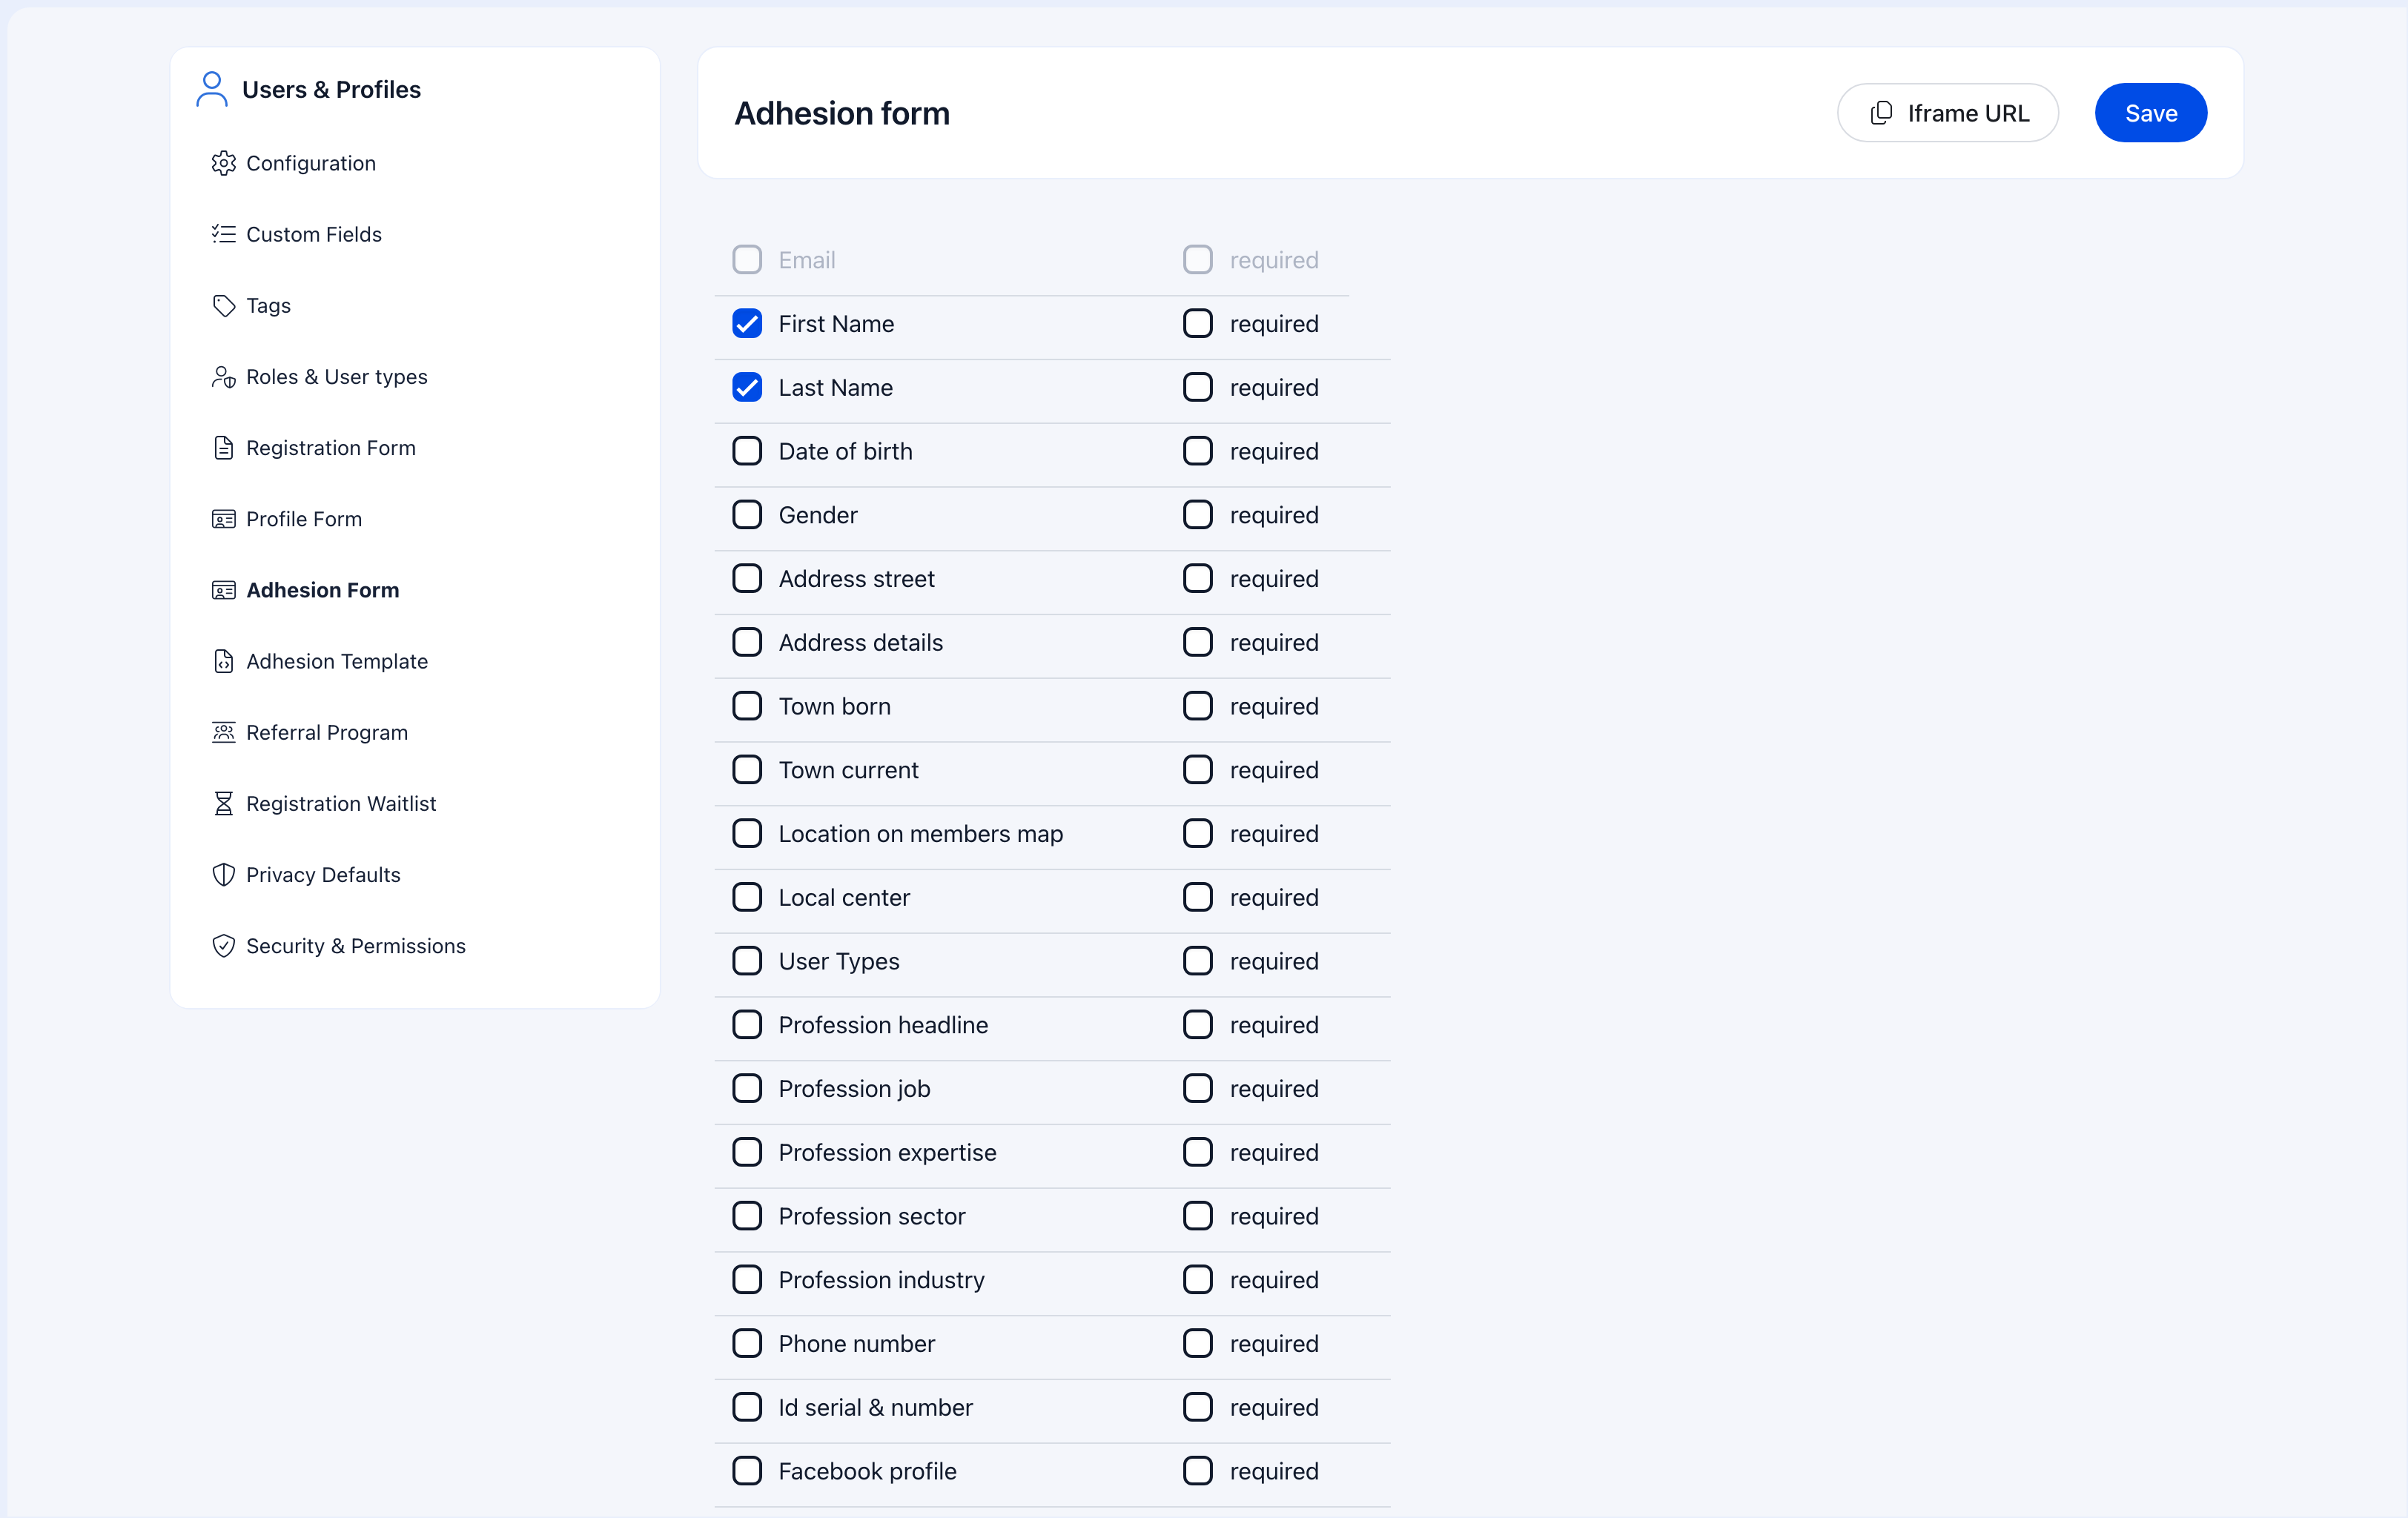
Building the adhesion form
Settings → Users & Profiles → Adhesion Form The form can include:- Standard profile fields — Name, address, phone, etc.
- Custom fields — Organization-specific data like license numbers or qualifications
- Document uploads — Profile photo, ID document, supporting documents
- Declarations — Terms acceptance, code of conduct, privacy policy consent
Managing applications
Navigate to Members → Adhesions in the sidebar to see the queue.Finding applications
| Method | How |
|---|---|
| By status | Filter by Pending, Draft, Approved, or Rejected — Pending is your work queue |
| By Local Center | See applications for a specific branch |
| By user type | Filter by what membership type they applied for |
| By date range | Find applications from a specific period |
| Search | Search by name or email to find a specific application |
Reviewing an application
When you open an application, you see:| Section | What to check |
|---|---|
| Personal information | Name, email, phone, address — verify completeness |
| Custom fields | Answers to your organization-specific questions |
| Documents | Uploaded ID (front/back), profile photo, supporting files |
| Local Center | Which center they selected (if applicable) |
| Payment | Fee payment status (if membership requires payment) |
| History | Every status change with timestamps and notes from previous reviews |
Taking action
Approve — Click Approve. The applicant becomes an active member and is notified. User type is auto-assigned (if configured). Return to Draft — Select a reason from your predefined list. The member is notified and can revise their application. When they resubmit, it returns to Pending. Reject — Deny membership with a reason. The member is notified. Bulk approve — Select multiple applications → Bulk Actions → Approve Selected. Useful during enrollment periods with many straightforward applications.The adhesion template (PDF generation)
You can generate a PDF from approved applications — useful for official records, member files, or physical signatures.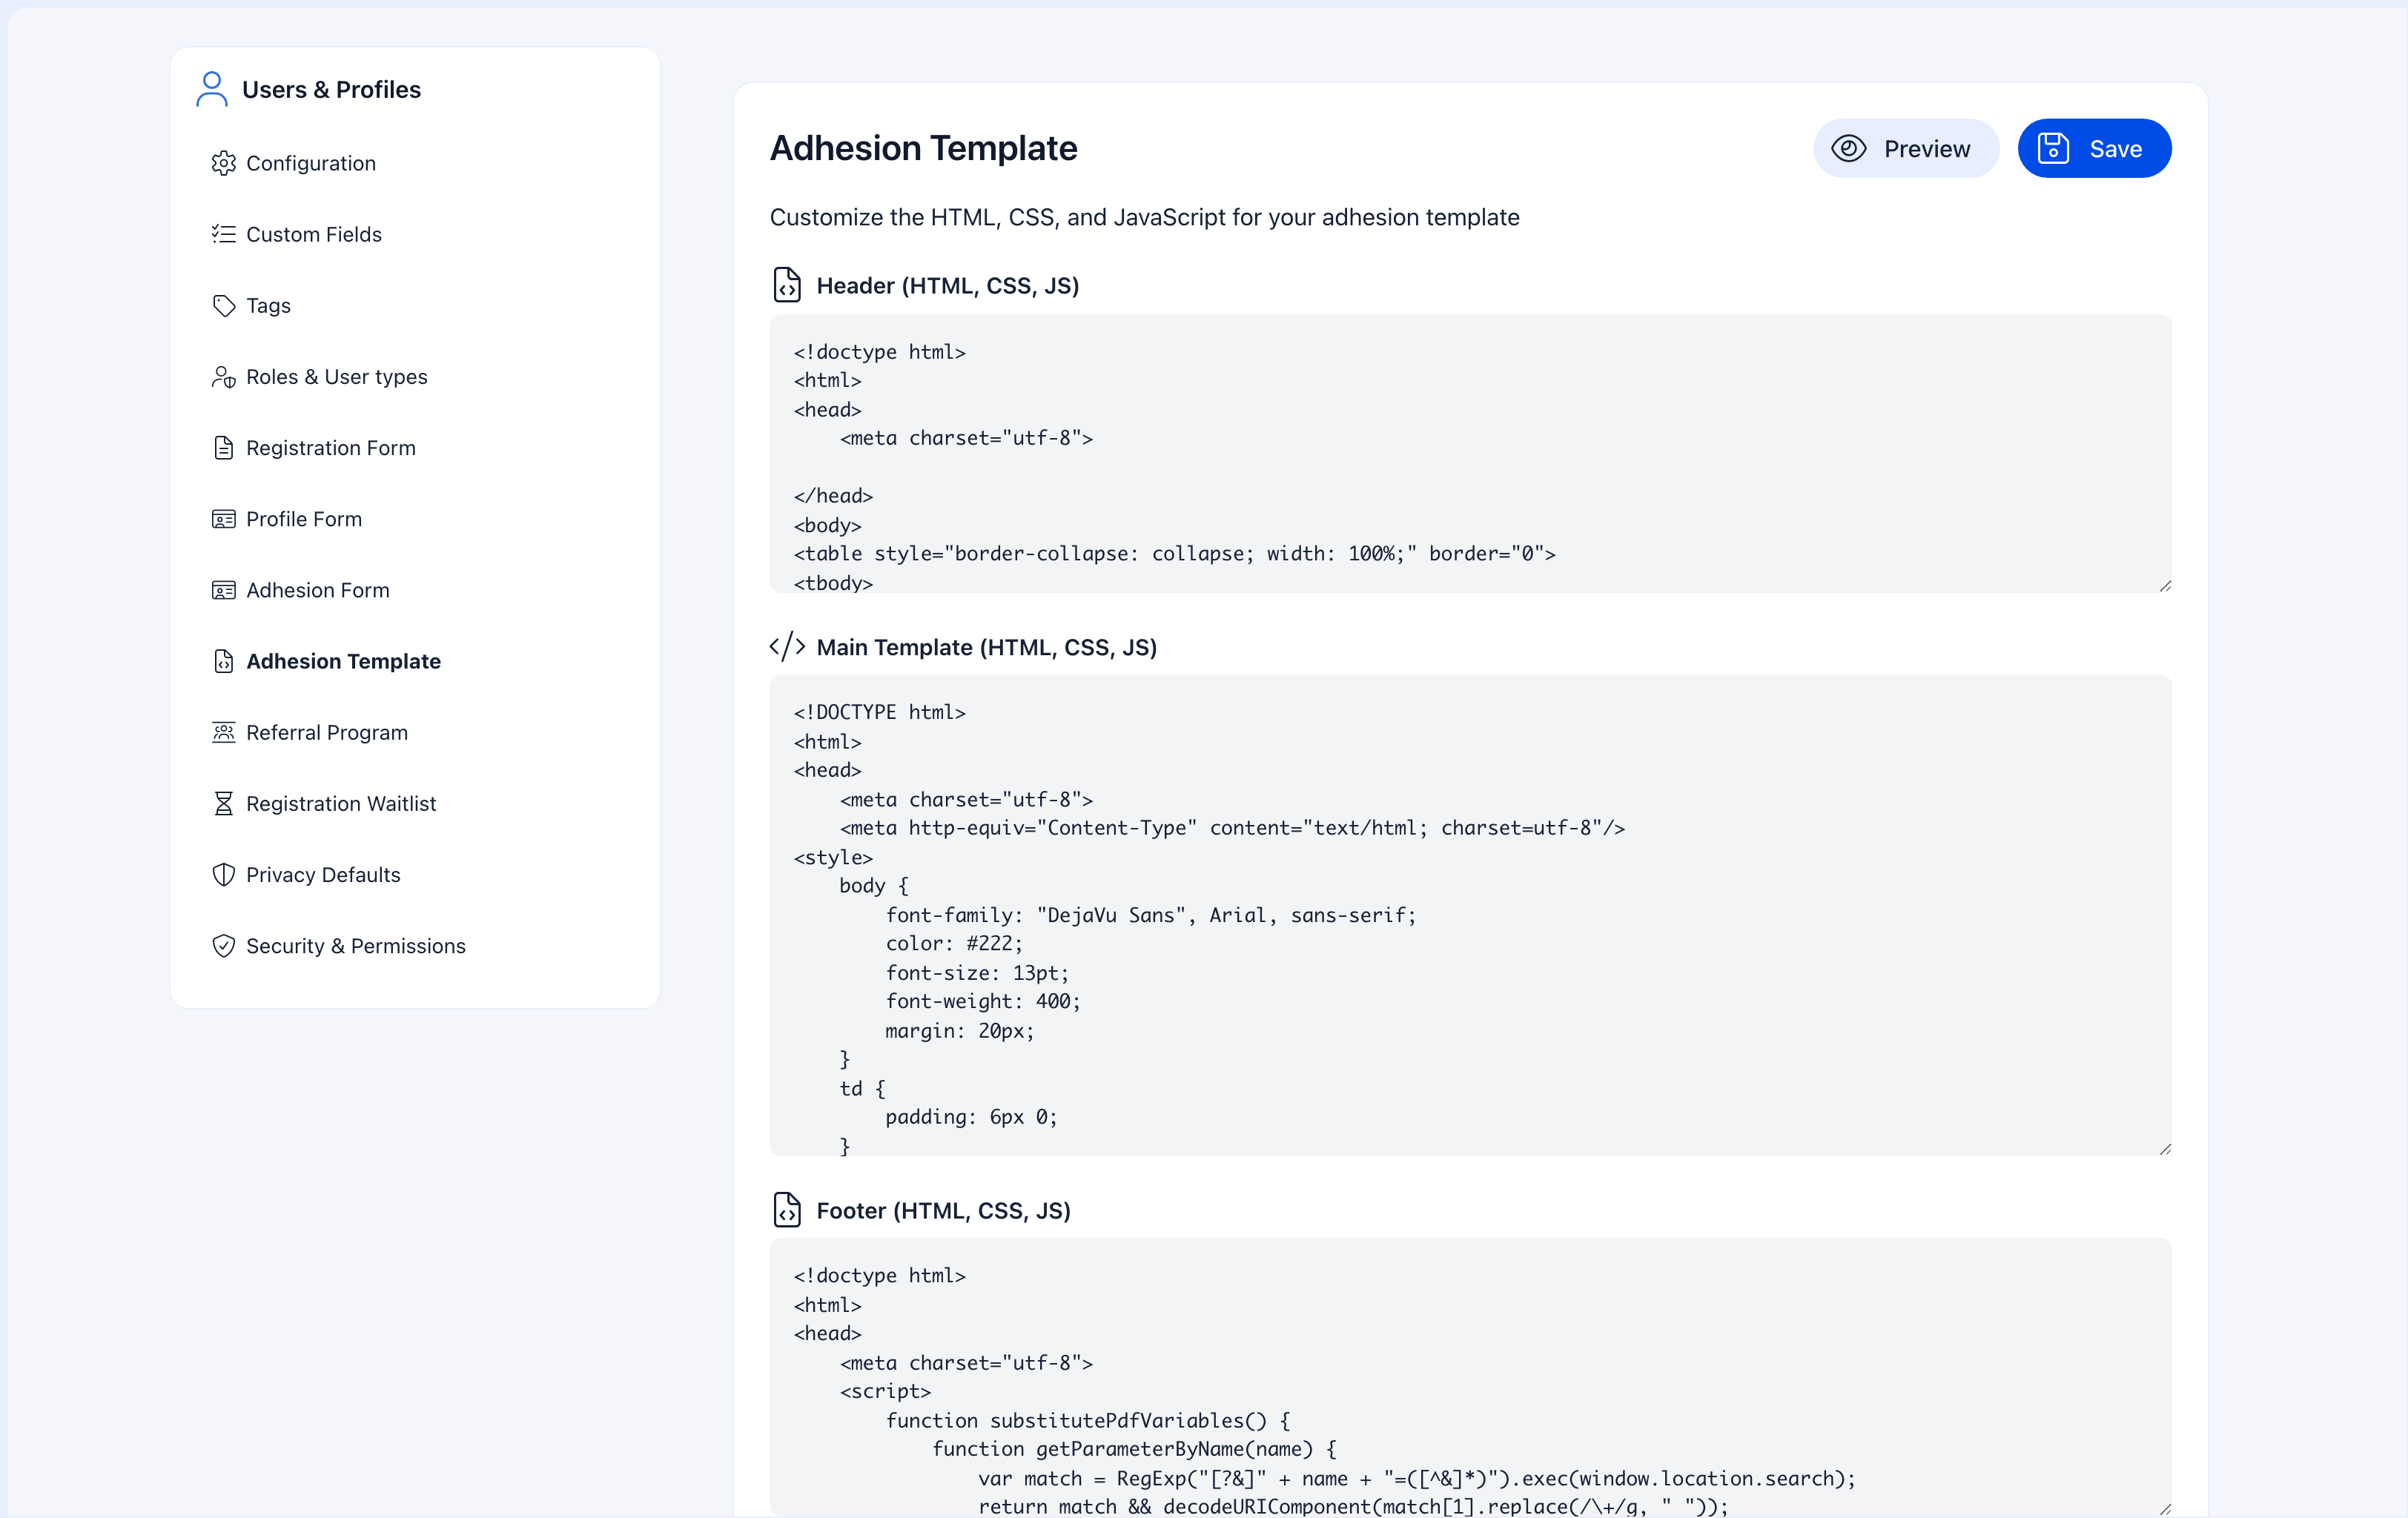
{{firstName}}, {{lastName}}, {{dateCreated}} to dynamically insert member data. The template supports organization branding (logo, colors) and signature fields.
Configure the template at Settings → Users & Profiles → Adhesion Template.
Interview tracking
For organizations that require interviews before final approval: Enable interview tracking to add a step between application submission and approval. The workflow becomes:- Application submitted
- Interview scheduled (admin sets date/time)
- Interview completed (admin records notes)
- Final approval or rejection
Adhesion vs other joining methods
| Method | Process | Best for |
|---|---|---|
| Open registration | Register → immediately Active | Communities, hobby groups |
| Registration + Unapproved status | Register → admin clicks Approve | Simple gate, no forms needed |
| Adhesion | Register → fill application → admin reviews → approve/reject/revise | Formal membership, documentation required |
| Waitlist + Adhesion | Join waitlist → invited → fill application → admin reviews | Limited capacity + formal membership |
Combining with other features
| Feature | How it works with Adhesion |
|---|---|
| Identity Validation | Require ID documents as part of the application. OCR pre-fills form data from uploaded documents. |
| User Types | Auto-assign a type when application is approved. Different types can have different adhesion forms. |
| Custom Fields | Add organization-specific fields to the application form. |
| Waitlist | Members wait in queue first, then go through adhesion when invited. |
| User Statuses | Approved applicants become Active. Pending applicants may have limited access. |
Common scenarios
An applicant submitted incomplete information
An applicant submitted incomplete information
Use Return to Draft with a clear reason (e.g., “Missing proof of qualification”). The member is notified and can update their application. When they resubmit, it comes back to your queue as Pending.
I have a backlog of applications to process
I have a backlog of applications to process
Check if your admin email is being monitored. If you’re the only reviewer, consider giving another admin HR Tenant permissions so they can help. Process applications in order — first come, first served is fairest.
An application was rejected but the person wants to reapply
An application was rejected but the person wants to reapply
They’ll need to submit a new application. The old rejection stays in the system as a record. If there were specific issues, communicate what needs to change before reapplying.
I want adhesion only for certain member types, not all registrations
I want adhesion only for certain member types, not all registrations
Set Adhesion to Active but not Mandatory. Then use the registration form to route applicants: include the User Type field so members self-select, and only require adhesion for types that need vetting. Members who select types that don’t require adhesion go through normal registration.
Related
- Registration Form — What members fill out before or alongside adhesion
- Waitlist — Queue before adhesion for capacity-limited organizations
- Identity Validation — Document verification as part of the application
- User Types — Auto-assign on approval