

Who this is for
You are in the right place if most of these are true:- Your members are organized geographically (district, group, section) rather than as one flat list.
- A large share of your members are children, enrolled by a parent who also needs an account.
- Adults are volunteers holding named positions with terms, not employees.
- You award progression: badges, levels, promises, training courses.
- You run residential events where you must know who is allergic to what, and who signed the consent form.
- Your organization has its own words for all of the above, and “member of local center” is not one of them.
Before you start
Settle these before you open a single settings screen. Each one is a decision the setup will ask you for, and each is more expensive to change once members exist. Tick them off on paper first.- Structure named. You can name every layer, from the national body down to the smallest team, and you know which layer owns the member list.
- One word per concept. You have written down what you call a district, a group, a section, a patrol and an age level. One word each, no synonyms.
- Age sections listed with their ranges. For example Beavers 6 to 8, Cubs 8 to 10.5, Scouts 10.5 to 14. You know which section a member sits in and which age level they count as for pricing.
- Volunteers listed with their posts. Each adult, the position they hold, the layer that position belongs to, and the date they started.
- Safeguarding policy on the desk. You know what your policy makes you record for every adult, and which of those records expires and after how long.
- Youth data audience decided. You know who is allowed to read a child’s medical, dietary and contact details: everyone who can open an event, chapter administrators only, or a named safeguarding lead.
- Parent consent approach chosen. Either a signed document you must be able to produce on demand, or a tick you only need to have collected. The two lead to different features.
- Subs schedule decided. What each age level pays, whether the group charges its own dues on top of the national ones, when the fee year runs, and in which currency.
- Data ready. You have dates of birth for your members, and you know which languages your organization runs in.
Speaking your language
Start here, before you configure anything else. Orgo lets you replace the wording it ships with your own, which is how “full member” becomes “Promise”, “user type” becomes “Age level” and “chapters” becomes “Local groups”. The feature is called Texts, at Settings → Customization → Texts, and it needsADMIN_TENANT.
The page is a two-column table: System Expression on the left is the phrase Orgo ships, Custom Expression on the right is the phrase you want in its place, with one Custom Expression column per language you have enabled. You do not type technical keys. Add Text Replacement opens a search over the whole interface catalogue, and you tick the results you want to override.
A worked mapping
These are the phrases a scouting association usually changes first. The middle column matters: one concept is almost never one row, because the catalogue stores singular, plural and lowercase forms separately, and stores longer sentences whole.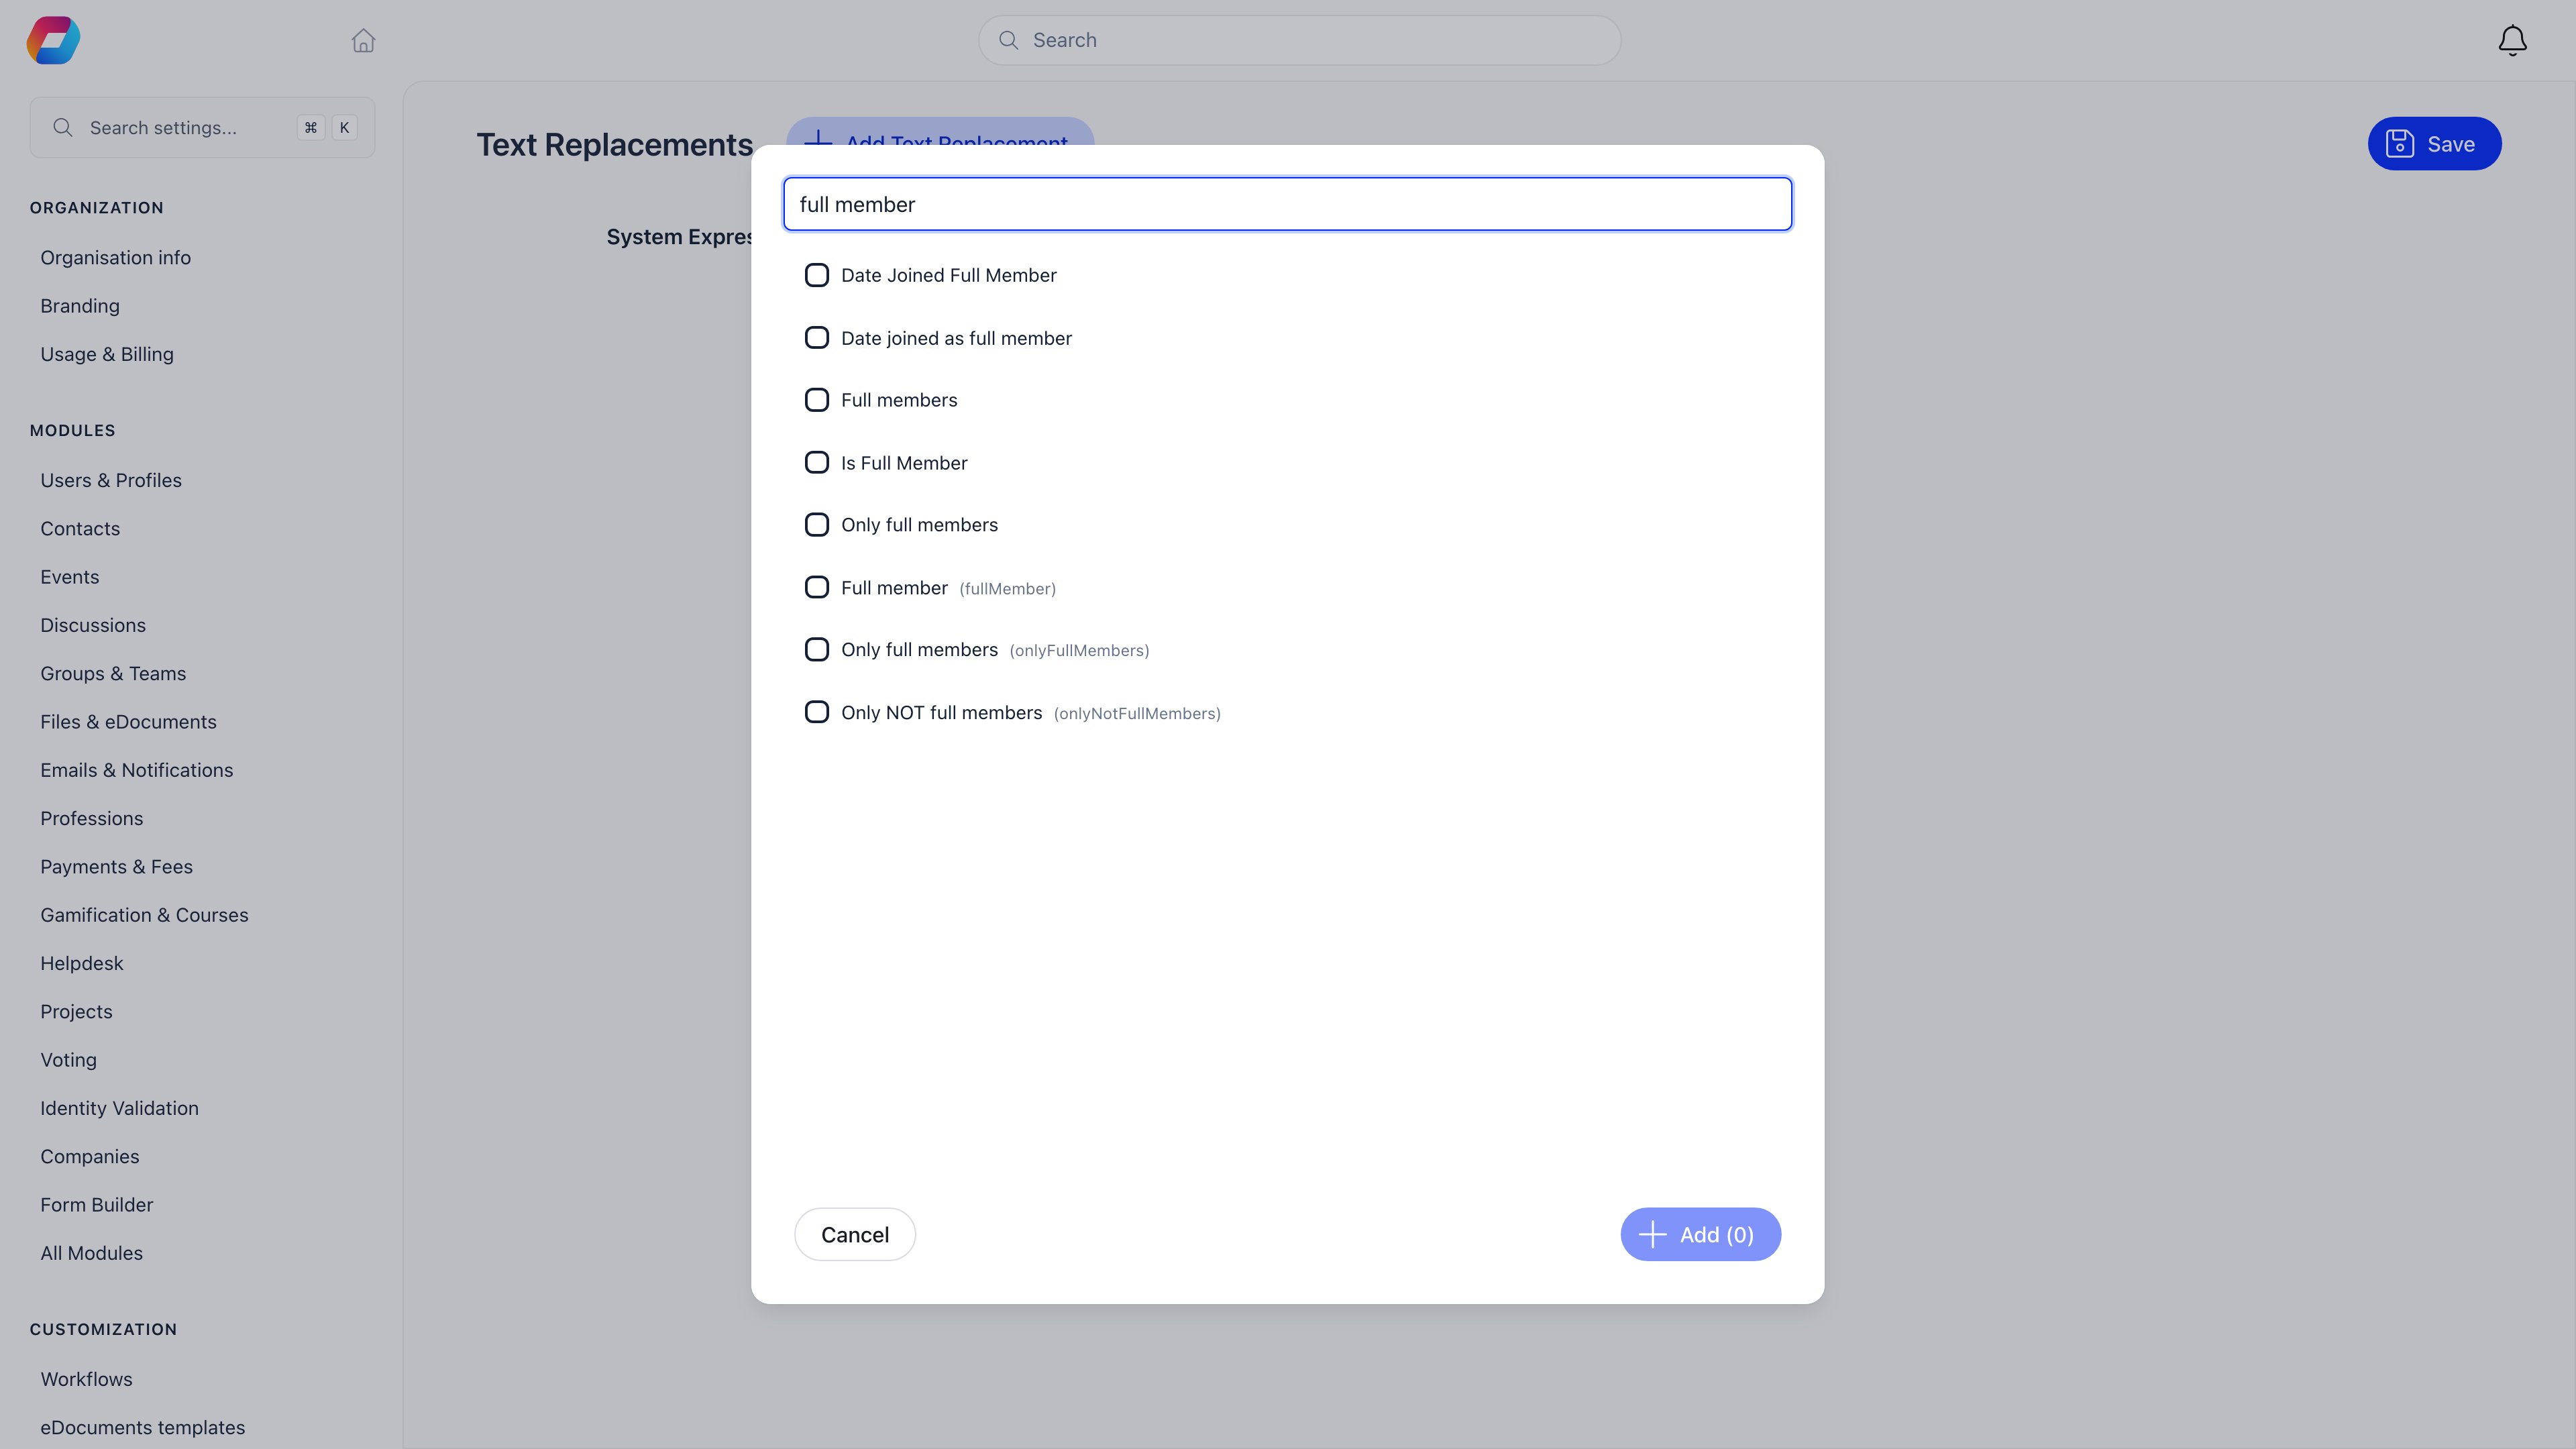
The real limit
Texts is applied in the browser only. The replacements are stored on your organization and merged into the interface translation catalogue when the app loads (client/src/utils/i18n.js). Nothing on the server reads them.
What to turn on
Every module and setting below is at Settings → Modules, and every one of them requiresADMIN_TENANT to change. Most are off until you switch them on. The two marked already on ship enabled, so your job there is to confirm rather than to enable.
Check the chapter layer first
Settings → Modules → Groups & Teams → Local Centers carries your group and district structure, and it is the one screen worth opening before all the others, because people go looking for a switch that is already flipped.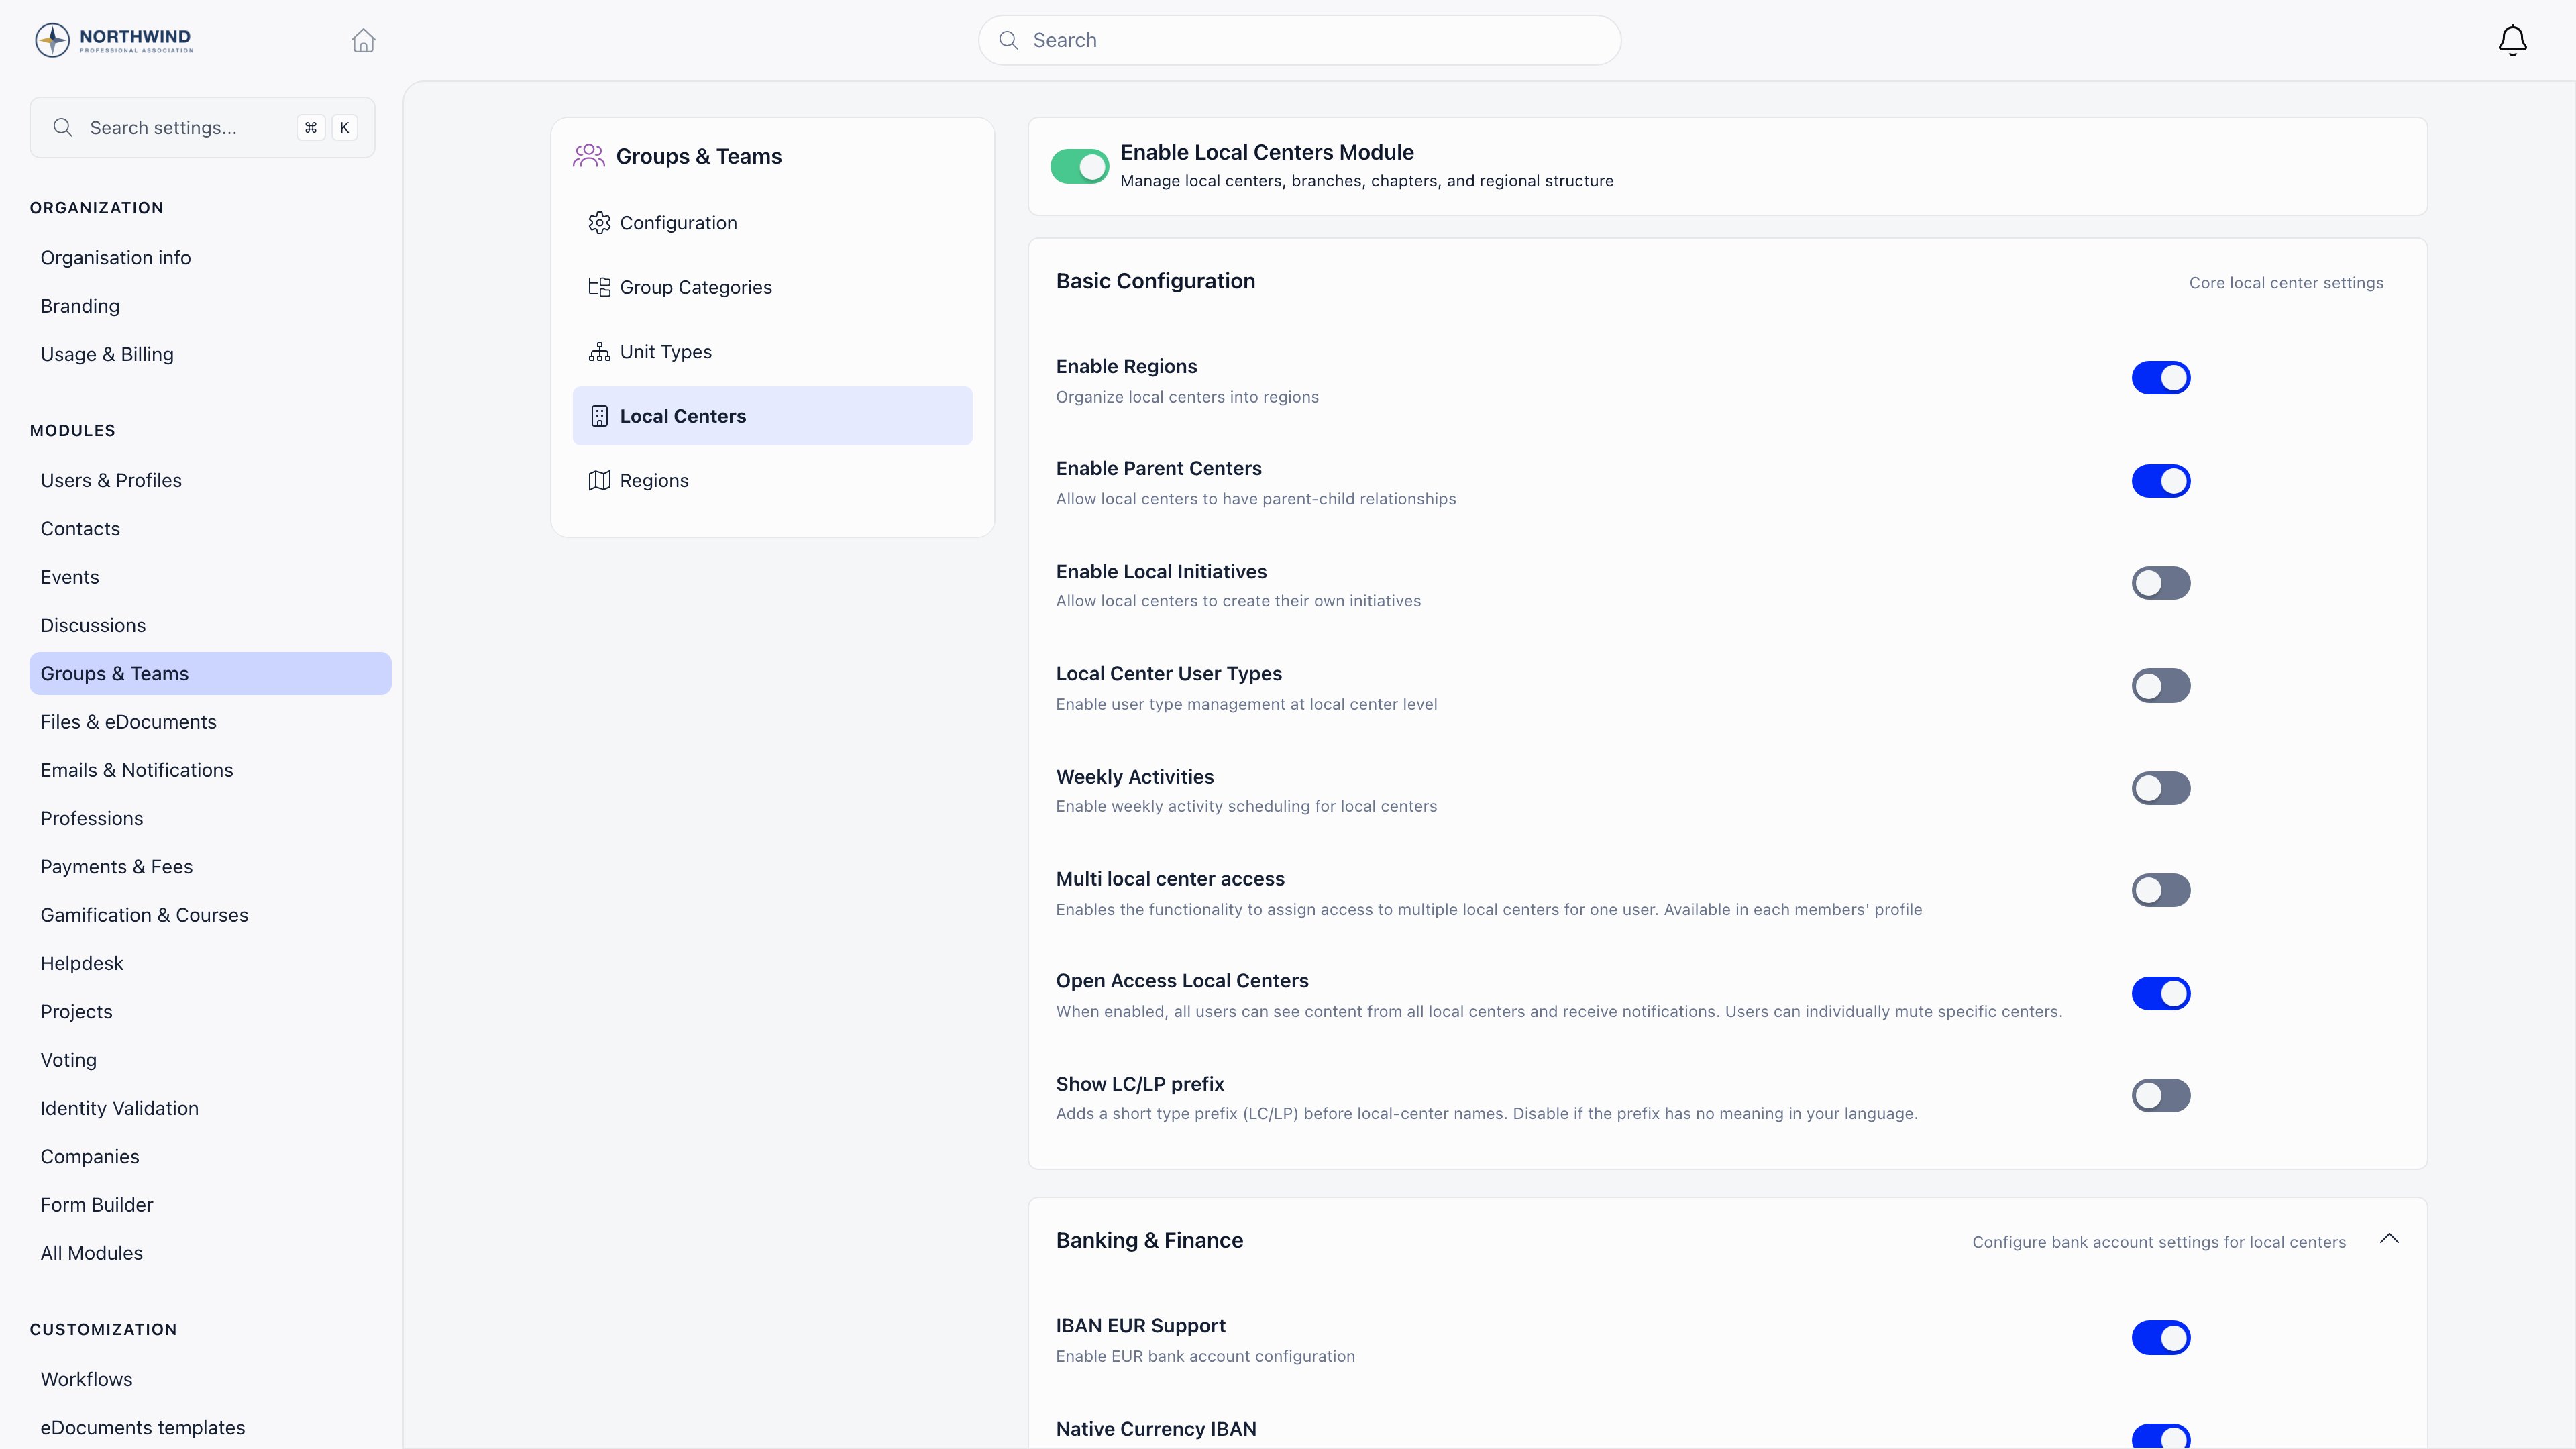
- Enable Parent Centers. Turn it on if you want any layer above your groups. It is not limited to one: county holding district holding group is a single chapter tree, built by flagging each layer that holds others with It’s a parent chapter.
- Enable Regions. Turn it on only if you want a flat reporting label. It grants no permissions, and it adds a Regions entry to the module menu on the left.
- Open Access Local Centers. Turn it on only if every member should see content from every group and be notified about it.
Setup order
The order matters. Several of these screens are hidden until an earlier one is on, and a few decisions are hard to reverse once members exist. Each step says what you do, where in the interface it happens, and how you can tell it worked, so you can follow along with Orgo open beside you.Turn on the modules
Relabel the vocabulary
Define your unit types
Create user types for your age levels
/join/<slug> for that age level, and it is also the way around the volunteer and parent picker limit described in Adult volunteers.![Role editor with Level set to User type, Title and Plural title filled in, the Not eligible for fee and Parent switches below them, and a URL Slug field whose hint reads Used for the registration URL /join/[slug]](https://mintcdn.com/orgo-dc7abe63/o3AjqCN517NINQ7V/images/platform/users/user-type-edit.png?fit=max&auto=format&n=o3AjqCN517NINQ7V&q=85&s=f0e8c891d625a165839fe46a8101a35f)
/join/<slug> opens a joining page rather than a not-found.Create roles for leader positions
Create the chapters
Create the units inside each chapter
ADMIN_LOCAL gets. Create your sections first, then the patrols inside them, so each patrol has a section to attach to.Done when: the chapter’s org structure shows every section, each patrol nested under its section, and no unit sitting at the top level by accident.Add the custom fields you need before anyone registers
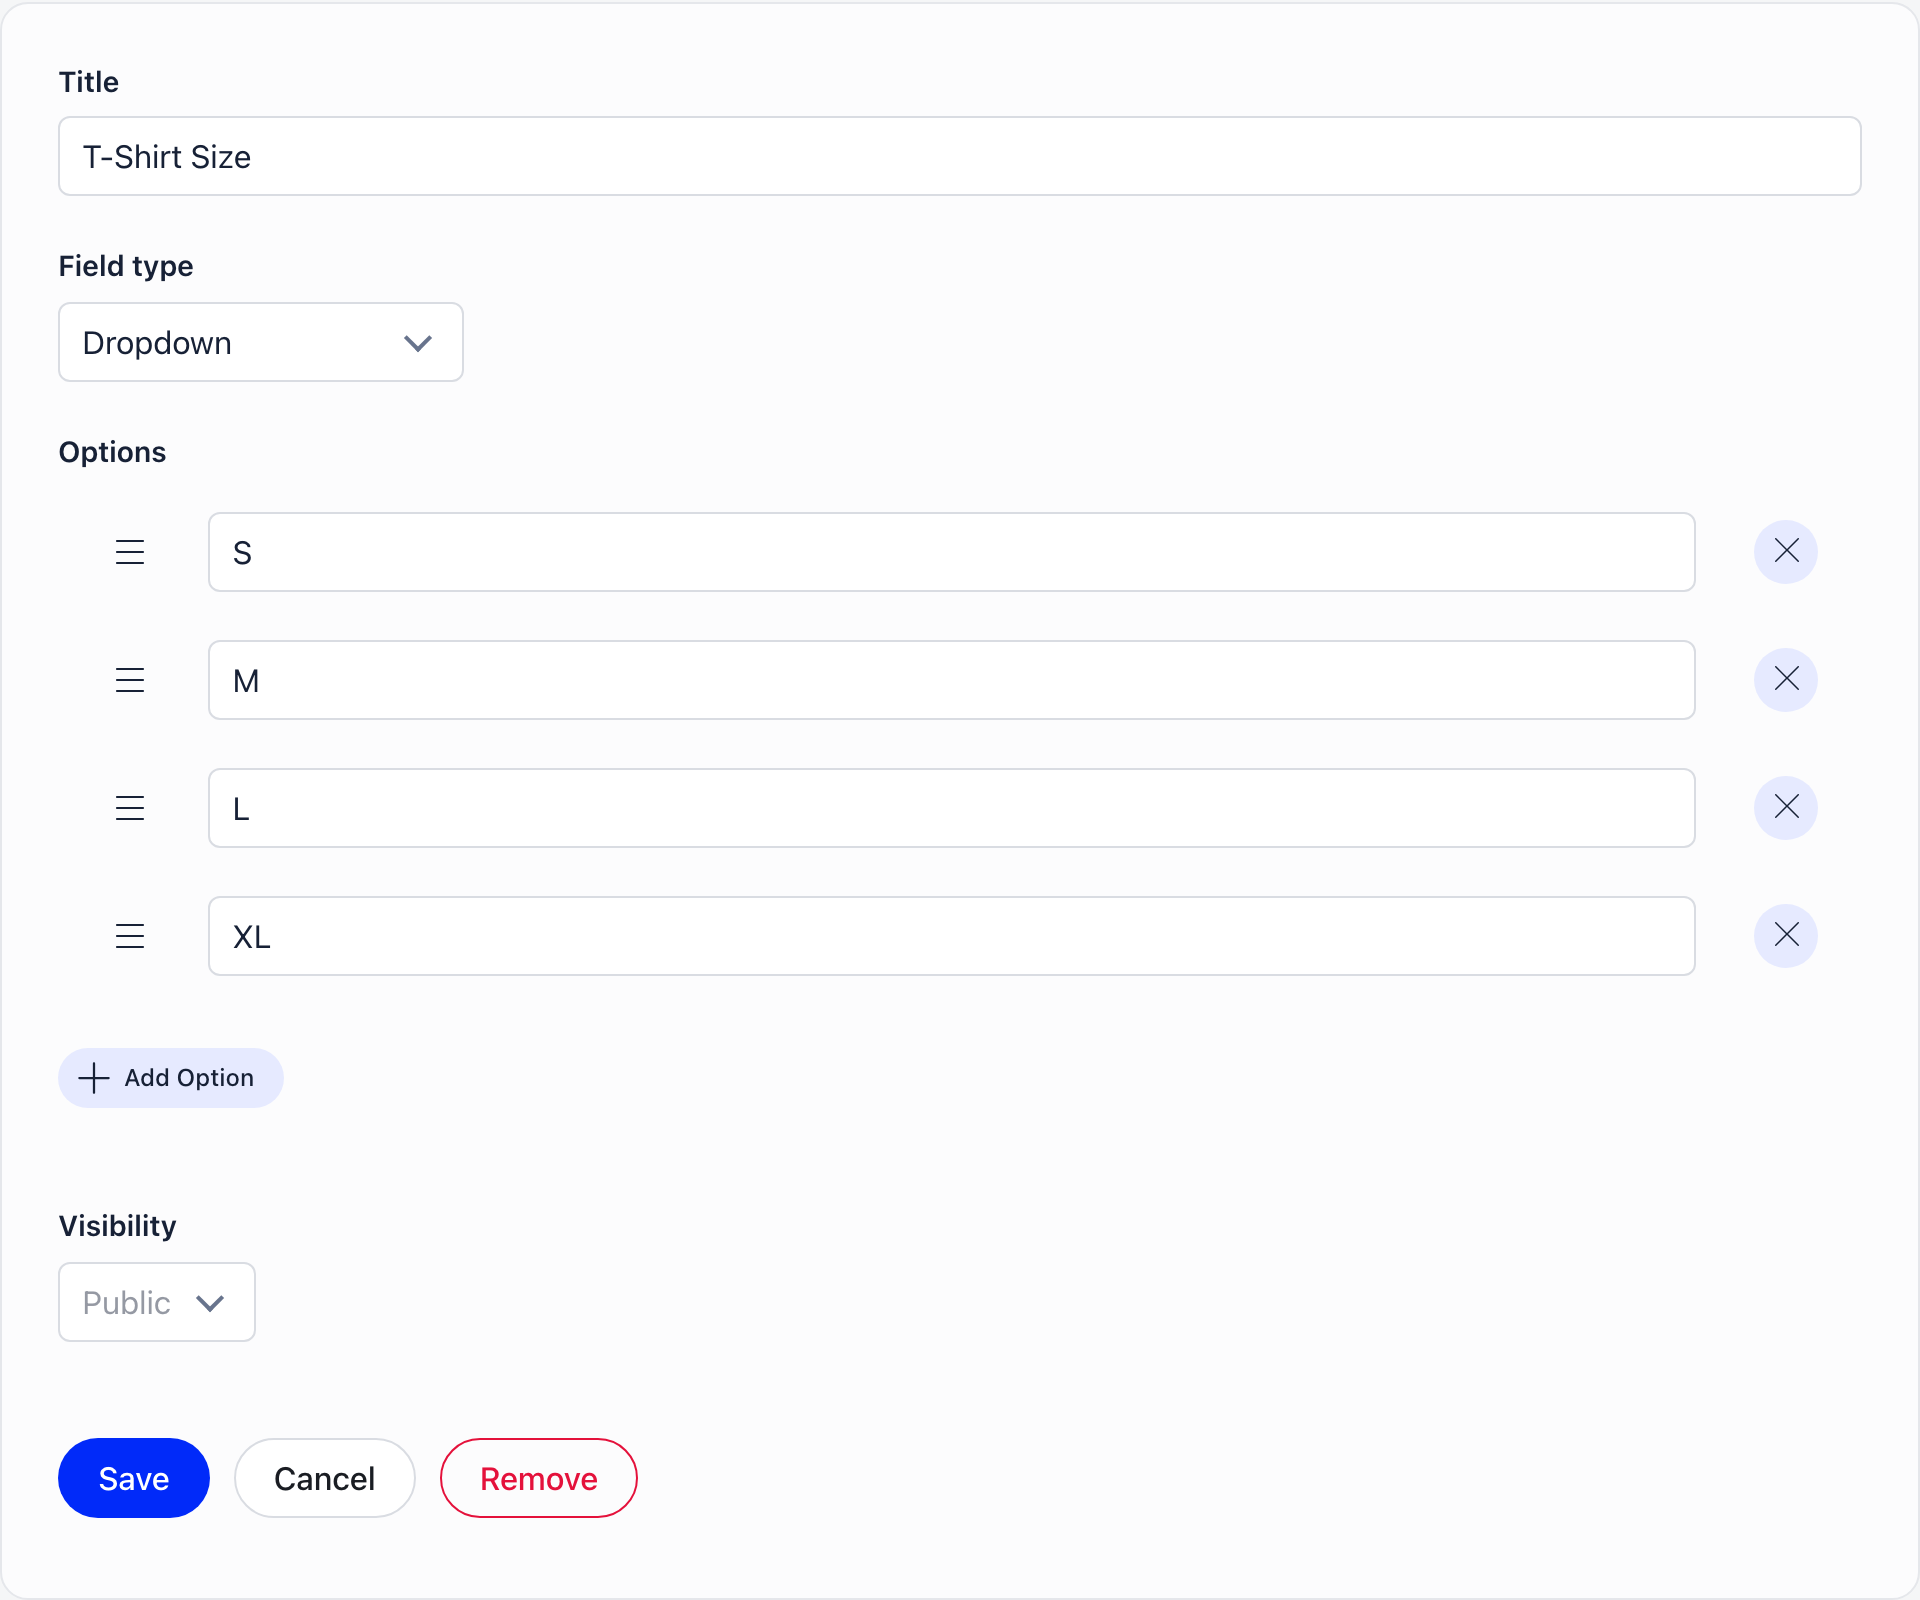
Build the registration form, then the fee, then the documents
Import your existing members
Structuring your association
Four separate mechanisms, and picking the wrong one is the most expensive mistake on this page because moving people afterwards is manual work.- Every member has exactly one chapter. Multi local center access grants named extra chapters to a member from their profile, but that is an access grant, not a second home group. Moving someone for good is a transfer request.
- A member can hold roles in several units at once, so a leader who runs the Cub section and sits on the group committee is two role assignments, not a choice.
- The unit member Admin flag is not cosmetic. It delegates scoped fee access and unit event attendance, so Orgo restricts it to people who already hold
HR_LOCAL,FINANCIAL_LOCALorADMIN_TENANTover the chapter. Unit admins cannot appoint each other. ADMIN_PARENT_LOCALreach is computed from the holder’s own primary chapter, not from a branch you pick. Give it to someone whose chapter sits under North District and they administer North District and everything beneath it, however deep, and there is no control that points it somewhere else. Give it to a district commissioner whose own chapter is North District and it stays inside North District, because a chapter flagged It’s a parent chapter anchors to itself and the grant never climbs to the county above.- Reshaping the tree is an organization-level job. Changing a chapter’s parent, or its It’s a parent chapter flag, requires
HR_TENANT. District and group administrators see those two fields greyed out and can edit everything else on the chapter form.
Youth members and parents
Turn on Enable Family Members and, if you want to hold details for relatives who never sign in, Non-Member Family Profiles. Both are at Settings → Modules → Users & Profiles → Configuration → Family & Relationships.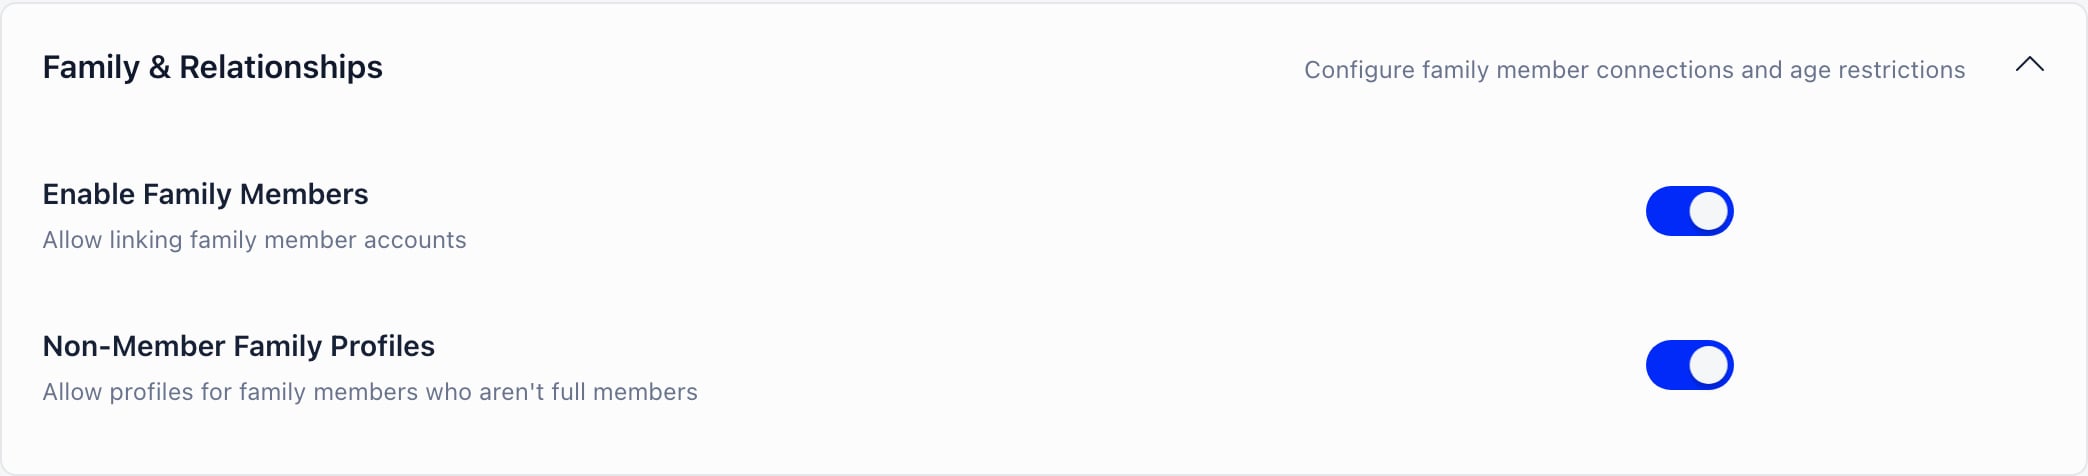
HR_LOCAL over the member’s chapter sees and manages it from the same tab.
Registering a child
The normal path is: the parent registers themselves, opens their Family tab, and uses Add in the Children section to register the child. That single action:- creates an active account for the child, marked as a child account;
- records a parental consent date and method against both the account and the family membership;
- creates the parent’s family if they do not have one and makes them its owner;
- treats the email as already confirmed, because the parent supplied it.
HR_LOCAL, on purpose: otherwise anyone could attach themselves to anyone.
What the age settings actually do
There are two age values on the organization, and neither behaves the way the names suggest.Consent
Parental consent is recorded when a parent registers a child, as a date and a method, and it is stored on both the account and the family membership. It is not shown on any screen and there is no consent report. If you need to evidence consent, or you need consent for something specific like photography or overnight stays, use an e-document template instead: that produces a signed, dated PDF you can show someone.The birthday field is load-bearing
Add Birthday to your registration form and mark it required. Several features silently do nothing without it:- age-conditioned fee prices skip the age check entirely for a member with no date of birth, and the member falls through to whatever price matches next;
- a member with no date of birth never matches an age-based role group;
- the notifications about children reaching an age never fire.
Fees and families
Family membership does not change what anyone pays. Fees are resolved per member, there is no family tier and no sibling discount, and linking a child to a parent does not transfer or cover the child’s fee. What a parent listed as managing a member can do is pay for them. For one payer covering several people by design, use Companies instead. Detail: Family Members, Waitlist.Adult volunteers
Positions, not people
Permissions belong on roles, never on user types. A user type cannot carry a permission at all: the permissions section disappears from the editor the moment you set the level to User type. So “Cub Leader” as a category is a user type, and “Cub Leader” as a post with access to the section’s members is a role. If you need both, create both. Both live in the same list at Settings → Modules → Users & Profiles → Roles & User types, and the Level column is what tells them apart: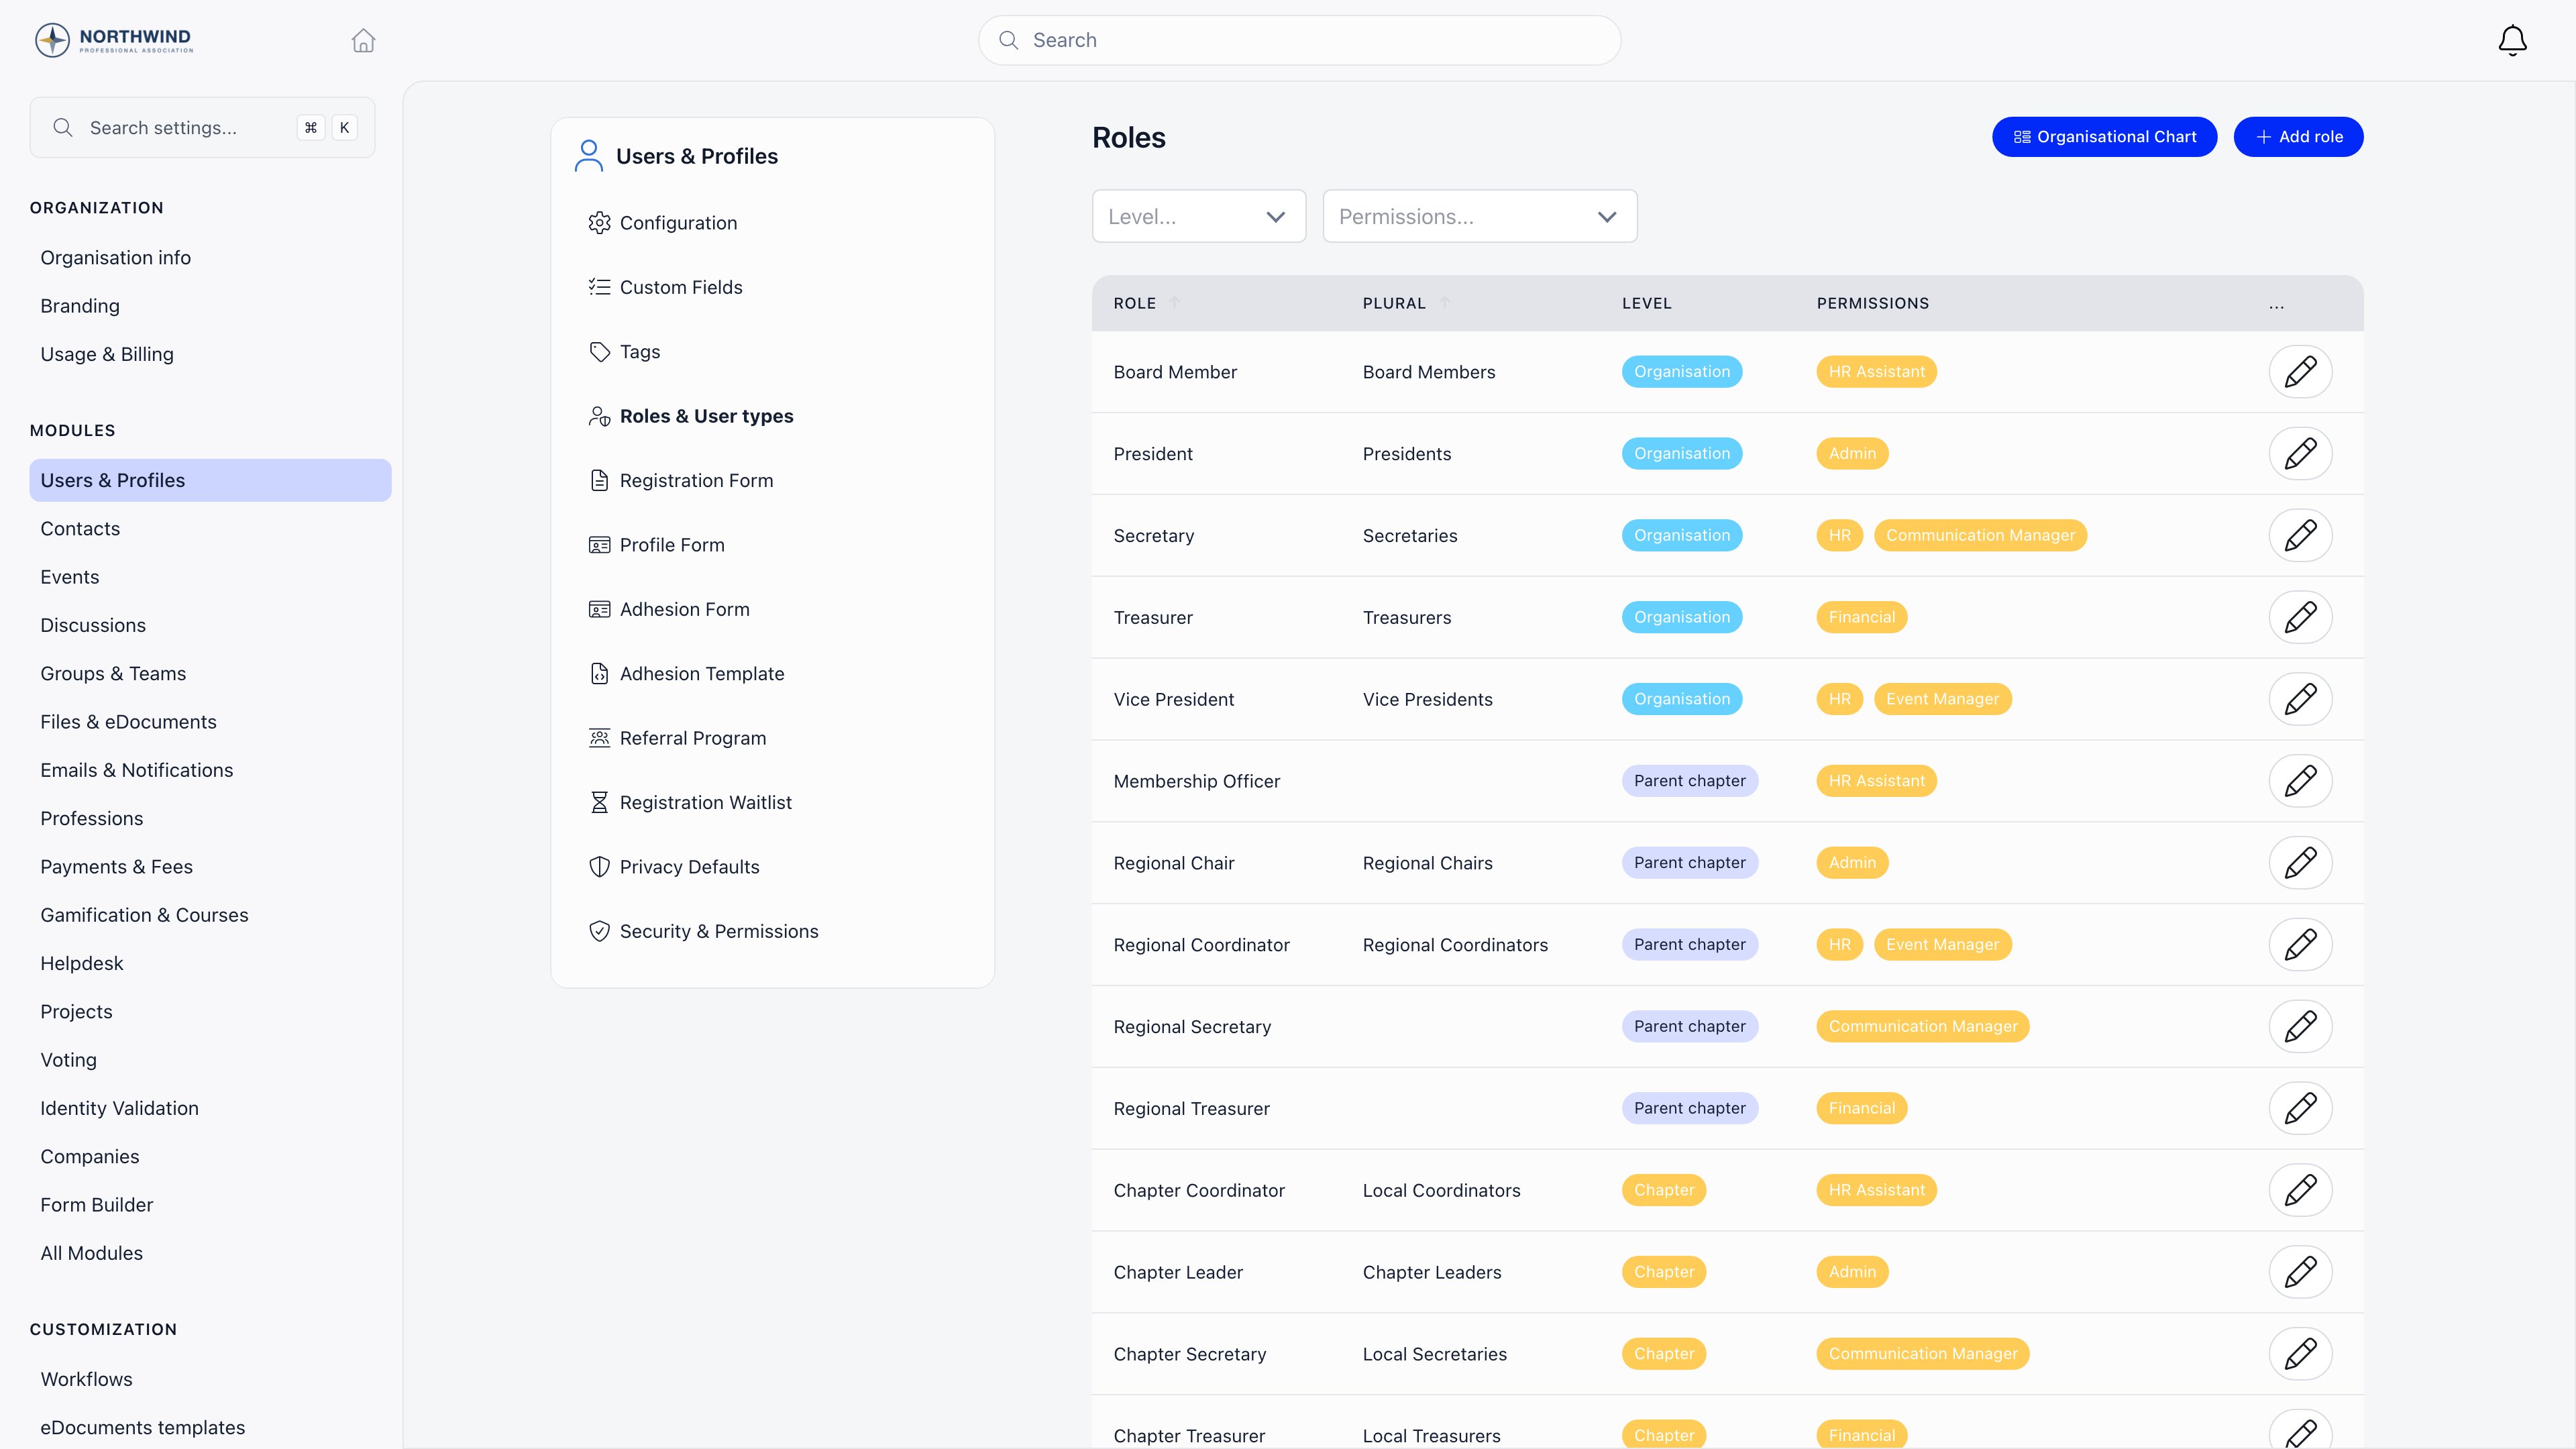
The volunteer flag, and its trap
Enable Volunteer Roles adds a Volunteer flag to a user type, and Enable Family Members adds a Parent flag the same way.Safeguarding checks: what Orgo does and does not do
This is the section to read carefully, because the feature name promises more than the feature delivers. Identity Validation collects a scan of an ID document, stores the details read off it, and puts the record in front of an administrator who approves or rejects it. Reviewing needsHR_LOCAL or above over the member’s chapter.
What it does:
- accepts a document image (PNG, GIF, JPEG; PDFs are rejected), front and optionally back;
- reads Romanian documents automatically (old ID card, new ID card, passport), keyed off the CNP;
- for every other country, lets an administrator type the details in by hand;
- records who approved it and when, and writes an audit entry for every change;
- stores the document number and personal number encrypted as well as in plain text, and keeps images in an unguessable location.
- no criminal record or vetting check. It does not talk to any disclosure service, and nothing in the product performs a background check;
- no reference or interview tracking;
- no expiry status. An expired document keeps whatever status it had. Expiry is only checked at the moment somebody tries to approve it;
- no re-check reminder. Renewal reminders exist only for payment-linked identities, not for volunteers;
- outside Romania, only a first and last name are required to approve a record. Nothing forces an administrator to confirm the document is genuine.
Progression and recognition
Badges need the Gamification module (Settings → Modules → Gamification & Courses → Gamification → Enable Gamification Module).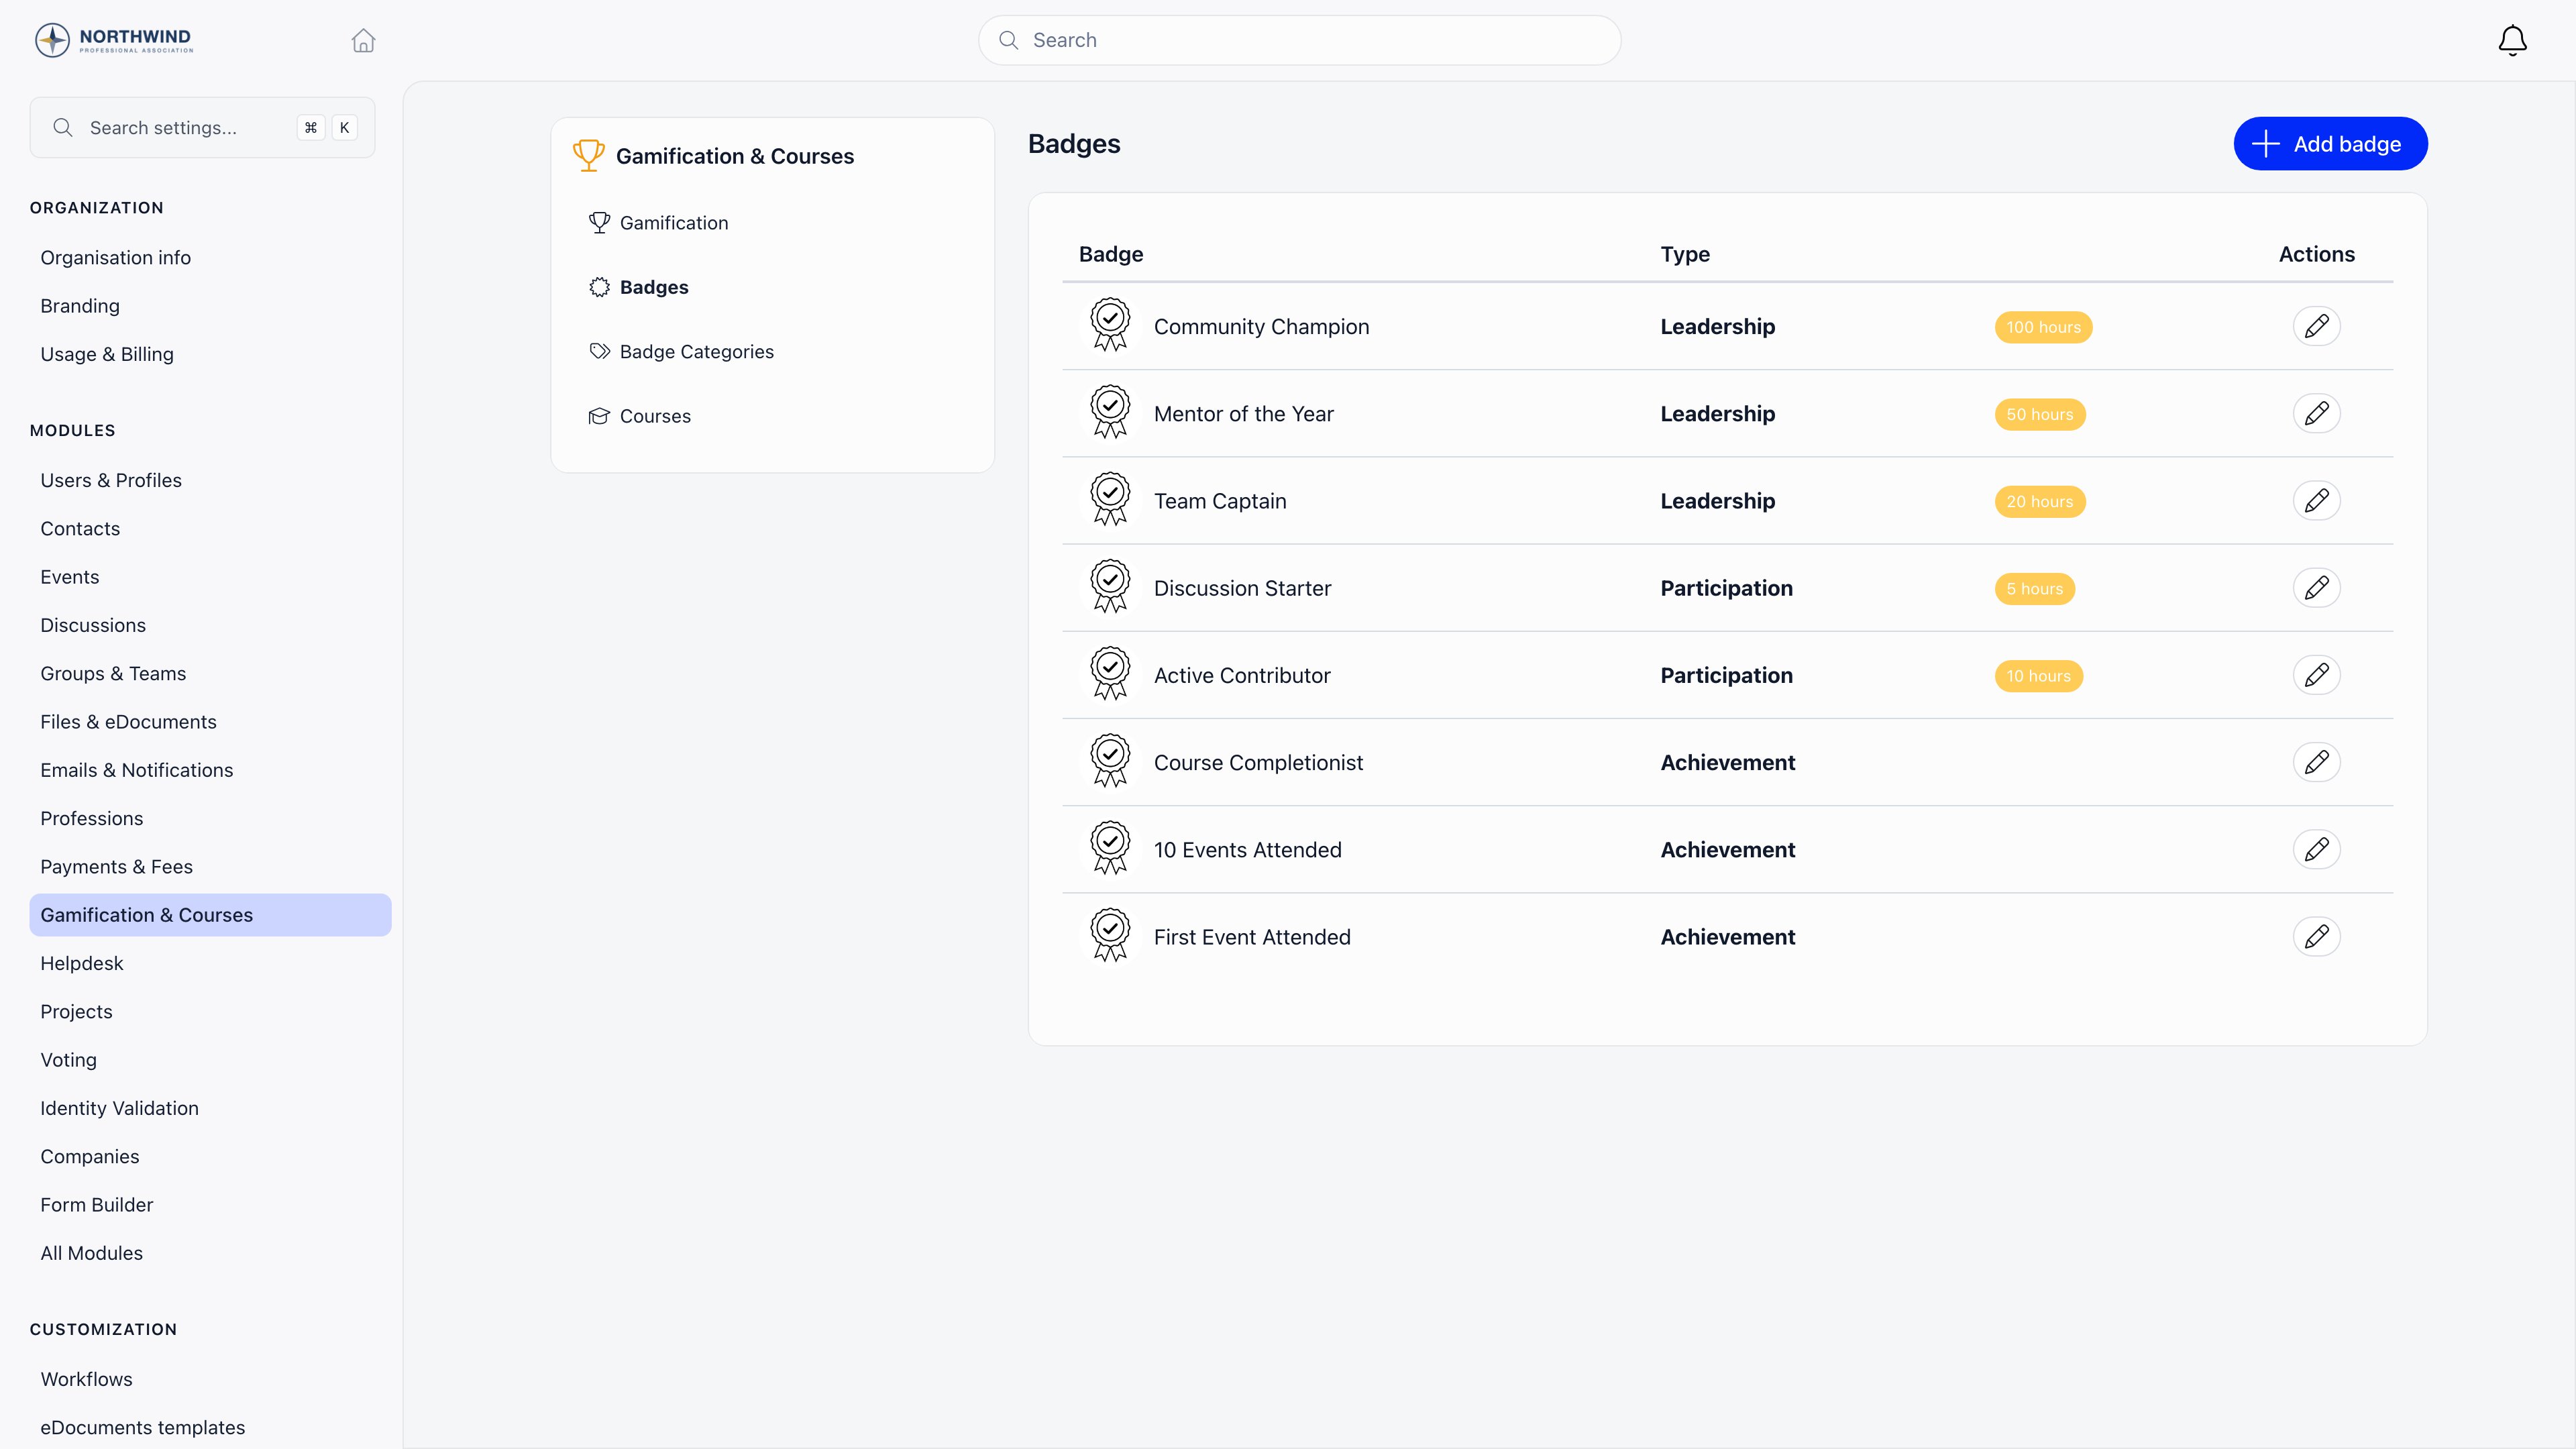
HR_TENANT, or HR_LOCAL over their chapter), awarded automatically when their logged volunteering hours pass a badge’s Hours number, awarded on event attendance when the event names a badge, and awarded when a course enrolment is marked complete. A member can hold a given badge only once, and every automatic path checks first, so re-marking attendance never duplicates an award.
Use Pending rather than Completed for work in progress. It is counted and filtered separately everywhere, which makes it a workable “started this badge” state.
Things to know before you load your whole scheme:
- Deleting a badge deletes every award of it, from every member. Deleting a category deletes the badges filed under it and their awards too. There is no undo.
- Nobody is notified when a badge is awarded or removed. Announce the ones that matter yourself.
- A badge has no expiry and no renewal. It records that something happened, not that a qualification is currently valid. For anything that lapses, use a Date custom field alongside it.
- Tier auto-promotion needs an ordering number that the settings screen does not expose. Tier cards on a profile light up from the points threshold alone, but the promotion that writes the badge onto the member also reads a
levelfield you can only set through the API. Award tier badges by hand unless you are willing to use the API.
Camps and events
Collecting what you need before a camp
Four steps, in this order. Editing any of it needsEVENT_LOCAL on the event’s group, which EVENT_TENANT and ADMIN_TENANT satisfy across the organization.
Turn the registration form on
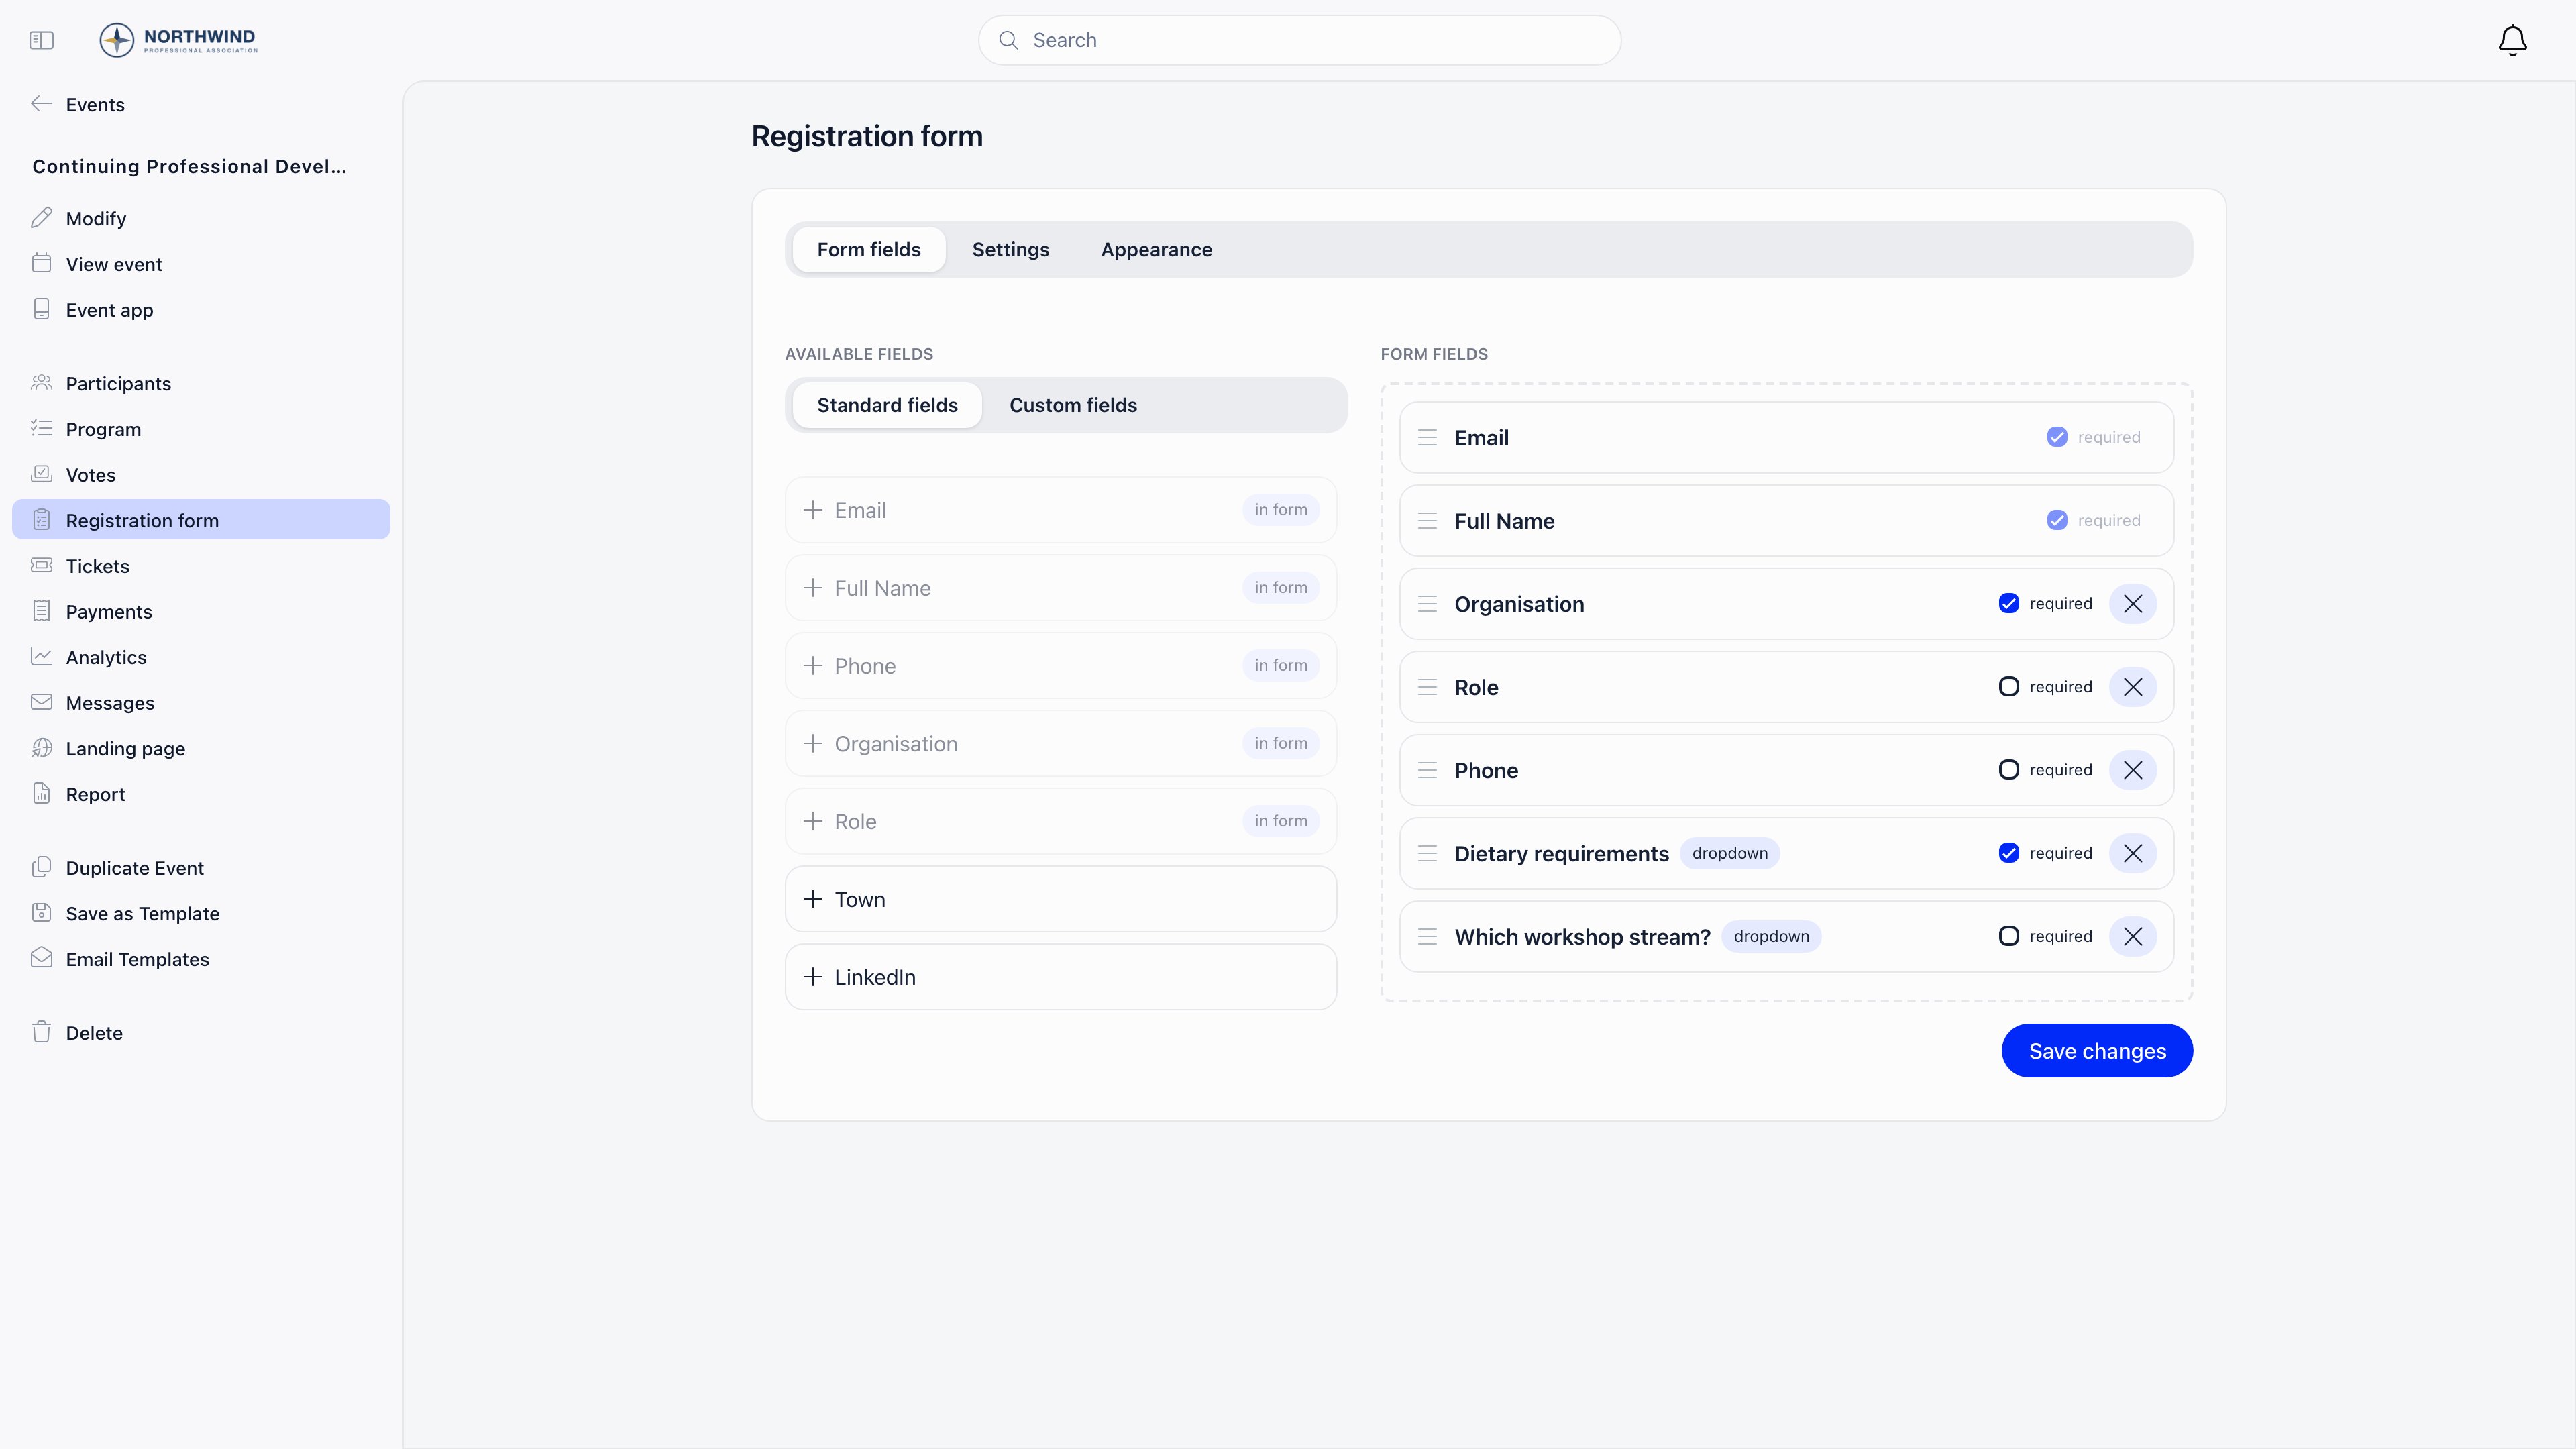
Add the fields a camp actually needs
Add the consent and rules wording
Save the camp as a template
Where camp data actually lives, and who can read it
Custom field answers are stored per registration, on that attendee’s record for that event. The same person answering differently at two camps keeps two answers, which is what you want for medical information that changes. You read them in two places: the Columns menu on the Participants screen adds one column per custom field, and Export downloads a CSV that needsEVENT_TENANT, EVENT_LOCAL on the event, or event ownership.
Consent at registration
Three separate things, and only the last one is a real signature:On the day
Every confirmed registration carries a QR code, delivered in the confirmation email as a PDF ticket, shown on the event page and in the event app. Scanning it sets the attendee’s RSVP to Attended, which is the same thing an attendance figure counts. Scanning twice is harmless. Two more camp-day realities. Check-in is online only, so at a site with no signal you fall back to a printed participant export and record the RSVPs afterwards. And walk-ins must exist on the participant list before they can be marked present: add them with Invite, then set them to Attended. Detail: Registration forms, Attendance, QR check-in, Ticketing.Setup checklist
One line per step in Setup order, written as the outcome rather than the click. Work down it with Orgo open, and treat anything you cannot tick as unfinished.- Modules on. Every module in the table above is in the position you chose, Groups & Teams shows a Unit Types tab, and Enable Local Centers Module is confirmed on rather than newly switched on.
- Languages then vocabulary. Every language you run in is enabled, and no Custom Expression cell in the Texts table is empty in any of them.
- Emails checked after relabelling. You have opened your system email templates and fixed the wording that Texts does not reach.
- Unit types defined top down. Each type below the top one names its parent, and every type that belongs to a group has Within local center ticked.
- One user type per age level. Each appears in the Roles list with a User type tag, and each that needs its own joining page has a working URL Slug.
- One role per post. Each carries the right level and the permissions it needs, and no permission is sitting on a user type.
- Chapters created. One per group, each under the right parent, each with the currency you will collect subs in. That currency cannot be changed later.
- Units created inside them. Sections first, patrols nested under their section, nothing stranded at the top level.
- Custom fields in place with visibility decided. For every field you can say who reads it and which form collects it, and nothing above Public is being asked for at public sign-up.
- Birthday required at registration. A test registration produces an account with a date of birth on it.
- Fees priced per age level. One price per level, assigned per member, not an age range on a single price.
- Consent and conduct documents built. Parental consent, the volunteer agreement and the code of conduct exist as e-document templates, with Mandatory document on where the person must be held until they sign.
- Safeguarding records have a home. A date field for each check that expires, a file field or Identity Validation for the evidence, and a named person with a calendar reminder to run the export, because nothing in Orgo watches those dates.
- Members imported and spot-checked. Counts match, sampled members sit in the right chapter and unit, badge categories and badges were imported before assignments.
- Camp form saved as a template. The full camp registration form, with its medical and dietary custom fields, exists as an event template so you never rebuild it.
- Door staff can scan. Whoever is on the gate either holds
EVENT_TENANTor is scanning from inside the Orgo mobile app.
Limits worth knowing before you start
Everything here is current behaviour, verified in the product. None of it is a reason not to use Orgo, but each one costs you a workaround if you find it late.Troubleshooting
We renamed everything to scouting words, so why do our emails still say member?
We renamed everything to scouting words, so why do our emails still say member?
How do I build an automatic group of all 8 to 10 year olds?
How do I build an automatic group of all 8 to 10 year olds?
HR_LOCAL administrator can do.Cubs and Explorers should pay different subs. How?
Cubs and Explorers should pay different subs. How?
A parent registered their child and the child cannot sign in
A parent registered their child and the child cannot sign in
Our section leader gets an access error scanning tickets at camp
Our section leader gets an access error scanning tickets at camp
HR_TENANT or EVENT_TENANT, and EVENT_LOCAL does not satisfy it, so the person who organized the event may still be refused at the door.Two fixes: have them scan from inside the Orgo mobile app, where EVENT_LOCAL on the event’s group is accepted, or grant EVENT_TENANT to the people on the gate. Marking somebody present without scanning is wider than both: the event owner, EVENT_LOCAL on the group, HR_TENANT and group admins can all set an RSVP to Attended from the participant list.Where do I see that a parent consented?
Where do I see that a parent consented?
Answers from our joining form never arrived on the profiles
Answers from our joining form never arrived on the profiles
A leader moved to another group and kept permissions they should not have
A leader moved to another group and kept permissions they should not have
_PARENT_LOCAL permissions, whose reach is recomputed from the member’s new primary chapter. That last one is the surprising case: a district-level permission follows the person to their new district rather than staying with the old one.Two different features are now both called Teams
Two different features are now both called Teams
We imported our badge scheme and now want to restructure it
We imported our badge scheme and now want to restructure it
Related
- Texts - replacing Orgo’s vocabulary with your own
- Units - sections and patrols inside a group
- Family Members - parents, guardians and child accounts
- Badges - the award scheme and how badges are given
- Registration forms - what a camp asks at sign-up
- Identity Validation - what an ID check does and does not prove